
From the Insert module page:
"Insert is a utility that makes inserting images and links to files into text areas or WYSIWYGs much easier. It adds a simple JavaScript-based button to FileField and ImageField widgets. When used with ImageField and ImageCache, images may be inserted into text areas with a specific ImageCache preset."
Insert is a simple enough module to download, unzip, and activate, but for the Beginner a few screenshots would be helpful in saving confusion and time. The best way to take advantage of Insert is to also download the Wysiwyg module. This documentation is just for clarification of using the Insert module, and documentation for the Wysiwyg module is on its own page. It is with this in mind that I am adding some screen shots to help the true Beginner use this neat module.
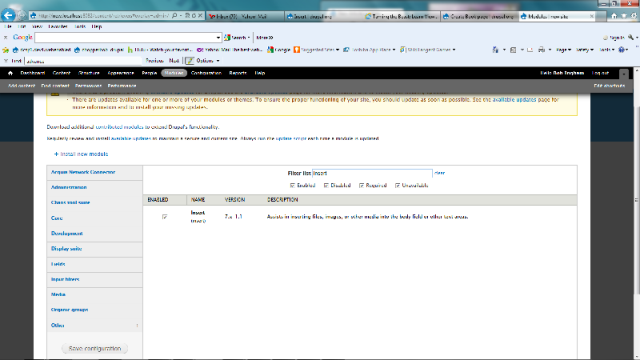
After downloading and unzipping the Wysiwyg module in your site directory, go to your site's "Modules" page. Find the Insert module and activate it:
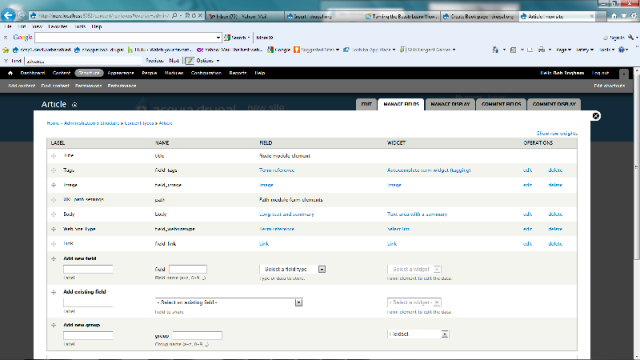
After you activate the Insert module you must create an image field and use it before you can use Insert. Navigate to Structures > Content Types > Article > Manage Fields. I've created an image field:
Now, in order to use Insert, click on the "edit" link to the right of the Image field listed under the "Operations" column, which will bring up the Article Settings and you'll have to scroll down about 3/4th's of the way down, just below the "Progress Indicator", where you will find the "INSERT" drop-down. Click on this, and it will expand INSERT to show all of its Style options:

The very first thing that you'll notice in the image above is the "Enable insert button" checkbox. Make sure you check it in order to have the button appear for use. Below that is the list of Styles for all the custom image styles you've created, plus any styles from modules that you've downloaded (e.g.; colorbox). The easiest way to have all styles available is to simply check the "SELECT ALL" box at the top. Now click the "Save Settings" button and then add new content for Article type. In the image below, I've already used Insert to place an image of puppies inside my text using the WYSIWYG editor that I activated:
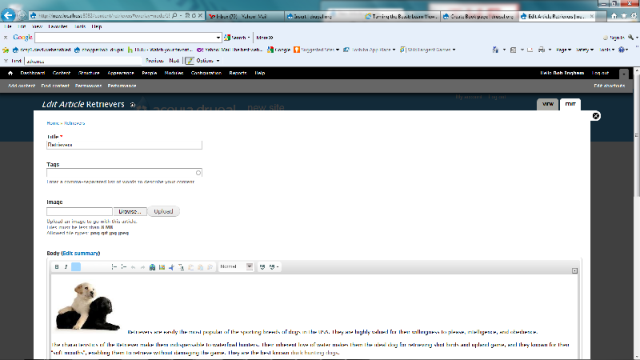
However, you'll notice that no where do you see an Insert button in the above image. That's because until you have an image uploaded, the Insert button will be hidden. Below, I've uploaded an image of Golden Retrievers, and you now can see that the Insert button has appeared:
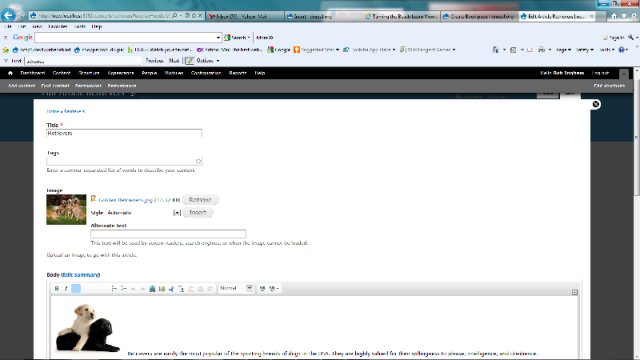
Just to the left of the Insert button is a drop-down arrow, and when you click on it, it will display all of the Styles that you had previously selected in the Insert Image Settings. Place your cursor inside the text box where you want to insert your image and select the Style that you want the image to be. Click the Insert button and the image will be inserted inside the text. After inserting the image, you can click on it and resize or reshape the image by dragging a corner. You are also able to move the image to another place inside the text body. Cool! Hope this helps some new Beginners in using this neat little module!
| Attachment | Size |
|---|---|
| insert module.jpg | 675.05 KB |
| image field.jpg | 675.05 KB |
| image field settings.jpg | 675.05 KB |
| insert example 1.jpg | 675.05 KB |
| insert example 2.jpg | 675.05 KB |


Comments
Great Job...but
the screenshot size doesn't seem proportionate to the resolution of the image. I can't click on the images to increase their magnification, they are not legible because of that.
Thanks!
Thank you so much!
One of the best tutorials for beginners! I've been struggling with the Insert module forever and you saved me the night. Thanks!
Screenshot resolution
I apologize for that; however, if I increase the resolution the screenshots take over the right column. A frustrating limitation, for sure. Although the text will be a little blurred, by increasing the browser window's magnification to 150% or 200%, you'll be able to make out the information and columns and follow along.
You're welcome
Being a Beginner myself, I have found the documentation severely lacking in detail for us Beginners. I hope other Beginners will also take the initiative to add details to any confusing documentation they've encountered!
enable insert check box
Very nicely done. I always forget to check that little check box.
What "Insert" module?
Are these instructions still current? My list of modules doesn't include an Insert module to enable. I'm on Drupal 7 and have installed WYSIWYG with CKeditor. I posted a question regarding this in the Forums thinking it was User Error (which is usually the case) but now I'm wondering if a dependency broke because this seems to be pretty straightforward.
The reply I got from the forum was to add the Insert module but the instructions on this page clearly warn against installing both the Insert module and WYSIWYG. Color me confused.
@dlshannon, it was an error
@dlshannon, it was an error in the document. You need to download 'insert' module separately. It's not part of 'wysiwyg'
You Say It Works, Right?
I created a new image field, enabled Insert Button, went to add content and Browsed for my image file, Uploaded it and when Insert button appeared I placed my image at the cursor in the text body. What do you think happened? I found the same image placed twice. One I guess image was “Uploaded” as an image field and then again was "Inserted" with Insert Module. Why you people confuse us saying something works?
Yeap, more banging my head
Yeap, more banging my head against the wall. What I needed was to hide that image field Display options.