
 The 2026 Drupal Business Survey is open. Your response will help shape the future of the Drupal business ecosystem.
On this page
- 1. Prerequisites.
- 2. Add two new Imagecache Presets:
- a. Name 1 'galleriffic_slide'.
- b. Add 'Scale and Crop' action.
- c. Add desired 'Width' and 'Height'. 500 x 400 is recommended.
- d. Name a second preset 'galleriffic_thumb'.
- e. Add 'Scale and Crop' action.
- f. Add desired 'Width' and 'Height'. 75 x 75 is recommended.
- 3. Add Gallery content type
- a. Add 'Gallery Image' field
- i. Select 'Required' and 'Unlimited' under "Number of values".
- ii. Select 'Enable custom title text'.
- iii. Select 'Enabled' under "Description field".
- b. Click 'Exclude' for the gallery image in the "Display fields" setting.
- 4. Create a Gallery node with a number of images
- 5. Create a new View name 'Galleriffic Node Gallery'.
- a. Add a "Node: Type" filter to select for 'Gallery'.
- b. Add "title" field:
- i. Select 'Content: Gallery Image (field_gallery_image) - data' and click 'add'
- ii. Enter 'Title' under "Label" in "Style Settings".
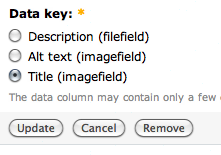
- iii. Select a "Data key" of 'title' at the bottom of the field definition.
- c. Add "description" field:
- i. Select 'Content: Gallery Image (field_gallery_image) - data' as in the previous step.
- ii. Enter 'Description' instead of 'Title' under "Style Settings".
- iii. Select a "Data key" of 'description' instead of 'title' at the bottom of the field definition.
- d. Add slide field:
- i. Select 'Content: Gallery Image (field_gallery_image)' in the field list.
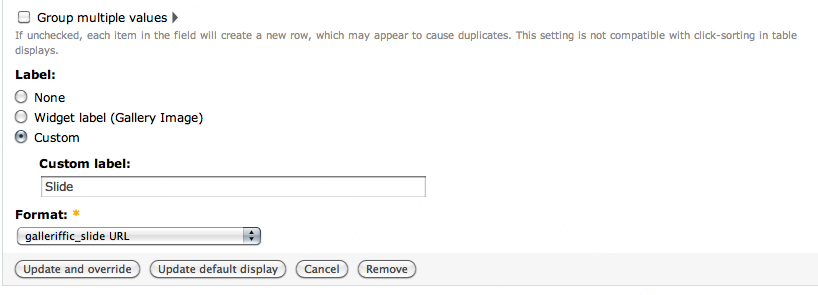
- ii. Deselect "Group multiple values", add 'Slide' as a custom "Label", select 'galleriffic_slide URL' under "Format".
- e. Add thumbnail field:
- i. Repeat steps above substituting 'thumbnail' for 'slide'.
- f. Add Style Settings:
- i. Select 'Galleriffic Gallery' under "Style" in the "Style settings" section.
- ii. Select appropriate settings for gallery. Defaults should be fine to start out with.
- d. Add Row settings:
- i. Select 'Galleriffic Fields' under "Row style"
- ii. Select the correct field for each type of row.
- 6. Add and configure a "Node Content" display in the View.
- i. Click 'Node content' and 'Add display'.
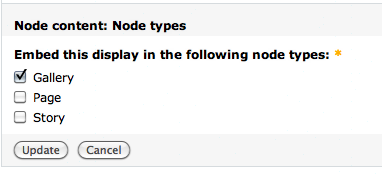
- ii. Select 'Gallery' under "Node types".
- iii. Add an Argument ( plus sign next to "Arguments") and select 'Node: Nid'.
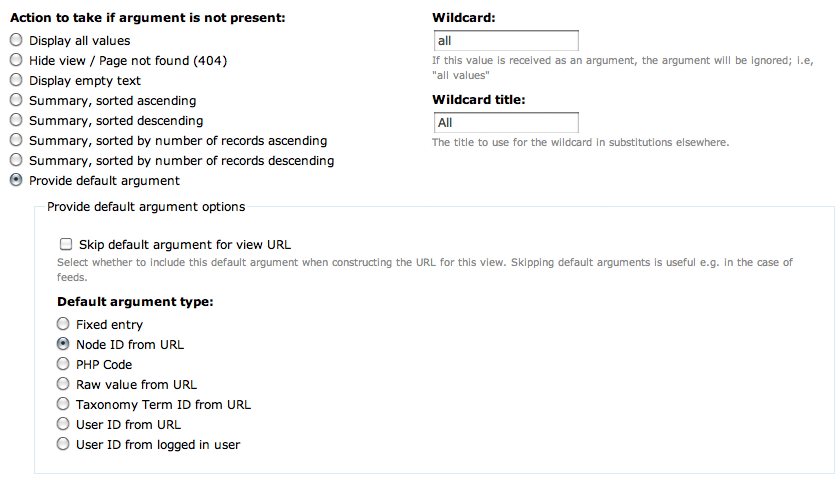
- iv. Select 'Provide default argument' and 'Node ID from URL' in the argument.
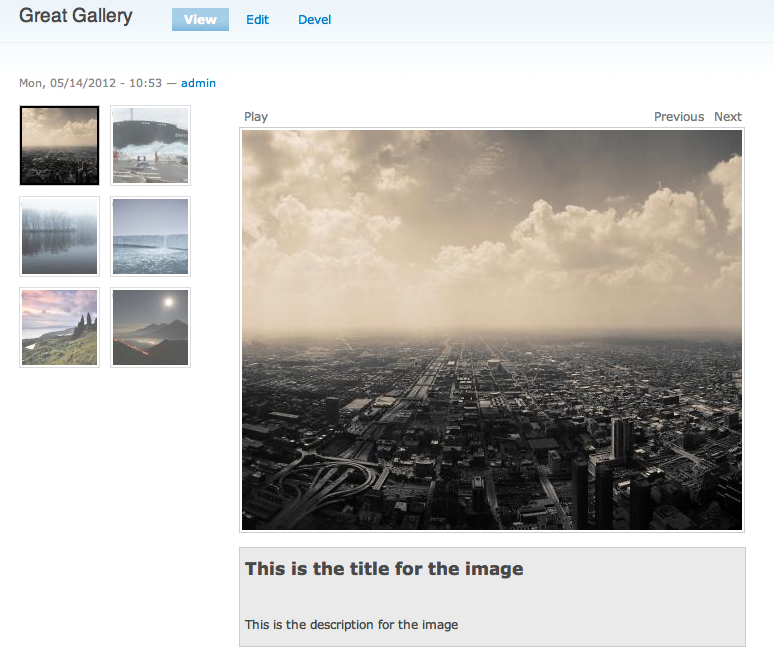
- 7. You are done! Return to your gallery node and see your wonderful gallery!
Step by Step Instructions for Views Galleriffic in Drupal 6
Last updated on
30 April 2025
You are browsing documentation for an older version of Drupal, which is not supported any longer, and the information may not be correct. See current documentation for Contributed modules
1. Prerequisites.
Install CCK, Views, Imagefield (requires Filefield), Views Attach, and Views Galleriffic
2. Add two new Imagecache Presets:
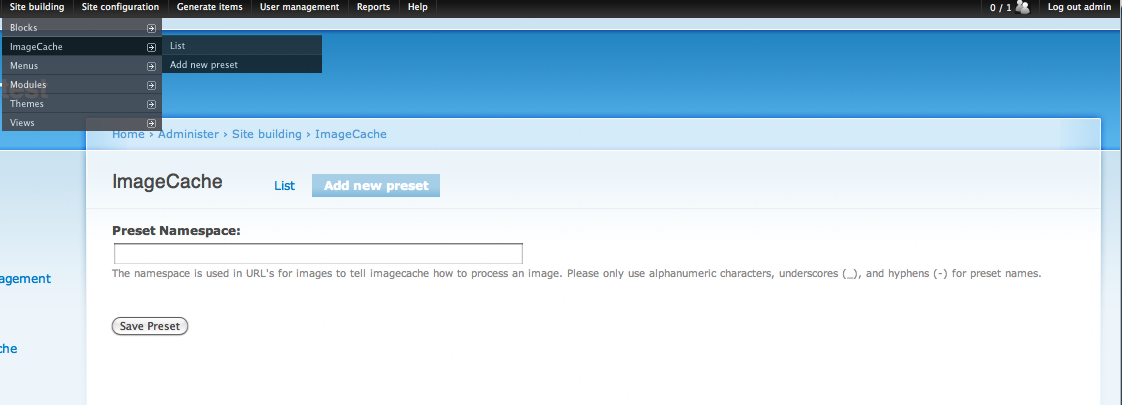
a. Name 1 'galleriffic_slide'.
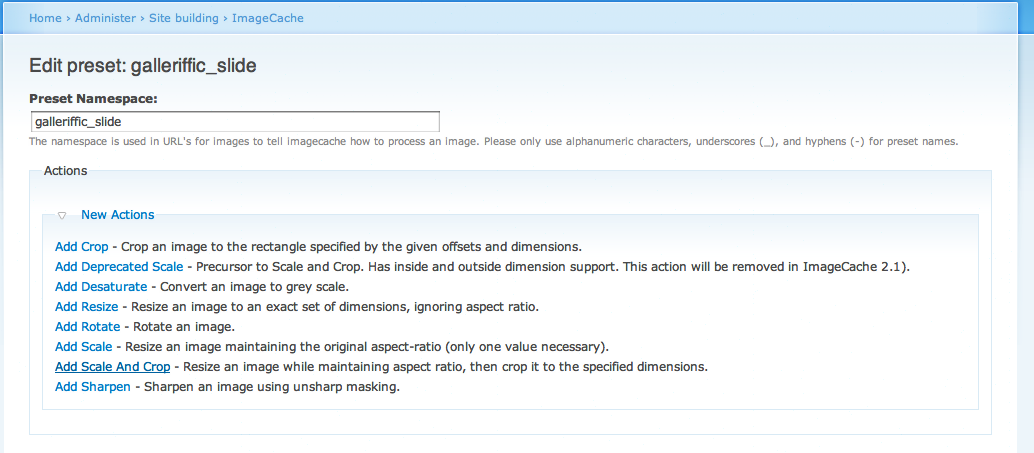
b. Add 'Scale and Crop' action.
c. Add desired 'Width' and 'Height'. 500 x 400 is recommended.
d. Name a second preset 'galleriffic_thumb'.
e. Add 'Scale and Crop' action.
f. Add desired 'Width' and 'Height'. 75 x 75 is recommended.
3. Add Gallery content type
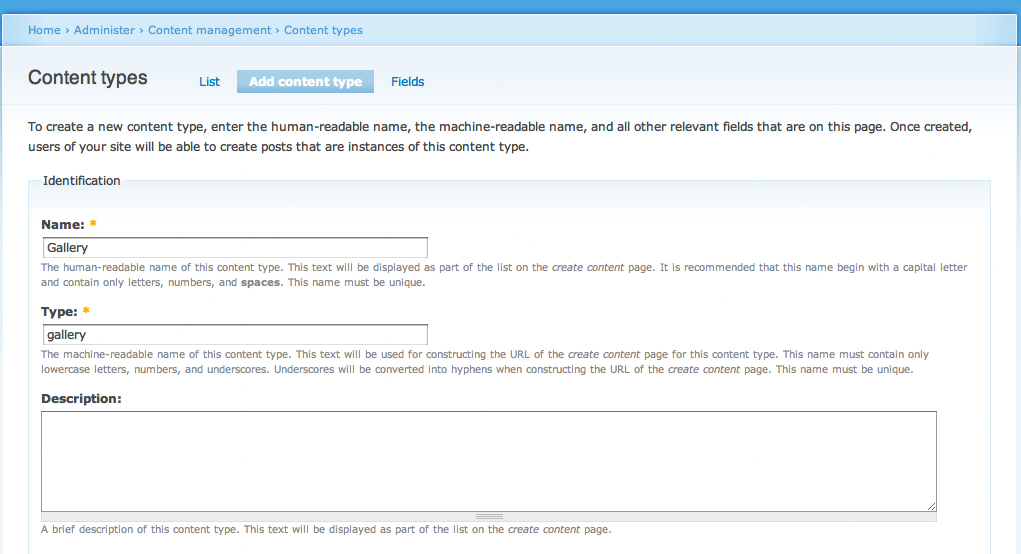
a. Add 'Gallery Image' field

i. Select 'Required' and 'Unlimited' under "Number of values".
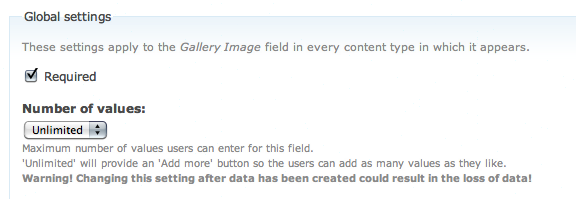
ii. Select 'Enable custom title text'.
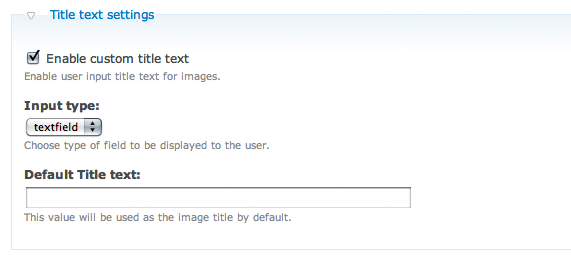
iii. Select 'Enabled' under "Description field".

b. Click 'Exclude' for the gallery image in the "Display fields" setting.

This will keep the images from showing up on the node. We are going to use Views to show the images on the node.
4. Create a Gallery node with a number of images

5. Create a new View name 'Galleriffic Node Gallery'.
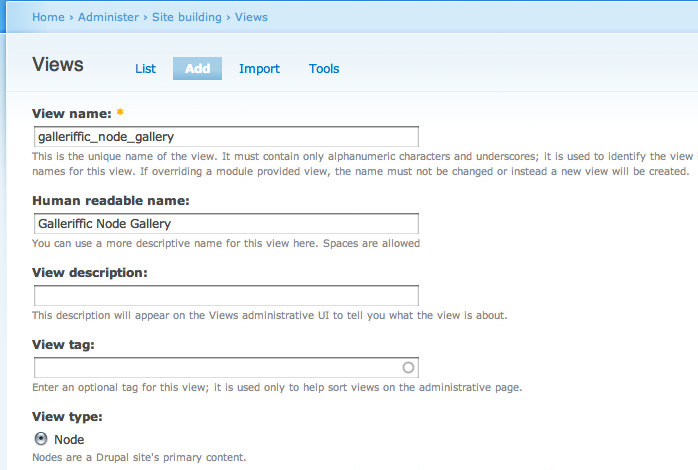
a. Add a "Node: Type" filter to select for 'Gallery'.


This isn't strictly necessary since we will be doing the same thing with the Views Node Attachment but it might come in handy if we add other displays such as a page in the future.
b. Add "title" field:
i. Select 'Content: Gallery Image (field_gallery_image) - data' and click 'add'

This may be different if you have a different field name.
ii. Enter 'Title' under "Label" in "Style Settings".

iii. Select a "Data key" of 'title' at the bottom of the field definition.
c. Add "description" field:
i. Select 'Content: Gallery Image (field_gallery_image) - data' as in the previous step.
ii. Enter 'Description' instead of 'Title' under "Style Settings".
iii. Select a "Data key" of 'description' instead of 'title' at the bottom of the field definition.
d. Add slide field:
i. Select 'Content: Gallery Image (field_gallery_image)' in the field list.

ii. Deselect "Group multiple values", add 'Slide' as a custom "Label", select 'galleriffic_slide URL' under "Format".
e. Add thumbnail field:
i. Repeat steps above substituting 'thumbnail' for 'slide'.

f. Add Style Settings:
i. Select 'Galleriffic Gallery' under "Style" in the "Style settings" section.
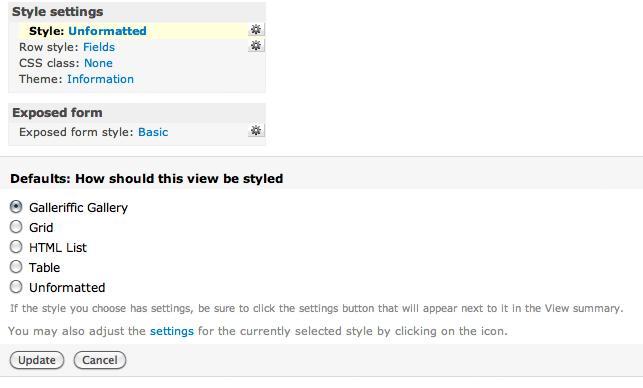
ii. Select appropriate settings for gallery. Defaults should be fine to start out with.
d. Add Row settings:
i. Select 'Galleriffic Fields' under "Row style"
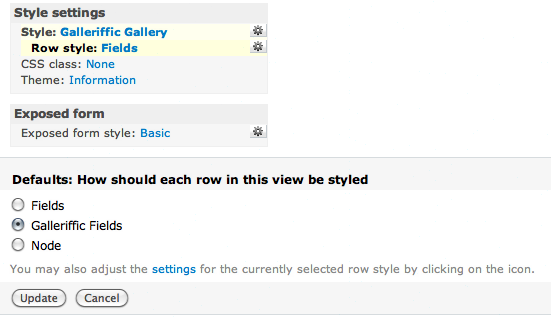
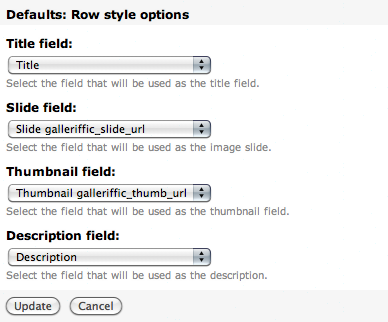
ii. Select the correct field for each type of row.
6. Add and configure a "Node Content" display in the View.
i. Click 'Node content' and 'Add display'.
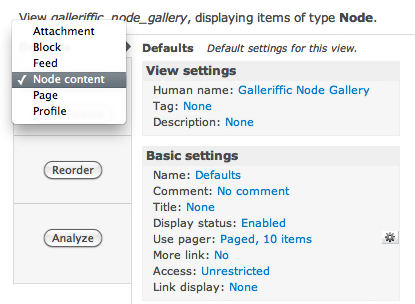
ii. Select 'Gallery' under "Node types".
iii. Add an Argument ( plus sign next to "Arguments") and select 'Node: Nid'.
iv. Select 'Provide default argument' and 'Node ID from URL' in the argument.
7. You are done! Return to your gallery node and see your wonderful gallery!
Help improve this page
Page status: Not set
You can:
You can:
- Log in, click Edit, and edit this page
- Log in, click Discuss, update the Page status value, and suggest an improvement
- Log in and create a Documentation issue with your suggestion
