
On this page
- Installation
- Configuring flags
- Combining Flag and Views
- Data fields from flags
- Exercises: documentation site
- Flag friends
- How to demo
- Preparation
- Suggested solution
- Comments
- Favorite documentation pages
- How to demo
- Preparation
- Suggested solution
- Comments
- List all content created by friends
- How to demo
- Preparation
- Suggested solution
- Comments
- Exercises: News site
- List spam-flagged comments
- How to demo
- Preparation
- Comments
- Approve spam-flagged comments
- How to demo
- Preparation
11: Flag
Drupal 7 will no longer be supported after January 5, 2025. Learn more and find resources for Drupal 7 sites
The Flag module allows you to create simple flags, that end users may use to flag nodes, users and comments on your Drupal site. Flag could, for example, be used to:
- allow end users to flag comments as spam;
- allow editors to flag which nodes should be listed on the front page or in the sidebar; and
- allow logged-in users to flag other users as friends, to follow what they post to the website.
Flags are usually displayed as clickable links on nodes, comments or users. The Flag module integrates well with the Views and Rules modules.
When installing the Flag module, you get an example flag, bookmark, which logged-in users can use to make their own lists of articles on your site. (See figures 11.1 and 11.2)
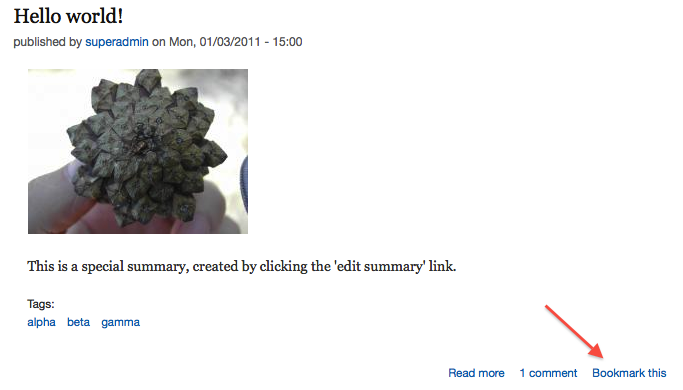
Figure 11.1: Note the link bookmark at the bottom-right corner. This is a default flag provided by the Flag module.
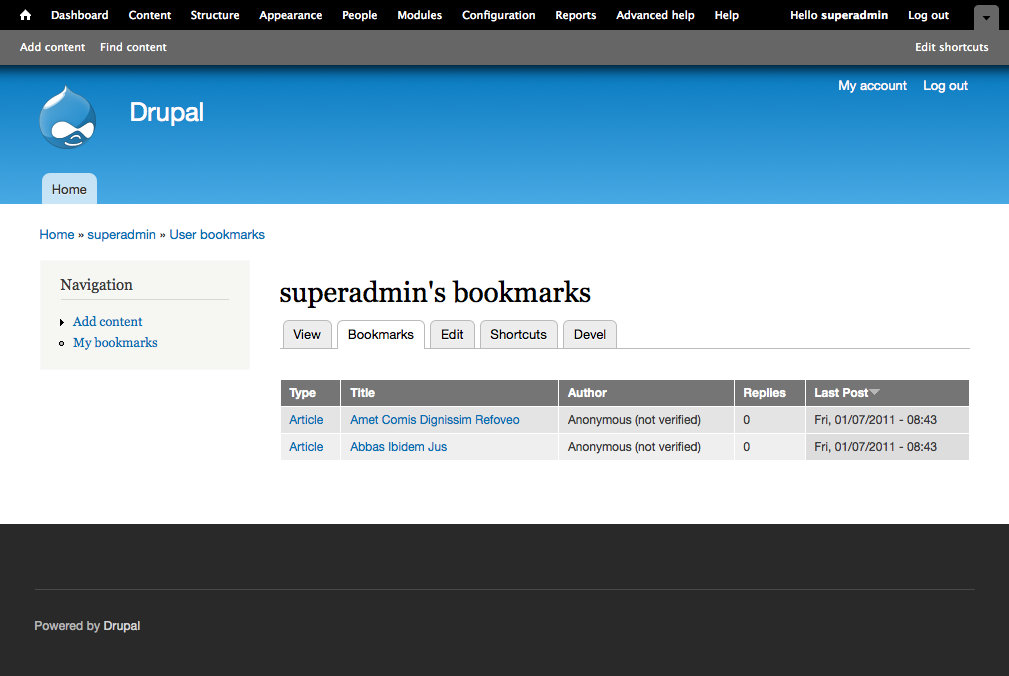
Figure 11.2: Bookmarked articles are included in a list of bookmarks, unique to each user.
The initial version of this section of the Community Documentation came from the book Drupal 7: The Essentials, courtesy of NodeOne and Johan Falk.
Installation
Flag is installed the same way as most other modules. Download the module from drupal.org, unarchive it, and put in the the sites/all/modules folder. Then enable it in the modules list. The Flag project also includes the module Flag actions, which can be completely replaced by the Rules module (see the next chapter).
The Flag module provides an example configuration for a flag, the bookmark flag, along with two separate views for displaying flagged nodes.
Configuring flags
The Flag overview page is found at the toolbar, Structure, Flags. The page lists all flags available on your website, along with links for editing, deleting and exporting each flag. Just above the list is a link add new flag. This takes you to a page where basic data for the new flag is set (see image 11.3), after which you are directed to the form used to add new and edit existing flags.
There are two basic settings for flags:
- Flag name: This is the machine name for the flag. It must be unique on the site and can only contain lower-case letter, numbers and underscores.
- Flag type: This determines which kind of entity the flag applies to, either nodes, comments or users. (There is currently no version of Flag that works with general entities.)

Figure 11.3: The first step in creating a new flag is to give it a machine name and determine which type of entity the flag applies to.
Other settings for flags are (see figure 11.4):
- Title: This is the administrative name for the flag.
- Global flag: This setting determines whether all users should share the same flagging (global) or if each user should be able to do their own flagging (per-user).
- Flag/unflag link text: These are the texts displayed to end users, at the link for adding or removing the flag. You may use token replacement patterns to include dynamic text strings. (Installing the Token module will give you a list of all available replacement patterns.)
- Flag/unflag link description: These texts are normally displayed as a tooltip popups, when hovering over the flagging or unflagging link. You may use tokens in the texts.
- Flagged/unflagged message: These texts are used as confirmation messages when flaggings have been added or removed. You may use tokens in the texts.
- Roles that may use this flag: This determines which users may set or remove the flag. If you install the Session API module, anonymous users may use the flags as well.
- Unflag not allowed text: This is the text displayed to users not permitted to remove a set flag. (If a user isn't even allowed to set the flag, it won't be displayed at all.)
- Flag access by content authorship: This option makes it possible to restrict flagging access to your own content only, or only content written by others. Content flags may also be restricted based on who wrote the node related to the comment.
- Flaggable content (only node and comment flags): This option restricts the node types on which the flag should be available.
- Display options: These settings determine the view modes in which the flag should be displayed and vary depending on the type of flag you have. Node flags may be displayed in full node view, teasers and also as a checkbox in the node edit form.
- Link type: Flags are either displayed as JavaScript links that don't require new page loads, normal links, or links to a confirmation page. (In the final case you may also set a text displayed when the user is asked to confirm the flagging.)
.png)
Figure 11.4: The page for creating or editing flags has a number of settings. Most of them self-explanatory.
How can this be used? A flag for flagging comments as spam could be a non-global flag with the message Report spam, which all users may set but not remove. A flag for promoting content to the sidebar could be a global flag with the message promote [node:title] to the sidebar, and could be set or removed by editors.
Combining Flag and Views
Much of the power in the Flag module stems from its integration with Views. (In fact, the Flag module was originally written as a Views plugin example!) To use Flag data in Views, you must utilize the flag relationships provided by the Flag module. (See figures 11.5 and 11.6) There are four types of relationship available:
- Flags: Node/comment/user flag: This provides data about each flagging on a node, comment or user. It includes the flagging user and when the flag was set. The relationship may also be used to limit the view to objects flagged by the current user.
- Flags: Node/comment/user flag counter: This provides data about how many flaggings a node/comment/user has.
- Flags: User's flagged content: This relationship can be used to limit the view results to users who have used a flag.
- Flags: User: This provides the full user object for the user who has set a flag. To use this relationship you must already have a flag object provided in your view by another relationship.
When adding Flag relationships, you must specify which flag the relation should connect to. Most relationships also have the option include only flagged content. This is another way of saying require this relationship (as used by other relationships).

Figure 11.5: The Flag module offers a number of new relationships in Views, providing flagging data.
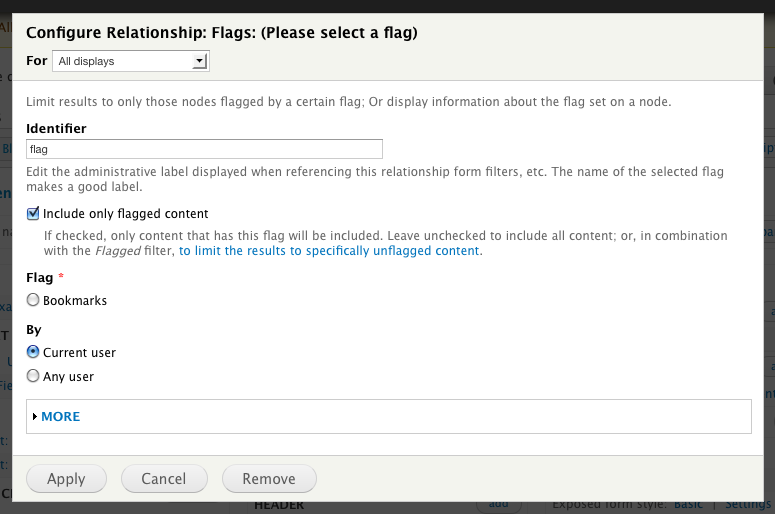
Figure 11.6: Each relationship you add will have its own settings.
Data fields from flags
With flag objects available in your view, there are a number of new data fields that you may use (see figure 11.7):
- Flags: Flag counter: The total number of flaggings for this view result item.
- Flags: Flagged time: The time a flag was set.
- Flags: Flag link (view fields only): A link used for setting/removing a flag.
- Flags: Flagged (filters only): A value telling if a flag is set or not.
- Flags: Content ID (contextual filters only): The ID for the flagged view result item.
The relationship flags: user provides a normal user object to the view, which can be used as alternative to any other user object available in the view.
.png)
Figure 11.7: Each Flag relationship provides a number of new data fields in the view.
How can this be used? A view of spam flagged comments can be built using the relationship flag counter and only include comments flagged with the relevant flag. A view of bookmarked nodes may use the relationship node flag and the view field flag link to allow users to remove the bookmark flag.
Exercises: documentation site
These exercises build on previous exercises in the documentation site suite. They can be carried out individually, with some preparation, or in sequence with the previous exercises. The exercises require using the concepts described in parts A and B of this book, as well as concepts from the Flag chapter.
Video recordings of the suggested solutions to these exercises are found at nodeone.se/learn-drupal.
Flag friends
As a site member, I would like to be able to flag other users as friends. I also want a tab on my user page with a list of links to all my friends’ user pages. This is important since it helps me to stay up to date with contributions from people I like.
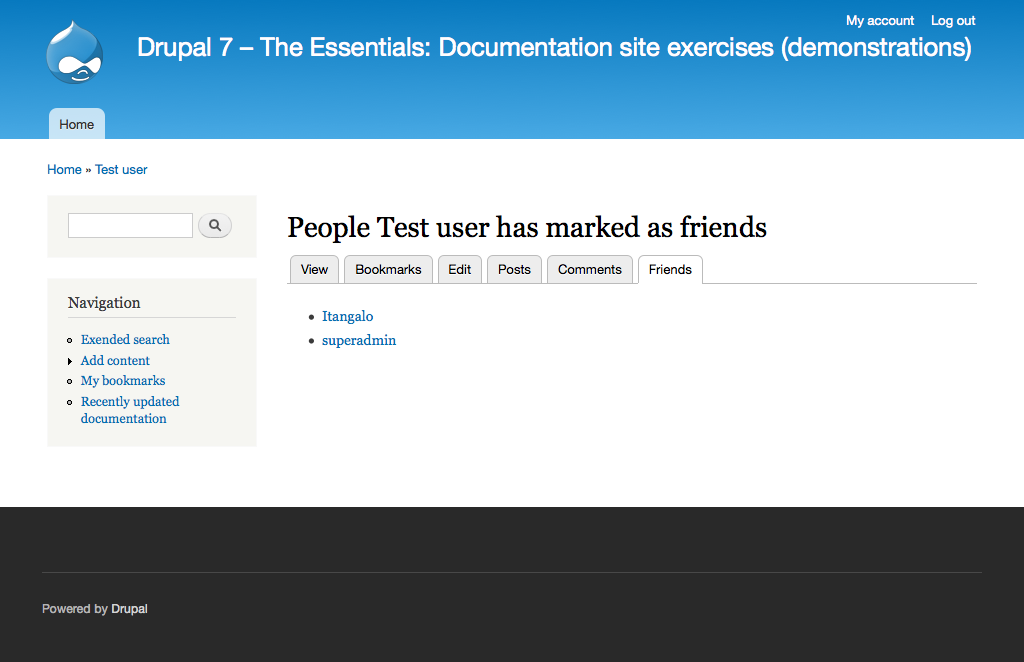
Figure 11.8: An example of a friend list.
How to demo
Log in to the site.
Flag two users as friends. (Create the users first, if necessary.)
Go to your user page and click the “Friends” tab. Verify that the flagged users are listed, in alphabetical order, linking to the respective user page.
Preparation
- A standard Drupal site.
Suggested solution
- Add a new user flag. Give it the machine name friend_flag and the title Friend flag. Add descriptive flag/unflag texts, descriptions and confirmation message.
- Allow all authenticated users to use the flag, but not to flag themselves.
- Add a new view. Give it the name Friends of a user, and have it list users. Create a page with the path user/%/friends and set the FORMAT: HTML list.
- Sort the view by user name in SORT and add a Menu tab in PAGE SETTINGS -Menu with the text Friends.
- Add a new relationship flags: user flag to join flag information in your view. Restrict the list to only flagged users, but users flagged by any user (not only the current user).
- Add a new relationship flags: user to join information about the flagging user in your view.
- Add a contextual filter user: uid and make use of the relationship to the flagging user – to require that the flagging user has the user ID specified by the contextual filter value. So different user can see different friends list on their own user account page.
Comments
- This could be implemented as a tab found on each user page, or merely a tab where you see your own friends. The latter would be difficult to do with Views and Flag only, but quite easy in combination with Page manager.
- If a user hasn't flagged any friends, it makes sense to have a short text displayed in the view.
- If you want more challenges, you can also create a list of all users who have flagged the viewed user as a friend.
The suggested solution should be complemented with links to the relevant sections of this book.
Favorite documentation pages
As a site member, I would like to mark documentation pages as favorites. A list of marked pages should appear as a tab on my user page, and the five most recently added should also appear as a block in the sidebar. This is important since it helps me access content I find useful.
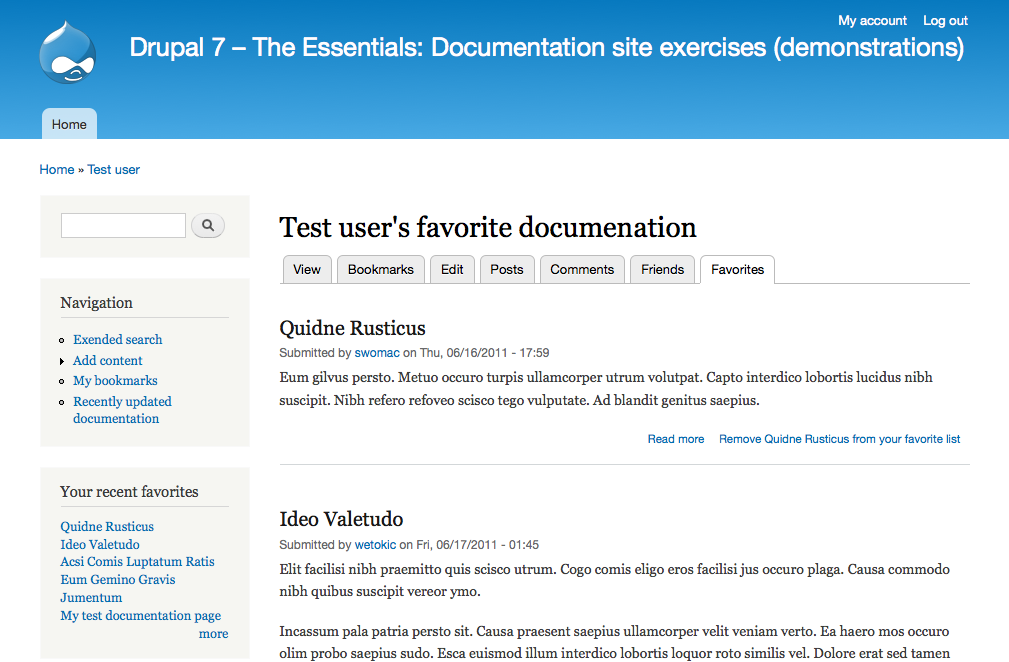
Figure 11.9: An example of how the favorite list may look.
How to demo
- Log in to the site.
- Flag at least six documentation pages as favorites. (Create the pages first, if necessary.)
- Verify that the five most recently added are visible in a sidebar block, linking to the respective documentation pages.
- Verify that the block links to a page listing all six documentation pages, with links to the respective pages. Verify that this page appears as a tab on the active user’s profile page.
Preparation
- The site should have a documentation page content type, as provided by the first exercise in this suite.
Suggested solution
- Add a new node flag. Give it the name favorite and the title Favorite documentation.
- Give the flag descriptive flag/unflag link texts, descriptions and confirmation messages. Allow all authenticated users to use the flag, and allow flags to be put on documentation pages only.
- Add a new view. Give it the name favorites, and have it list content without any specified sort criteria. Create a page with the path user/%/favorites, displaying 10 teasers at a time, with a pager. Also create a block, showing five linked titles without any pager.
- In View's main configuration panel, add a new relationship flags: node flag to get information about all the flags on the listed nodes. Use the favorite flag, and include only flagged content – but include content flagged by all users.
- Add another relationship, flags: user, to get information about the user setting each flag.
- Add a contextual filter user: uid, restricting the view to list only content where the flagging user has the user ID provided by the contextual filter value. If the filter value is missing, which will be the case for the block, provide default value from user ID from logged in user. Also validate that the filter argument is a user ID.
- Add a sort criteria flags: flagged time, for sorting the list with newest flaggings on top.
- In the block display, override the contextual filter settings. Set the title to Your recent favorites. Also override the more link option (in the middle column), setting it to yes.
- Give the block the block name active user's favorites. Save the view. In the blocks administration page, place the new block in one of the sidebars.
Comments
- As with the previous exercise, this could be implemented as a tab found at each user page, or only on your own user page. The second task is greatly simplified using Page manager.
- When building the block display, it is possible to use the flag relation option to include content flagged by the current user only. However, this would make it difficult to use the more link, as the page display expects a contextual filter value. A better approach (for Views), is to use the same contextual filter settings but allow the block to fetch a default value for the filter.
List all content created by friends
As a site member, I would like a list of all the content created by users I have flagged as friends. I would like this list to be available as a tab on my user page. This is important since it helps me keep up with contributions from people I like.
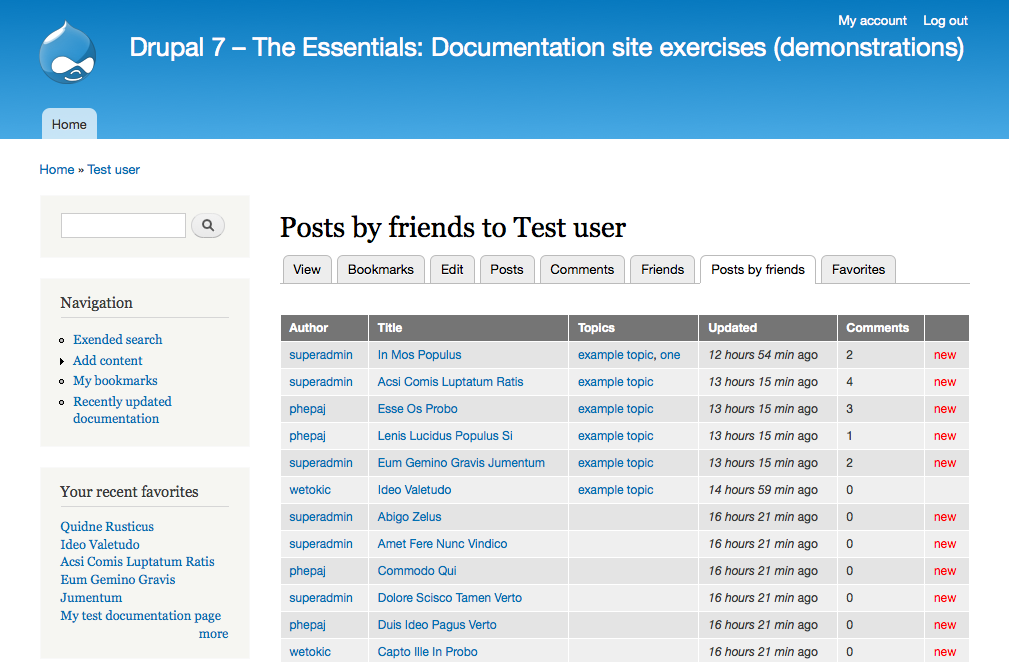
Figure 11.10: An example of how the friend feed may look.
How to demo
- Log in to the site as a user (Alpha). Create at least one piece of content.
- Log in to the site as another user (Beta). Create at least one piece of content.
- Log in to the site as a third user (Gamma). Create a piece of content . Flag Alpha and Beta as friends.
- Go to Gamma’s user page. Click on the tab Posts by Friends.
- Verify that the content created by Alpha and Beta, but not Gamma, is listed.
Preparation
- The site should have a documentation page content type, as provided by the first exercise in this suite.
- The site should have the friend flag, as described in a previous exercise in this chapter.
Suggested solution
- Create a new node view. Give it the name Posts by friends of a given user and have it list content with newest on top. Create a page with the path user/%/posts-by-friends, listing 10 teasers and using a pager.
- In Views' main configuration panel, add (if necessary) a relationship content: author to access the user object for the documentation author. Then add a new relationship flags: user flag to get all the friend flags set on the content author. Finally, add another relationship flags: user to join the user setting the friend flag.
- Add a contextual filter user: uid, using the relationship to the flagging user. This will restrict the results to only those where the flagging user matches the provided contextual filter value.
- Add a menu tab item with the text Posts by friends.
Comments
- This, as the previous two exercises, is a case where it becomes easier to create a tab at all user pages to display friend's posts, rather than at your own user page only. (And just as in previous examples, it would be quite easy to solve both these cases if we were using Page manager.)
- Creating a view with three relationships is not something you should do unless you know that you have to. Relationships can result in heavy database queries, leading to poor performance on your site. If the queries are necessary, though, Views is probably a good way of building them, since you get optimized queries and caching functionality built-in.
Exercises: News site
These exercises build on previous exercises in the news site suite. They can be carried out individually, with some preparation, or in sequence with the previous exercises. The exercises require using the concepts described in parts A and B of this book, as well as concepts from the Flag chapter.
List spam-flagged comments
As editor, I would like site visitors to be able to mark comments as spam. I would also like a list of all comments marked as spam. This is important since it helps me to keep abusive content off the site.
How to demo
- As an anonymous visitor, flag at least two comments as spam. Verify that you cannot remove the spam flag.
- In another browser, also as anonymous visitor, flag one of the spam flagged comments as spam. Verify that the spam flag was not already set.
- Log in to the site as editor. Go to admin/content/comment. Verify that there is a tab “Spam” visible.
- Verify that the list contains all the spam flagged comments, with the newest comment on top. It should also have the number of flaggings and links for viewing, editing and deleting the comment.
Preparation
- The site should have a news article content type, as provided by the first exercise in this suite.
- The Session API module must be downloaded and installed to allow anonymous users to use flags.
Comments
- A useful feature would probably be to add an exposed filter, allowing editors to show only comments with a certain number of spam flags.
- Including the entire comment body in the list would probably save the editor a lot of time, but make the list difficult to overview. One solution for this is to have the body comment as a tooltip for the link to the comment.
- The Views Bulk Operations module can be used to allow editors to select a number of comments to unpublish or delete all at once.
Approve spam-flagged comments
As site editor, I would like to mark spam-flagged as approved, removing them from the list of spam-flagged comments. This is important since it prevents me from checking the same potential spam more than once.
How to demo
- As anonymous visitor, flag a number of comments as spam.
- Log in to the site as editor and go to admin/content/comment/spam.
- Verify that each potential spam comment has a link approve.
- Verify that approved comments are removed from the list when reloading the page.
Preparation
- The site should have a news article content type, as provided by the first exercise in this suite.
- The site should have the spam flag from the previous exercise.
Help improve this page
You can:
- Log in, click Edit, and edit this page
- Log in, click Discuss, update the Page status value, and suggest an improvement
- Log in and create a Documentation issue with your suggestion
