On this page
- Installing Drupal
- Technical requirements for installing Drupal
- Installing Drupal
- Download the Drupal codebase
- Make two changes to the file system
- Installation through the web interface
- Alternative ways of installing Drupal
- Modules
- Modules are found at drupal.org
- Finding modules
- Assessing modules
- Installing modules
- Uninstalling modules
- Updating modules
- Modules in Drupal core
- Required modules
- Enabled non-required modules in the standard installation profile
- Disabled modules in the standard installation profile
- Exporting configuration to code
- Features
- Strongarm and update hooks
- Elaboration: Using Features efficiently
- Themes
- Changing the theme of your website
- Installing contributed themes
- Base themes and writing your own themes
Appendix 1: Installation, code base management and themes
Drupal 7 will no longer be supported after January 5, 2025. Learn more and find resources for Drupal 7 sites
(This page is left intentionally blank.)
This line exist because the page body must be at least ten words long.
Installing Drupal
The initial version of this section of the Community Documentation came from the book Drupal 7: The Essentials, courtesy of NodeOne and Johan Falk.
Technical requirements for installing Drupal
Drupal is written in PHP and uses a database to store much of the information being handled on your site. The most common platform for running Drupal is a so-called LAMP stack – Linux, Apache, MySQL, PHP – but Drupal will run on any platform that can run PHP and has a database usable by Drupal. You can, for example, run Drupal on Windows or Mac platforms.
Drupal 7 runs all database queries through an abstraction layer, PHP Data Objects (PDO), which theoretically allows Drupal to run on a wide variety of databases. To work in practice, though, you need drivers to manage the interpretation necessary between Drupal and PDO. This limits your options of databases to use, but the most common databases already have drivers ready to use with Drupal. Drupal supports MySQL (and compatible databases, such as MySQLi and MariaDB), PostgreSQL, SQLite, MS SQL, Oracle databases and the non-relational database MongoDB.
A clean install of Drupal 7 requires PHP to use about 32 MB of memory, but a full website will most likely require much more. The exact memory requirements depends on how a site is set up (and optimized), but a Drupal developer with the php memory limit setting at 128 MB will rarely need to care about the site's memory.
Installing Drupal
You install Drupal by the following steps:
- Dowload Drupal and put it on a server.
- Make two adjustments to Drupal's file system (or make sure that Drupal can do them for you).
- Provide Drupal with the login information for your database.
- Set a few basic settings for your site, such as information for the first user account.
These steps are described in more detail below.
Download the Drupal codebase
You will find the latest version of Drupal at drupal.org. There is a big green button get started with Drupal, providing you with some easy-to-use links to get started. There is also a link directly to Drupal core on the site's front page. (See figure A1.1)

Figure A1.1: You can download Drupal from drupal.org. The “Get started with Drupal” button is a good start.
The downloaded file package is either a zip or a tar.gz archive, depending on which download link you use. Regardless of its format, the archive should be extracted with a suitable tool and its content should be moved to the web folder on the your server.
Drupal won't care if you place all the files in a sub folder of your server's web folder or directly in the web root. The only thing affected is the path used for accessing your site.
TIP: If you're using a web hosting service, you will probably need an ftp client to upload files. A good and free ftp client is FileZilla. You will need ftp login information, provided by your web hosting service.
Make two changes to the file system
Before the actual installation can start, you will (on most servers) need to make two adjustments to the file system. This ensures Drupal is able to write files to two places. The required steps are:
- In Drupal's root folder there is a subfolder sites, containing a subfolder default. Within it is a file named default.settings.php. You should copy this and give the resulting file the name settings.php (placed in the same folder). Note that the file should be copied, and not renamed. Drupal requires the original file as well.
- In the same folder (sites/default), you should create a subfolder named files.
- The file and folder you have created should both be writable for Drupal, meaning that they should be writable for your server. These are the only places Drupal requires write access (except for a temporary folder that should be outside the web folder and usually are inherited from your server settings without you having to even think about it).
TIP: If you're using an ftp client, you can change the write access for files and folders by right-clicking on them and choosing any option similar to properties or file attributes. How the settings appear depends on your ftp client, but you should be able to find a setting for group write access. Check that option.
TIP: Depending on how your server is set up, Drupal may be able to make these changes itself during the installation process. If you find this step confusing, skip it and try installing Drupal anyway. Drupal will let you know if some requirements are unmet, and provide suggestion to how to get things working.
Installation through the web interface
When the file structure is in place, you do the actual Drupal installation by visiting your soon-to-be website. The server will find Drupal's index.php file and if no database environment is available, Drupal will run the installation wizard. The steps in the wizard are:
- Select an installation profile. Drupal core contains the Standard and Minimal profiles. (See figure A1.2) The standard profile contains a number of commonly used settings, while the minimal profile is as bare as it gets. There are a number of other installation profiles available at drupal.org, for example for building news sites or project management sites. The examples in this book all build on the standard profile.
- Choose language. By default only English is available, but if you (or the installation profile) have downloaded additional language packs, Drupal will recognize them and offer alternatives on this screen. (See figure A1.3) You can add new languages while building your site, as well as during the installation.
- When language settings are complete, Drupal will check that all requirements are met, such as the file and folder described in the previous section are writable. If anything is wrong, and Drupal can't fix it by itself, you will get an error message along with notes about how to fix the problem.
- Database configuration. This includes selecting the type of database and entering information necessary to access the database, database name, username and any password. (See figure A1.4) If you use a web hosting service only providing you with a single database, you may separate different installations by using a table prefix. This is short text added before all database tables created by Drupal (such as site1_ or site2_).
- When the database settings have been entered, Drupal will run the actual installation. This means that Drupal will be busy for a minute or so and displaying the different steps in the installation process as entertainment.
- Configure site. When the installation is complete, you will be asked for basic site information, such as site name and time zone settings. (See figure A1.5) You should also enter information for the first user account on the site. This account will be granted all permissions on the site and should only be used during development and system updates. (It should not be used as a personal account used to post content to the site.)
- When all these settings are made, your installation is complete. (See figure A1.6) You can now start the fun of experimenting with Drupal!
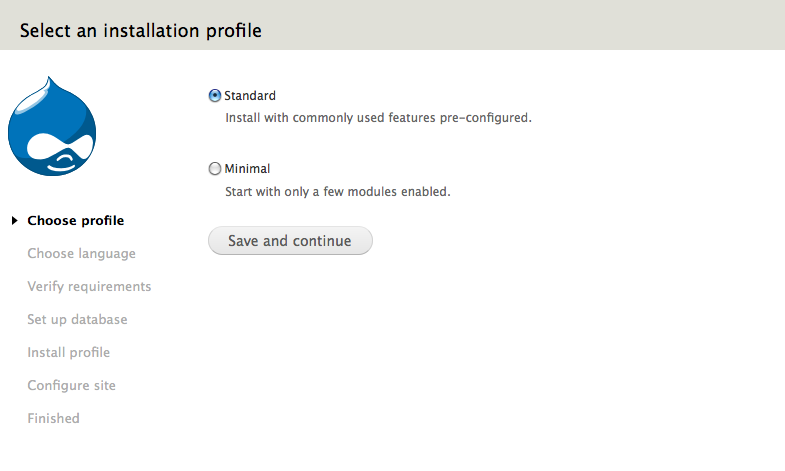
Figure A1.2: Professional Drupal developers tend to like the minimal installation profile. Others tend to like the standard profile.
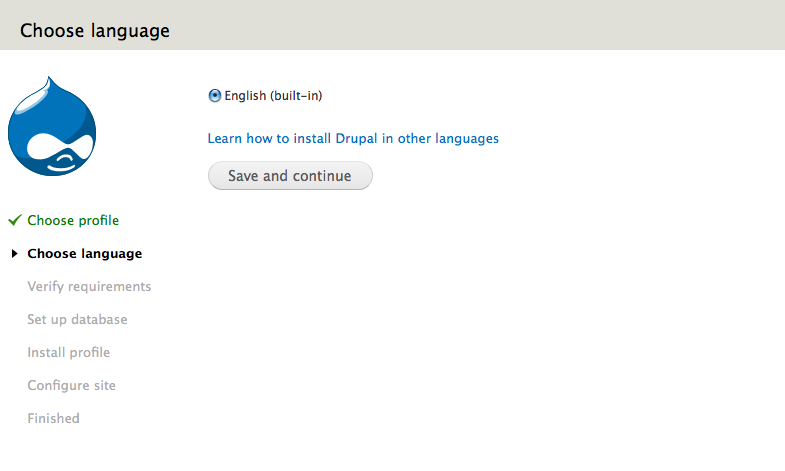
Figure A1.3: By adding more languages you can use Drupal in non-English languages even during the installation.
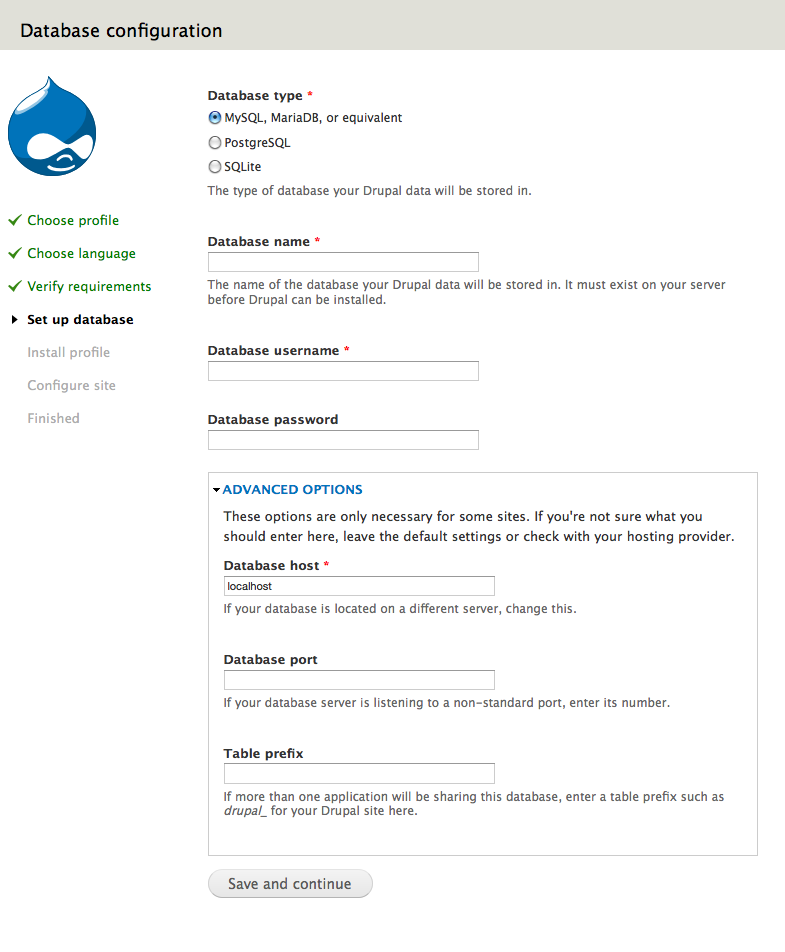
Figure A1.4: Drupal needs database login information to work properly.

Figure A1.5. The last step is entering some basic site information, including information for user account 1.

Figure A1.6: A new Drupal website, fresh from the installation process.
Alternative ways of installing Drupal
There are other methods for installing Drupal. Many experienced Drupal developers use the script collection Drush to automate downloading and installing Drupal. There are even tools available for automating Drush, creating new Drupal sites in assembly-line style. (Anyone fascinated by this should check out the Ægir project.)
New Drupalists sometimes prefer prepared single-click installations, where as much as possible is pre-configured. These installations normally require that the automated installer knows the server configuration. This is why these are offered by some web host providers, but not in the default Drupal installer. Another way for an installer to know the server setup is to install a server while installing Drupal.
One example of hosted one-click installers is found at WebEnabled. An example of an installer including both Drupal and a server to run it on is Acquia Drupal.
Modules
What makes Drupal powerful is only partly the functions included in a standard installation. The real power lies in the possibility to extend and customize these functions by using modules. These are plugin programs which alter the behaviour of your Drupal site.
This chapter summarizes how you find, assess, install and update modules.
The initial version of this section of the Community Documentation came from the book Drupal 7: The Essentials, courtesy of NodeOne and Johan Falk.
Modules are found at drupal.org
Since Drupal is open source software, anyone can create their own modules, and do things to the Drupal codebase. When looking at Drupal's development you will see that cooperation works better than each and every person working on their own. One of the ways to facilitate cooperation in the Drupal world is the ability to create project pages for modules at drupal.org, Drupal's main hub.
The project pages contain information about module features, documentation links, and issue queues for giving feedback to module maintainers, report bugs, submit patches, and a lot of other stuff. Having a single site for contributed modules, contrib modules in Drupal lingo, has a positive effect on the Drupal community, as it helps Drupalistas to cooperate even more.
TIP: Modules only constitute one of the project types available at drupal.org. There are also themes, installation profiles, documentation and translations. Drupal core itself is run as a project on drupal.org, using the project name drupal.
Finding modules
There are a number of ways to find modules to match the features you want to build:
- Use the search box at drupal.org and limit your search to modules.
- Visit the download & extend link at drupal.org to browse lists of popular modules. You can also go directly to http://drupal.org/project/Modules.
- Ask around in any of the available forums, to get the opinions of experienced Drupal developers about which modules match your requirements. You will find links to web forums and other ways of contact at http://drupal.org/getting-involved (including live chats). Wise people learn from others' experiences.
- Use your favorite search engine to search the internet.
Assessing modules
Learning to recognize good modules is a skill that takes time to master. A good start is, once you find a module you think matches your requirements, to check these criteria:
- Make sure that the module works with Drupal 7 (or the Drupal version you are using). On the module's project page is a list of all versions you can download . The Drupal 7 versions have version number starting with 7.x (such as 7.2).
- At the project page is also a header project information. It is a good sign if maintenance status is actively maintained and development status is under active development. It is also good if reported installs is high. Consider anything less than a thousand reported installs a warning.
- The information about the latest release of the module, also found on the project page, could provide further information. A high version number indicates that the module has been around for a while and should be more mature. If, on the other hand, it is more than six months since a new release was published, there is a risk that this module is not very actively maintained. Modules available in (only) beta, alpha or dev versions should only normally be used on experimental sites.
- In contrast to the naïve reaction, a large number of issues reported on the project page is a good sign. It means that a lot of people use the module and care about its future. It is usually a bad sign, though, if more than 10–20 percent of the reported bugs are open.
- Modules offering general solutions are in most cases preferable to those that solve very specific problems. This is probably the most difficult factor when assessing modules, since it is far from obvious what you can do with the most general modules. Luckily, you have this book to help you!
- Finally, you can of course also install the module and try it out. The more rigorous you are with other ways of assessing modules, the more time you can spend on trying out and learning the modules with the highest potential.
Installing modules
The easiest way of installing modules usually looks like this:
- You find the module at drupal.org and copy the link of the module's archive file (in the tar.gz format).
- You go to the module list on your Drupal site (modules in the toolbar) and click the link install new module found at the top of the page.
- You paste the link to the archive of the module and hit the install button. If Drupal asks for login information for your server, you enter these.
- To get back to the module list, you follow the link for enabling the newly installed modules.
- You check the modules you want to enable, and save the settings. (See figure A1.7)
- Done!
However, this does not always work. In these cases, the most common installation procedure is this:
- You carry out step 1–4 in the previous list, but fail when you try to enable the module, can't find any administration page for changing the module settings, or you simply won't get the module to work.
- You return to the module's project page at drupal.org and read the installation instructions, and/or notes about how the module works. You may even check out the README or INSTALL text files for the module.
- You find any additional steps you need to carry out before you can start using the module. These could be:
- The module depends on another module and can't be enabled until you have downloaded that module too.
- The module depends on an external library, which must be downloaded manually.
- The module is an API module, without any user interface of its own (and only useful when combined with other modules).
- The module connects to a third-party service and requires API keys from that service before you can use it properly.
.png)
Figure A1.7: The module list is used to enable and disable modules. There is also a link for adding new modules.
TIP: You can also add modules manually in the Drupal file structure, which is useful when writing your own modules. Contributed modules should be placed in the sites/all/modules folder (and not in the root folder modules, used for Drupal core modules). Custom-written modules are usually placed in the sites/default/modules folder.
TIP: Technically, what you download from drupal.org is a project, while the items you enable in the module list are modules. A project may contain many modules. Most Drupalistas, though, refer to module projects simply as modules.
TIP: Experienced Drupalistas often use the tool Drush (“Drupal shell”) to download modules. Check out the project page for Drush for more information.
Uninstalling modules
You should disable and uninstall modules that you don't need. It is done in the following way:
- You disable modules by deselecting the relevant check boxes in the module list, and then saving the settings. This turns off any functionality provided by the module, but won't delete any data. If you enable the module again, everything is restored.
- Modules are uninstalled at the uninstall tab found at the module list. Uninstalling a module removes any data saved by the module.
There are some benefits of removing unnecessary module folders from your file structure. The biggest benefit being that you won't confuse other developers with modules that are neither used nor enabled. You cannot remove the files using Drupal's web interface, but must manually go into your Drupal files and remove the module's folder at sites/all/modules. You should always uninstall a module before removing its folder.
Note: This step is often overlooked and undervalued. This is a mistake should you grow your new site to be a great success. Don't miss this step for your peaceful future.
Updating modules
As you will notice after building your first Drupal site, there are frequently module updates published. The procedure for installing module updates is:
- Log in as user 1, or another account with permission to perform system updates.
- Put the site in maintenance mode, an option found from the toolbar, Configuration, Maintenance mode. This prevents visitors from affecting your database while you're performing the updates.
- Make a backup of your entire database and preferably also the file structure of your website. (You should at least backup the folder of the module you're updating.)
- Download the updated module and replace the relevant module folder.
- Visit update.php in the root folder of your site. There is a link available at the module list. The page will display a summary of the steps desribed above. Review these and then click continue to get a list of any update scripts that need to be run in order to convert old data in the database. Click apply pending updates to run them. (If no available updates are displayed, it means that you are already done!)
- Make sure that the website works as it should and then take it out of maintenance mode.
TIP: If you find the procedure above time-wasting, or even outright boring, you are recommended to check out the Drush project. This allows you to apply updates with a single command in a terminal.
Modules in Drupal core
A standard Drupal installation contains almost 50 modules. Some of these are enabled in the standard installation profile. Some modules are so important for Drupal that you can't turn them off.
All core modules are described briefly in the list below.
Required modules
- Field: This module is responsible for basic management of entity fields.
- Field SQL storage: This module allows entity field data to be stored in SQL type databases.
- Filter: This module provides the text formats applied to user input and the filters the formats consist of.
- Node: This module provides the node entity and related functions.
- System: This module provides many of the most basic functions in Drupal, as well as some of the site settings.
- User: This module provides the user entity, as well as the login and permission system.
Enabled non-required modules in the standard installation profile
- Block: This module is responsible for block rendering in Drupal.
- Color: This module allows you to customize the color scheme used in the default Bartik theme as well as in some other themes.
- Comment: This module provides the standard commenting functionality in Drupal.
- Contextual links: This module provides the gear links with some handy links, visible when hovering over blocks and some other elements on your site.
- Dashboard: This module provides simple functions for building an administration dashboard using blocks.
- Database logging: This module logs different types of events to your website's database.
- Field UI: This module provides the user interface for changing entity field settings. It can usually be turned off on live sites.
- File: This module provides an entity field for storing files.
- Help: This module provides simple help pages on your site.
- Image: This module provides an entity field for managing images.
- List: This module provides entity fields for lists.
- Menu: This module is responsible for displaying menus, as well as the administrative interface for managing menus.
- Number: This module provides entity fields for numbers.
- Options: This module provides some widgets for entity fields.
- Overlay: This module allows administrative pages to be displayed in a layer rendered on top of your public website.
- Path: This module provides URL alias functions for your website.
- RDF: This module provides your site with RDFa metadata about the elements displayed on a page. This may be useful for screen-readers as well as search engine robots.
- Search: This modules provides tools for searching content on your site.
- Shortcut: This module allows you to create sets of shortcut links, as well as links for adding and removing shortcuts.
- Taxonomy: This module provides taxonomy term entities and the functionalities for managing them.
- Text: This module provides entity fields for text.
- Toolbar: This module provides the administrative toolbar, displayed at the top of a standard Drupal installation.
- Update manager: This module makes regular checks to see if there are any updates available to Drupal core or contributed modules and themes.
Disabled modules in the standard installation profile
- Aggregator: This module allows your website to read RSS feeds from other websites and publish their content in blocks and separate pages. It is possible to use aggregator data in Views.
- Blog: This module provides a node type and some functionality for managing blogs on your website. You can build more powerful and flexible blogs using fields and Views.
- Book: This module allows you to order nodes in a tree structure, and also provides forward/backward/up links at nodes included in a tree structure. The feature can be useful when writing documentation.
- Contact: This module creates a simple contact form on your website and also per-user contact forms.
- Content translation: See the chapter about Drupal in more than one language for details.
- Forum: This module provides functionalities for simple discussion forums. You can build more flexible forums using fields and Views.
- Locale: See the chapter about Drupal in a non-English language for details.
- OpenID: This module allows users to log in using OpenID technology, which for example means that authentication can be managed by another website. See http://openid.net/ for more information about OpenID.
- PHP Filter: This module provides a text format parsing and executing PHP code in the entered text. Using PHP in this way is a bad habit and will create massive security risks if put into the wrong hands.
- Poll: This module provides a node type for simple polls on your site.
- Statistics: This module provides site traffic statistics by counting visits to each node page. Statistics data can be used in Views. This module is not recommended on larger websites, since it may cause performance problems.
- Syslog: This module logs activities on your site in the syslog standards, which for example means that you can be notified if severe errors occur.
- Testing: This module provides a number of automated tests for functions provided by Drupal core, as well as a testing framework for contributed modules. Automated testing should be a part of all professional software development.
- Tracker: This module provides lists to track the most recent activity for users, or the website as a whole. You can create more flexible lists with Views.
- Trigger: This module allows you to configure simple reactions when selected events occur on your website. You can create more flexible reactions using the Rules module.
Exporting configuration to code
One of the great advantages of Drupal, compared to other frameworks used to build websites, is how quickly you can build new functions on your site. This is to a large extent explained by the fact that 90 percent of all functions can be provided by clicking and configuring modules, rather than writing code. In that light, it may seem strange that Drupal's community is putting a lot of effort into finding a good way for converting the configuration on a Drupal site into code to export the configuration.
There are several reasons why so many people are interested in saving configuration as code. One of the reasons is that it is easy to reuse functions that you have built. If you spent a day at clicking around in Drupal to build a photo gallery, you probably don't want to spend another day repeating this configuration the next time you want to build a similar gallery. If you could export your configuration and move the exported code to your new site, you could have the gallery set up in five minutes instead! Indeed, that would be useful.
But the most important motivation for exporting configuration into code is not that it could be copied. It is that it could be version controlled.
Professional software development have for many years been using version control systems as a part of the standard tools. These are tools used to record a certain state of the code being built, allowing you to view and revert to the code in different stages of the development. Version control systems could be compared to the saving functions in large computer games, allowing you to save your progress between every level (or right in the middle of it). If things go bad or you spent a lot of resources just to hit a dead end, which is hopefully more common in games than in development, you can return to these save points and start over.
Modern version control systems don't only allow developers to save the code they are working on themselves, but can also merge your own work with that of others, even if you are writing code within the same file. This means that you could be working with a specific feature in a project, while your colleagues are working with several other features and you could still share your progress with each other.
Version control has become such a natural part of software development that no professional coder would like to take on a project without version controlling her code. It allows you to keep track of the files you're working with and, maybe even more importantly, to transfer a recorded state of the code to test servers, staging servers and live servers. If, for some reason, it turns out that the latest updates on the live server have severe bugs, you can always revert to the previous version of the live code. You are saved.
Today there are many good systems for version control of code. The problem, though, is that configuration you make in Drupal is saved in the database and there are no good ways of version controlling database content.
In the old days, this lead to Drupal developers being forced to do point-and-click changes on the actual live site rather than a development copy of it. Even if you have done this over and over again on a test environment, something may go wrong. Maybe you make a mistake when you click. Maybe there are differences between the live and test server you didn't know about. Maybe someone else has been fiddling with the settings on the live Drupal site, without telling you. If you don't have version control, there is a risk that you can't undo your changes. There is no saved state to return to and no ctrl + z.
This is not the way it should be.
The initial version of this section of the Community Documentation came from the book Drupal 7: The Essentials, courtesy of NodeOne and Johan Falk.
Features
The method for exporting configuration that has become de facto standard in the Drupal community is based on a module called Features. Features allows you to select components of your site configuration that you want to export and saves all the related settings into a mini module. (See figure A18) The module can be used on the site where the configuration was originally made, or any other site where you want to reuse the same settings. When the mini module is enabled, install scripts will run and replicate the configuration for the components you selected to export. This includes node types, entity fields, views, flags, rules and custom pages.
The mini module consists of a number of small files, which can be treated as any other files. This means that they can be version controlled. You can save, update, move between different environments and revert if you need to.
The Features module has some functions making it particularly useful:
- If any component provided by a mini module are changed by manual configuration, Features will notice and mark the component as overridden.
- In combination with the Diff module, you may review the overrides of each mini module.
- You may revert each component individually to the state defined by the mini module.
- If the overrides reflect improvements you want to keep, you can let Features recreate the mini module, giving you some new files that you can track in your version control system.
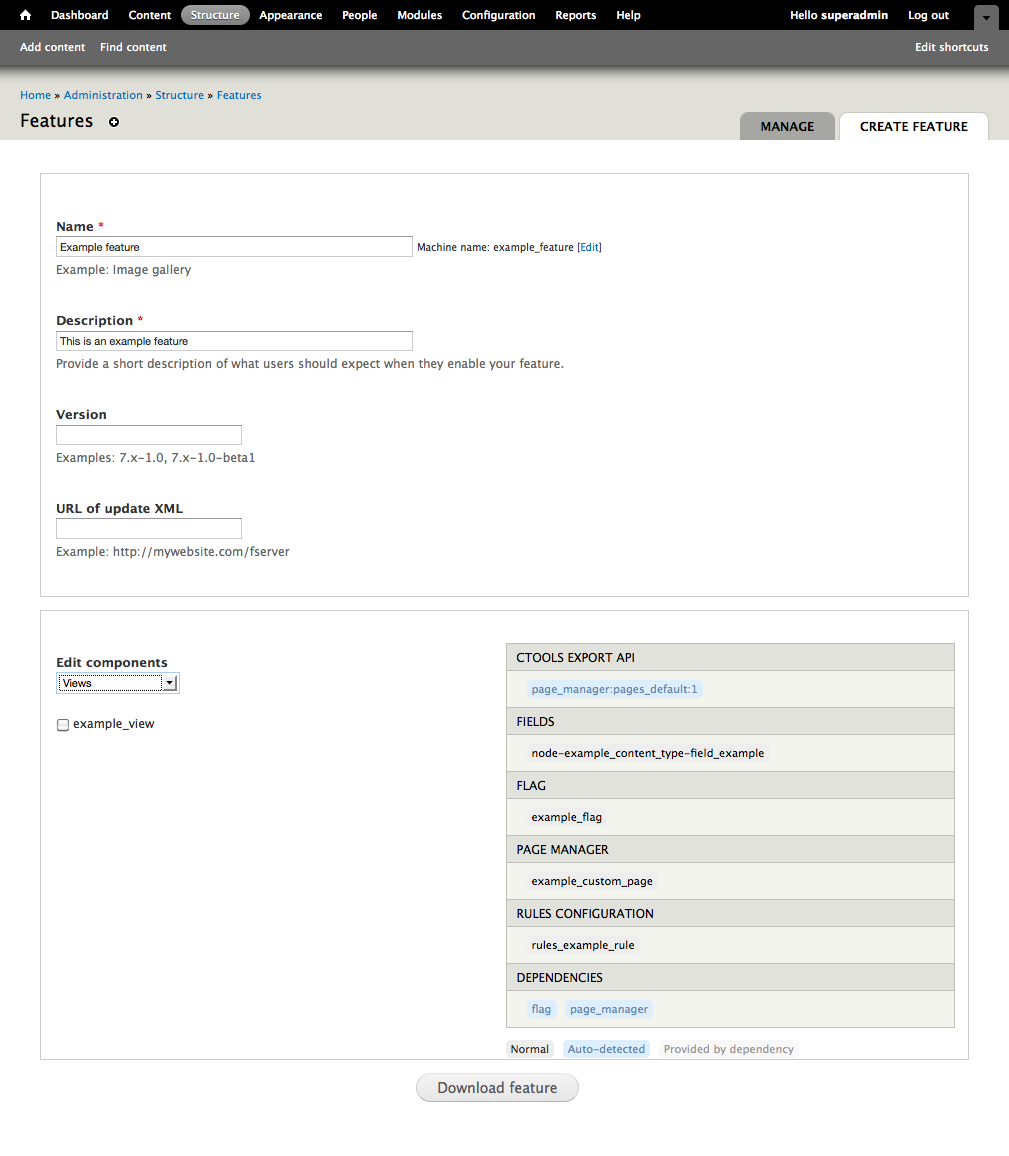
Figure A1.8: The Features module allows you to export selected part of your Drupal configuration and save this configuration as a mini module.
TIP: Features integrates well with the tool Drush, mentioned previously in this book.
TIP: The mini modules created by the Features module are also called features. In online documentation, these features are usually written with a small f, while the Features module has a capital F. Feel free to suggest a different naming convention (or as we say in Drupal-speek: "patch welcome").
Strongarm and update hooks
Features has solved many of the problems that used to block version control of Drupal configuration. But some problems remain.
In order for Features to be able to export the configuration, the corresponding module must save its settings in a way that Features can recognize. Practically all larger modules support Features, but many smaller modules don't. If you want to version control all the configuration in a project, you will either spend a lot of time improving a number of modules or have to find other solutions.
In particular there are a number of settings in Drupal core that are not natively recognized by Features. To solve this, the Strongarm module was written, acting as a bridge between Features and the settings stored in the Drupal variable table. Since many small modules have so few settings that they chose to store them in the variable table, rather than creating their own tables. Strongarm is able to pick up these settings and tell Features about them.
Still, the Features + Strongarm combination will usually not give you 100 percent exported configuration. If you want this, which you should always strive for, you will sometimes be forced to custom-code so called update hooks. These are functions being executed when you update modules (or Drupal core) from one version to another. Your custom update hooks should be written to perform the last database changes which otherwise would have required manual clicking, finally providing you with a fully automated workflow for updating site configuration.
Elaboration: Using Features efficiently
It takes time and training to use Features efficiently and you are encouraged to start using Features to export configuration early on to get this training. Here are a few tips.
- The best way of assuring that Features has captured all the settings you want to export is to install your features (mini modules) on a clean Drupal site. On the site used to build the features, non-exported settings in your database may trick you into believing that everything is exported.
- Divide your site configuration into several different features. This makes it easier for several developers to work in a single project.It also makes it possible to enable and disable each feature individually on the resulting site. You can also reuse selected features on other sites more easily.
- When dividing site configuration into separate features, you want the lines between the features to be as clear as possible to avoid conflicts. Usually this means that different sections or functionality on the site is kept in separate features. For example building a blog feature and a news feature. But you could also break the configuration up further, such as blog creation/management and blog display. In general, many small features are better than a few large ones.
- Some features depend on other features. Marking any required features as dependencies when building a new feature may save you future problems.
- A lot of small modules store their configuration in the variable table. All these variables are available as Strongarm components when creating features. Check this list if module settings don't show up as separate component groups.
- You will probably find it useful to have a core feature including all the basic settings for a site, such as permission roles and site front page. This feature could, if necessary, be treated as a standard module and used for including any custom update hooks.
- Exporting individual menu items with Features is sometimes problematic, since menu items can be defined by (say) a custom page and then overridden by the Menu module. If you want to export manually created menu items in the same menu as menu items provided by modules, you will most likely end up with overridden features that cannot be reverted. This can be solved by removing the menu items defined in (say) custom pages and adding the corresponding menu links manually in the menu interface.
- Drupal block settings cannot be exported with Features, even using Strongarm. Three modules that help in exporting block-like configuration are Panels, Context and Boxes.
A good module that export block settings is Features Extra, but still follow on development
TIP: The work of improving the configuration export in Drupal is ongoing. There is a dedicated project for improving this for Drupal 8, where the current approach is to by default store all configuration in code. Features is the de facto standard for Drupal 6, and so far also for Drupal 7, but it is possible that the work for Drupal 8 will provide new and better configuration management even for Drupal 7. Anyone interested in this progress should join the discussion group at http://groups.drupal.org/build-systems-change-management.
Themes
At a large scale, Drupal does three things when a page on your website is requested. The first is that Drupal checks which files and libraries are necessary to collect the information on the page – and how much of the information the requesting user is allowed to access. The second is to actually collect all the information, which usually involves quite a bit of querying and poking in the database. The third and final step is to take the big, naked array of collected data and dress it up with different templates and HTML tags to make it presentable in a web browser.
The last step is called Drupal's theme layer and is governed by your site's theme. The theme layer is separated from the rest of the data management. This means a website can have its look and feel completely changed without having to change the content a bit. For anyone skilled in HTML, CSS, JavaScript and other languages used to present digital content, it also means the possibility to do an extreme makeover of Drupal's presentation.
TIP: Most Drupal themes outputs (X)HTML, but nothing in Drupal forces the content to be presented as a web page. A theme could for example present content as spoken text, or as XML files processed by other applications.
The initial version of this section of the Community Documentation came from the book Drupal 7: The Essentials, courtesy of NodeOne and Johan Falk.
Changing the theme of your website
At the toolbar, Appearance, you will find a list of all themes available on your Drupal site. (See figure A1.9) In a standard Drupal installation you will find four themes:
- Bartik: This is the standard theme, used for non-administration pages.
- Seven: This is the theme by default used on administration pages.
- Garland: This is the default theme used in Drupal 6, ported to Drupal 7 as an alternative to Bartik.
- Stark: This is a stripped-down theme that could be used as a base theme (see separate section).
Each theme has a set default link, used to set which theme should be used on non-administration pages. Just below the themes list is an option to select which theme should be used on administration pages.

Figure A1.9: The themes overview page allows you to select which theme should be used on your site.
TIP: If more than one theme is enabled, site builders can install ThemeKey or Switchtheme so your users can choose which theme they would like to use. This may be useful to offer a high-contrast theme to users with visual impairments.
The page for selecting the theme has a tab settings, used to change a number of theme settings. The theme settings usually include options to turn page elements on and off, such as site name or main links, and the option to change logo or shortcut icon for your site.
Each theme enabled on your site will have its own sub tab, where you can change settings individually. Themes may also add new settings to this page. The Bartik theme, for example, allows changing color settings on your site using the Color module. (See figure A1.10)
.png)
Figure A1.10: Each theme has its own settings page. The default theme Bartik has settings for changing its color scheme.
Installing contributed themes
Developing themes for Drupal is an art in itself and will not be covered in this book. Luckily, you don't have to write your own theme to be able to vary the look and feel of your Drupal site. There are plenty of contributed themes to download and use. Six months after Drupal 7.0 was launched, 169 themes were available.
You will find contributed themes at the same place as contributed modules at drupal.org under the tab download & extend. Themes are installed in one of two ways, like modules:
- By using the link install new theme found at the theme overview page and pasting a link to the theme archive at drupal.org.
- By manually downloading and extracting the theme and placing it in the folder sites/all/themes in your Drupal installation. (Not the root folder themes, used for core themes.)
When this is done, the new theme will be available in the themes overview list and may be used in the same way as other themes.
Base themes and writing your own themes
For small websites it is often enough to use a contributed theme, perhaps with a tweak here and there. In professional web development few clients would accept having a site that looks like hundreds or thousands of other Drupal sites.
The art of writing new themes will not be covered in this book, but there is room for two tips for anyone hungry to develop a theme of her own:
- Instead of building a new theme from scratch, you should use a base theme. This a theme written to be extended and built upon. Using a base theme will save you a lot of work in resetting parts of Drupal's standard markup and you will also get good support for older versions of Internet Explorer (which has a tendency to make web sites look broken). With a good base theme, at least 80% of your theming work can be accomplished by just writing CSS.
- Instead of hacking and changing your base theme, you should create a sub theme, including only the things separating your theme from the base theme. This allows you to update the base theme when necessary, without jeopardizing your own work.
TIP: The Stark theme, included in Drupal core, is an example of a base theme and more base themes can be found on drupal.org. One good base theme when learning to theme is the Zen theme, the most popular of all Drupal themes. Next to Stark in the theme overview is a link to more information about how to create your own theme.
Help improve this page
You can:
- Log in, click Edit, and edit this page
- Log in, click Discuss, update the Page status value, and suggest an improvement
- Log in and create a Documentation issue with your suggestion
