Imagecache is a module that lets you make different sized alternatives of the same images. It requires an image manipulation library such as GD2 or ImageMagick and requires clean urls to be enabled. You can use imagecache with any image uploaded to Drupal, so you can use it with Image module as well as normally uploaded images using the Upload module, but the most common way is to use it with CCK and Imagefield.
View a screencast on using Imagefield and Imagecache.
One useful example is in a community site with many users. Users could upload a user picture that is for example, a 240 pixel square. This may work great for user profile pages, but say you want to make some views of users in specific groups - 240 x 240 pixels may be too big for a view that lists of dozens of people. On these views you may want to make the pictures smaller - 120 x 120 pixels for example. Image cache gives you a way to accomplish this without having to manually resize each image.
Another example that we're going to demonstrate in detail is when you want to scale images down for a teaser and display them in their full size when viewing the whole content. Before proceeding, make sure you have installed and enabled Imagecache, CCK and Imagefield. Also create the content type with the Imagefield you'll want to resize. If you just want to edit a template manually to resize an image, you should scroll down to the end.
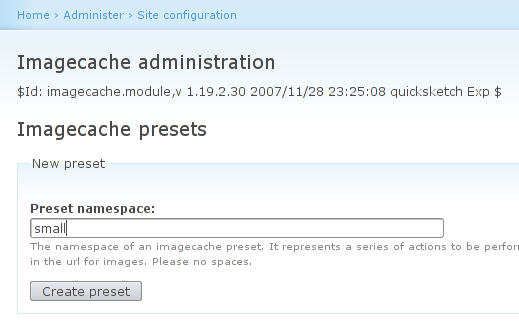
First login to Administer -> Site Building -> Image cache (this used to be Administer -> Site Configuration -> Image cache in older versions of the module). Then label a new namespace preset: for example "small" (no quotes) and click on the 'Create preset' button.
Then choose an action: scale, resize, or crop. Scale works well when you want to keep the aspect ratio, you only need to enter one of the dimensions in this case. Resize will allow you to produce images of any arbitrary size, even if that results in a distorted image. Crop will allow you to display only part of the image, I'll use the Drupal logo as an example:
Scaled to 50%:

Resized to 60x20:

Cropped to 50%x50%, both offsets set to top:

For this example, scale will suffice, so select it and click on the 'Update preset' button:

After that, give the preset a width and height, you can use a percentage to get sizes relative to the original image's size or enter an absolute value in pixels. In the first example example we would use 50% or 120 to make a 120 pixel square image. As the second example is more generic and you might be dealing with images of several sizes, the best choice would be to specify a maximum value for both width and weight the image displayed in the teaser.
Let's suppose you want to scale the maximum size of the image to be 48x48. To do that, you fill out the width and height, and set it to scale to fit inside dimensions, unless you don't care if one of the dimensions may actually end up greater than the specified value. Don't forget to click on the 'Update preset' button after setting the needed values.

Now that we've successfully created our preset namespace, we need to edit the desired CCK field to automatically resize the images. To accomplish that, first go to Administer -> Content Management -> Content Types. After that, click on the configure link for the content type that contains the content type that has the field you want to configure.

Then just select display fields and set Teaser to the desired preset and click on 'Submit' (in this case "small", you could also edit full if you wanted the images to always be resized, even when browsing the full content):

Voilà, now all images in a "testimage" field will be automatically scaled down to a maximum of 48x48. Below is the final result.
Preview:

Full view:

If you want to add manually an image and apply an imagecache preset on it, you need to add a code snippet to the desired .tpl.php file:
print theme('imagecache', $preset, $image['filepath'], $alt, $title, $attributes);
Below is an example in which I manually call Imagecache using the namespace small and printing file test.jpg on the root of the Drupal installation directory (the image path should always relative to it). The alt atribute is shown when the image cannot be displayed while the title attribute is meant to be displayed in a tooltip.
print theme('imagecache', 'small', 'test.jpg', 'just a test image', 'test image');
($alt, $title, $attributes are optional, $attributes intentionally omitted in the example, as it's not a very frequently used parameter).
Putting several of these practices together can lead to code such as this:
<?php if ($field_images[0]['view'] > '' ) : ?>
<?php foreach($field_images as $item) { ?>
<div class="images">
<?php print '<img src="/files/imagecache/medium/'.$item['filepath'].'" title="'.$item['title'].'" alt="'.$item['alt'].'">'; ?>
<?php print '<h3 class="img_title">'.$item['title'].'</h3>'; ?>
</div>
<?php } ?>
<?php endif; ?>
 Come together with the global Drupal community in Rotterdam, 28 Sept – 1 Oct 2026. Sessions, contribution, connection, and Early Bird savings until 8 June.