On this page
JUpload Install and Workflows
Installing
The JUpload module includes the minimum number of files from the full JUpload project on SourceForge. You can use it with just those files or add JUpload to your sites/all/libraries.
Some reasons to add JUpload as a Library:
- Update the applet to a newer version (5.0.8 is currently included) before the module is updated
- Create a signed version for your site
- Customize the applet beyond the options available in the config
If you are using version of JUpload included with the module, there are only 2 steps to configure it.
- Configure the FTP Connection information at Admin -> Configuration -> Media -> JUpload
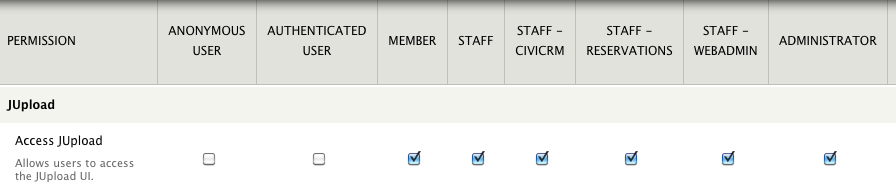
- Configure the permissions for the Role that can use JUpload Admin -> People -> Permission -> JUpload
Security
If you use the version of JUpload included with the module, you will see several security related messages when launching JUpload. These vary between browser and OS, but will look something like...
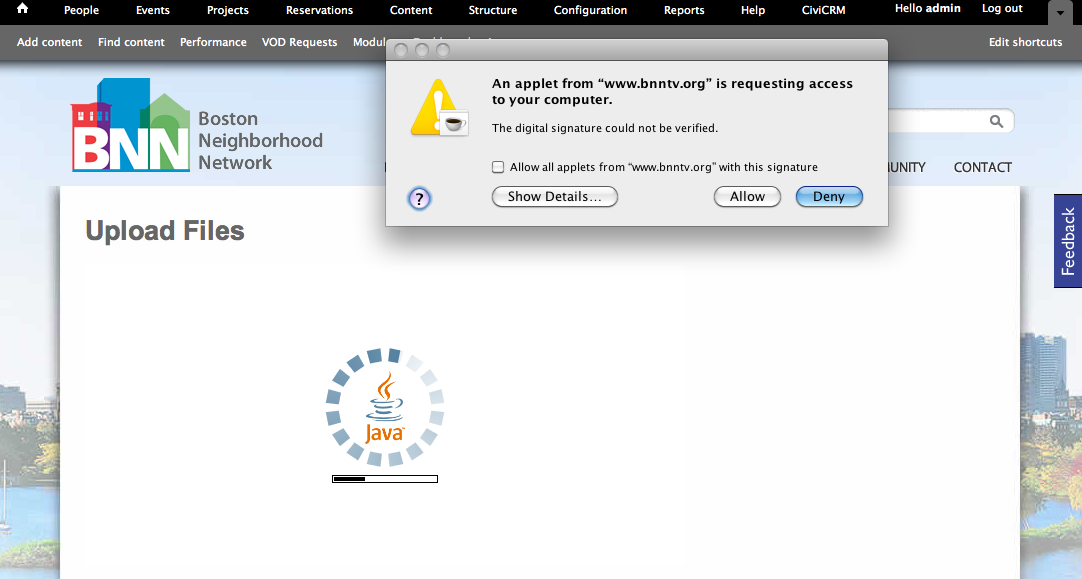
If you select the Always Allow option, you will only see those messages once.
Workflows
The JUpload module can be used to move large files into your video workflow. These workflows can be very simple or very complex. A simple configuration can be configure in minutes:
- Configure FTP Server that uses Port 21 on a box with a public IP address. This can be a Mac, PC, or Linux box. There are hundreds of tutorials for this part fo the configuration and a lot depends on the way you network is configured.
- Once your FTP Server is configured, try connecting with a client like Filezilla using a username and password. If you can't connected with Filezilla, JUploader won't be able to connect either. It is easier to troubleshoot the FTP connection with Filezilla.
- Enable the JUpload module
- In admin/config/media/jupload enter the same server, username, and password you used inthe previous step
- Add permission to Access JUpload for users in any roles you want to give access to at /admin/people/permissions
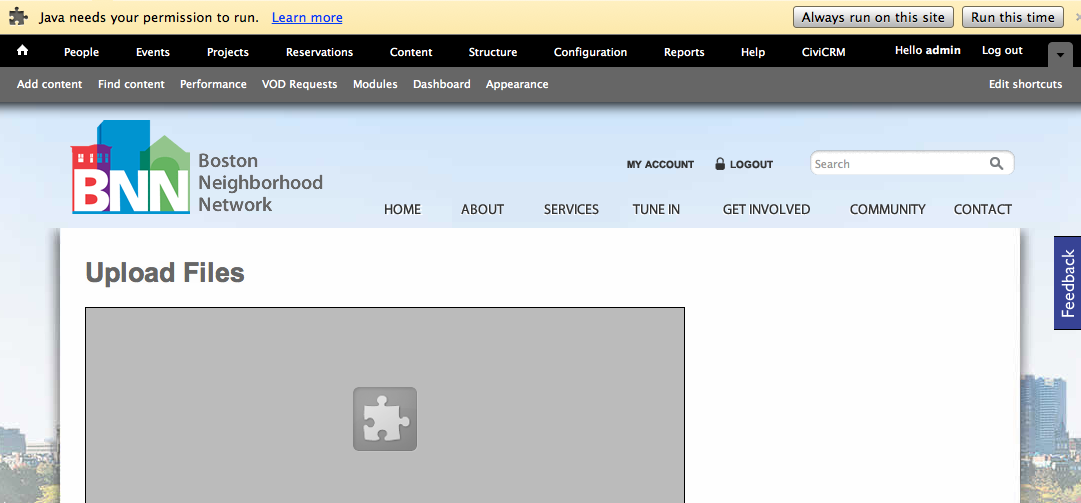
- Go to /jupload
- Allow the Java applet to run
- Upload a file
Now what happens after the file is uploaded depends on your configuration. Here are some examples of how JUpload can be configured:
Simple JUpload Workflow Using FinalCut Compressor
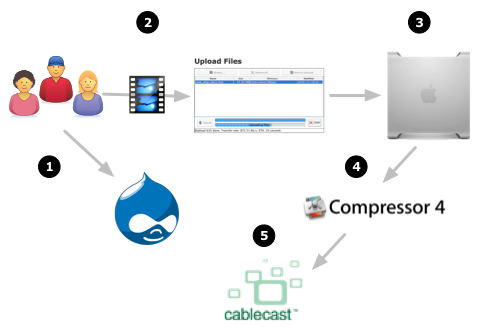
- First users login to Drupal.
- If they are in the correct role, they can use JUpload to upload a file
- The file is transfered to Mac running FinalCut. This could be an edit station with a public IP address or a dedicated transcoder
- FinalCut Compressor can be configured to automatically transcode files and save the file to your playback server or this can be manually started by staff.
Simple JUpload Workflow Using Telvue Archive Server
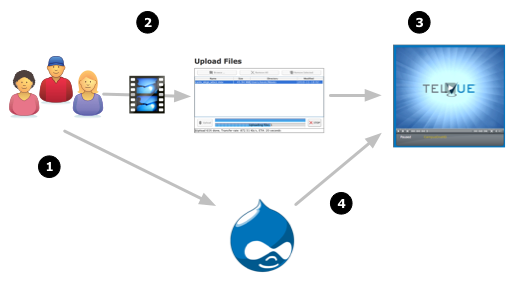
If you happen to have a Telvue Archive Server, you can make this even simpler
- First users login to Drupal.
- If they are in the correct role, they can use JUpload to upload a file
- The file is transfered to the Telvue Archive Server and encoded into the proper MPEG2 format for playback
- Metadata about the video is submitted from Drupal using the Telvue API
- For the Archive Server, shows can be pushed to playback servers or Cloudcast for VOD
Moderate(ly Difficult) Workflow Using Bakery, Media Derivatives API, FFMPEG and AmazonS3 for VOD
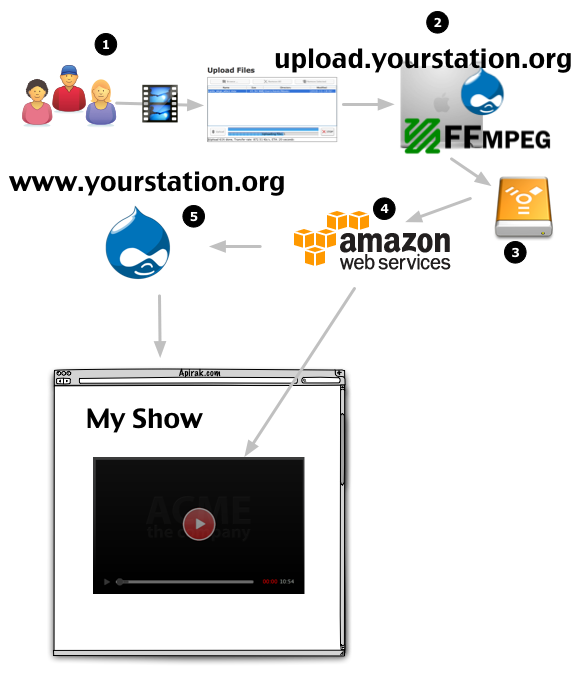
This workflow creates a VOD from MPEG2 that is passed from the FTP server to a large NAS that is also connected to the playback server. It assumes users are creating the MPEG2 correctly.
- First users login to a 2nd Drupal site running Bakery for Single Sign On on a server at the station. The server can be as simple as MAMP running on a Mac.
- If they are in the correct role, they can use JUpload to upload a file
- The file is transfered from the FTP server to a large external storage as it is uploaded.
- Once the MPEG2 is uploaded, the Media Derivatives API uses FFMPEG to create an H.264 and moves the file to AmazonS3
- The main Drupal site checks Amazon for new files and plays the files using Cloudfront and RTMP which allows media chapter links
Difficult Workflow Using Bakery, Media Derivatives API, FFMPEG, Local Server for VOD, and MPEG2 for Playback
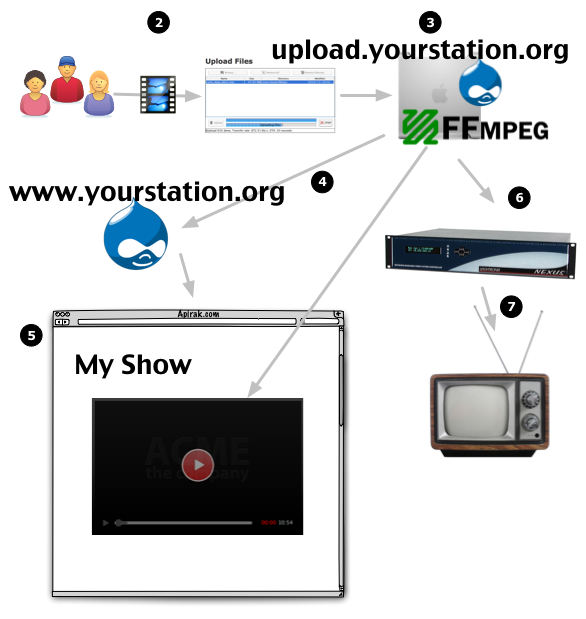
This workflow creates a VOD AND MPEG2 from any type of file a user uploads. One of the reason this is more difficult is it requires a network with enough bandwidth to host VOD.
- First users login to a 2nd Drupal site running Bakery for Single Sign On on a server at the station. This server MUST have enough storage and bandwidth to store VODs and MPEG2s.
- If they are in the correct role, they can use JUpload to upload a file
- The original file is transfered to the FTP server. This can be any format FFMPEG supports.
- Once the file is uploaded, the Media Derivatives API uses FFMPEG to create an MPEG2 and H.264
- The main Drupal site checks the Upload/FTP server for new files and plays the files using HTTP. Without a server like Wowza to generate the RTMP stream, media chapter links aren't supported.
Help improve this page
You can:
- Log in, click Edit, and edit this page
- Log in, click Discuss, update the Page status value, and suggest an improvement
- Log in and create a Documentation issue with your suggestion
