Displaying a molecular structure file in a customized Jmol applet: example.
This document is under construction and is meant to be a documentation page for the Jmol module.
Installing the external Jmol library
For the module to work, you need to download and unzip the external Jmol library. You can download this from http://jmol.sourceforge.net/download/. The content of the zip file should be extracted in your Drupal installatin folder under sites/all/libraries/jmol in such a way that you have the file sites/all/libraries/jmol/Jmol.js. See my file browser screenshot below. If the folder sites/all/libraries/jmol doesn't exist, create it.

Now proceed by unzipping the Jmol module file into sites/all/modules or your own custom module folder. Enable the Jmol module in Administration > Modules and if you don't receive an error message, everything is correctly installed.
Creating a new content type with a file upload field
The idea of the Jmol formatter module is that an uploaded molecular structure file is displayed in a Jmol applet. Uploading a file can be done with a content type that allows file uploading. Let's create such a content type.
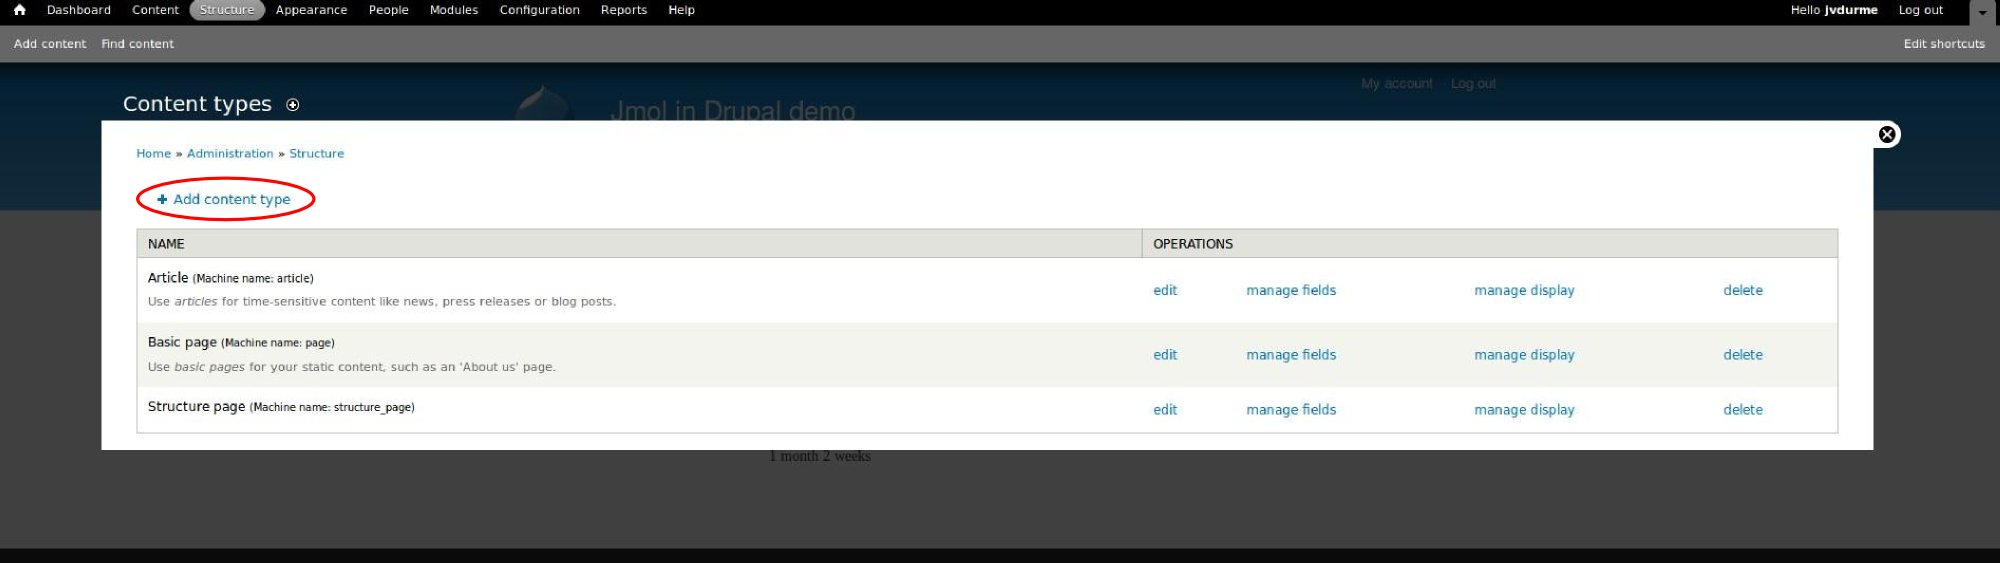
Go to Administration > Structure > Content types and click Add content type as in the figure below.
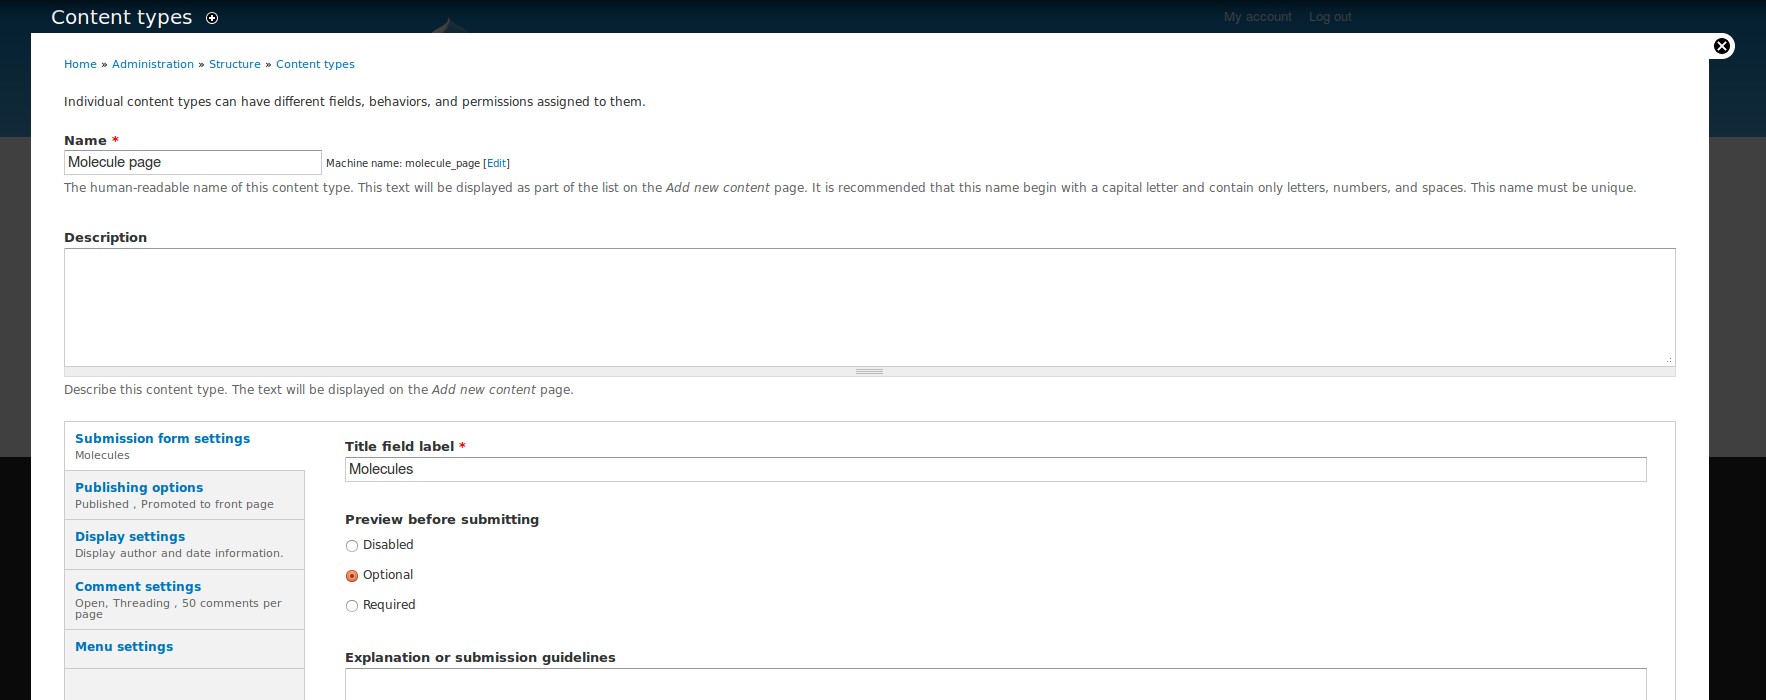
In the next window you can set some descriptions for this new content type. Such as Name and Title field label. Just fill in e.g. Molecule page and Molecules as in the figure below.
Then click on Save and add fields at the bottom.
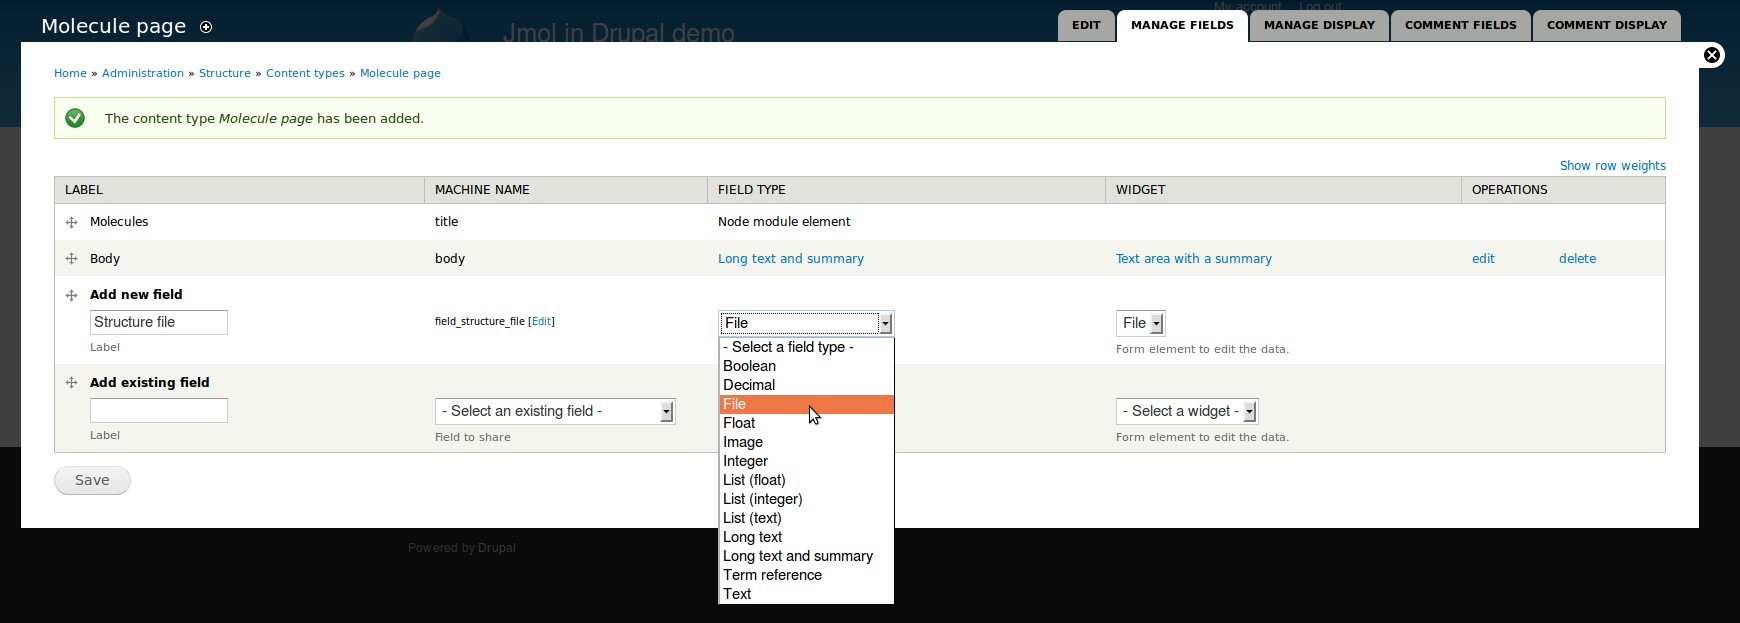
On the next page (see figure below) we will add a field to upload a file anytime we create a webpage of this content type. Type the fields' label (e.g. Structure file) and select File in the Field type column. Also select File in the widget column.
Press Save.
In the next page leave the Field Settings as they are and click Save field settings.
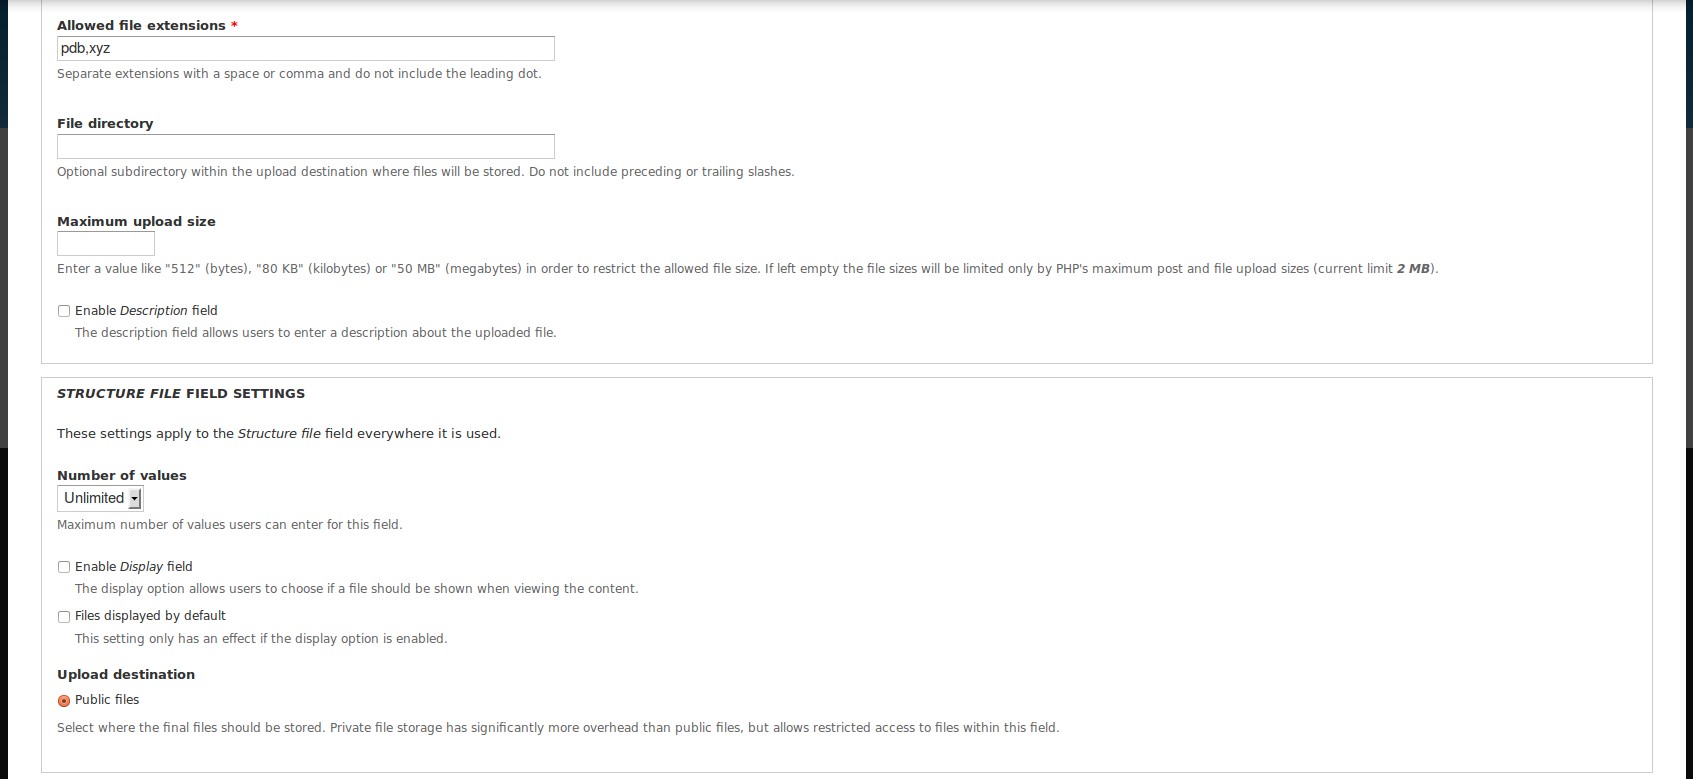
In the next page you can configure this file upload field. You definately need to change the Allowed file extensions otherwise you will only be able to upload .txt files. As I want to upload .pdb and .xyz structure files, I type the extensions in the box (see figure).
I also want to be able to upload multiple files per page so I set Number of values to Unlimited.
Press Save settings.
Now click on the Manage display tab on top. For the Structure file field choose Jmol applet in the Format column. See figure below.

Click the cog wheel on the right to open the formatter settings form. See figure below.
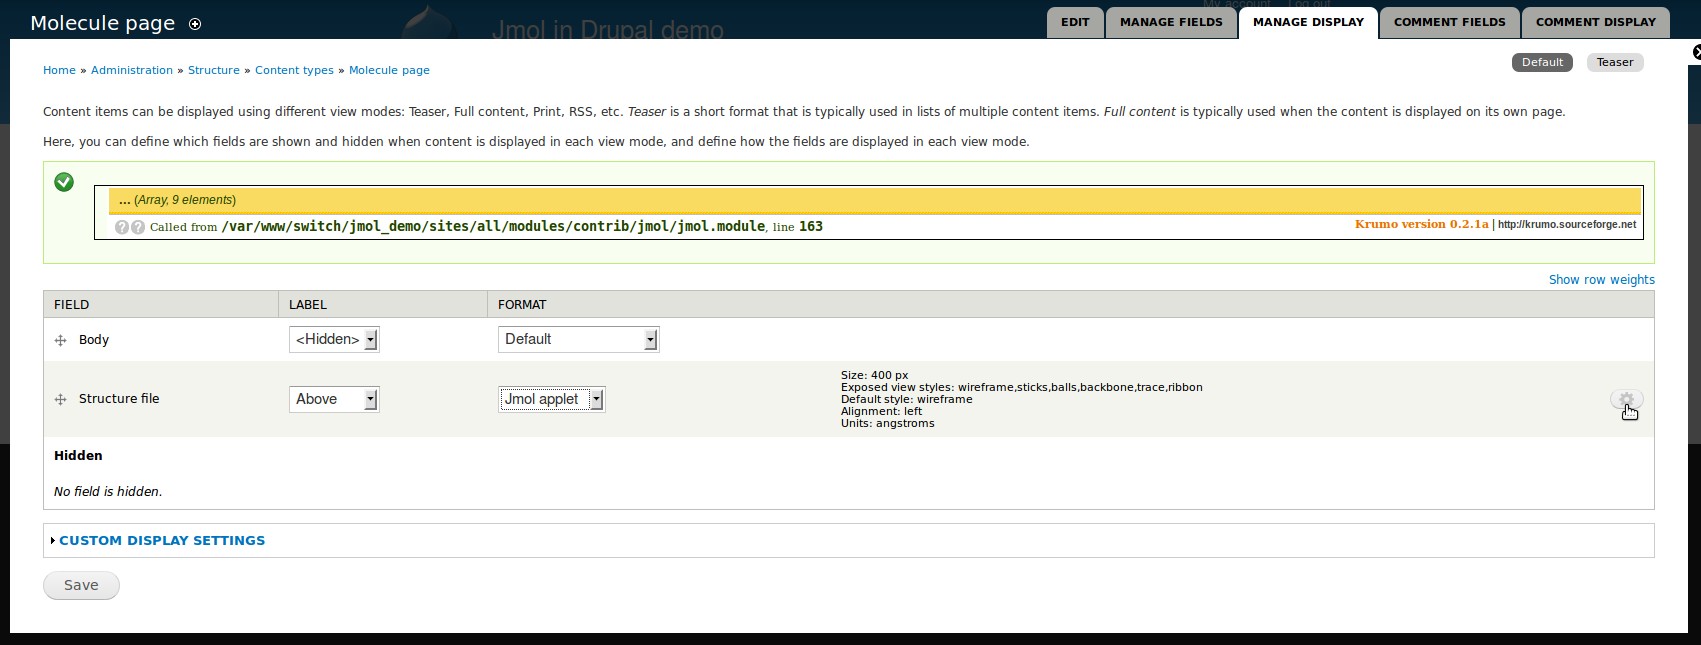
Now you can customize the appearance and options of the Jmol applet as it will appear on your web pages. Customize and then click on Update. Then don't forget to press Save on the Molecule page.

Modifying an existing content type to add a file upload field
Instead of creating a new content type you can also add a file upload field to an existing content type, such as "Basic page". Once the file field has been added, proceed then as above to present the uploaded file as a Jmol applet.
Adding a webpage with the new content type
Go to Administration > Content and click on Add content. See figure below.

Now click on Molecule page (the content type we just created).
Enter a name for this page in the Molecule field on top and upload the two file included in this module's files/ folder, these are 1crn.pdb and helix.pdb. Or upload any other structure file(s) you want.

You can also write text in the Body field.
When done press Save.
Et voilà! You should now be looking at your molecules in a Jmol applet!
figure
to be continued
Help improve this page
You can:
- Log in, click Edit, and edit this page
- Log in, click Discuss, update the Page status value, and suggest an improvement
- Log in and create a Documentation issue with your suggestion
