
 Come together with the global Drupal community in Rotterdam, 28 Sept – 1 Oct 2026. Sessions, contribution, connection, and Early Bird savings until 8 June.
- Introduction
- Features
- Requirements
- Installation
- Do first example map
- For Sitebuilders and Developers
- Future plans
- Contacts
Introduction
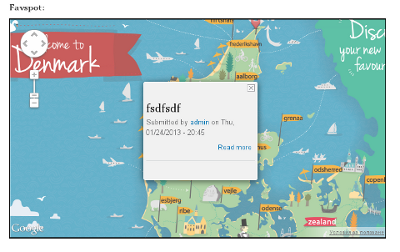
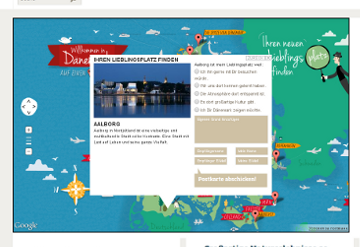
The module provide interface for converting any image to google map.
In example usage the module can help to make map for a pirate treasure or may be map for a campus, or whatever you want to present as eye candy map.
Features
- Adjust tile size
- CSS customizeable controls
- Customizeable pin images
- CTools pane plugin
- Markers
- Markers description popup (modal and native from google)
- API hooks
Requirements
- Drupal 7.x
- ImageMagick >= 6.5.8
- PHP configuration should allow shell_exec()
Instalation
- Unarchive the zip and put directory into your sites/all/modules
- Enable it from your admin panel -> Modules
- (Optional) For using pins (markers) you should enable also and gmap_image_field_pin module.
- Go your /admin/reports/status page and check if there is some problem marked with GMap Image Field, if there is nothing such, then all is okay, and the modules are ready for use and can skip next steps.
- Install ImageMagick (version newer or 6.5.8), You can get it from http://www.imagemagick.org/script/binary-releases.php, there is also and description about installing.
That should be all steps to get module working.
Do first example map
- Do the INSTALLATION section.
- Go your website admin panel - Structure - Article (or some other content type) -> manage fields.
- Add new field from type GMap Image.
- Let settings for Tile size and Tiles format to their default values (256 for size, and jpeg for format).
- Allow pinning of the maps as selecting one of the content types from the checkboxes on "Allow pinning nodes on this image". (NOTE THAT "Articles" is not available for pinning because contain the maps)
- Save the field settings.
- Now go to the Article's content type "Manage Display".
- Using the settings icon for the newly created field for the gmap image, setup the display as you wish.
- Update display settings for the field, and save settings for the content type.
- Now you are ready to upload images as maps from the "Add content", and selecting the content type that contain map (in our example this is Article) Upload some image with high resolution using the "Map image" - Image
- Add some pins, this can be done using the "Add content" and adding nodes from type that is selected for the pinning. So if you add field "GMap Image" to "Article" and give pinning ability to "Basic Page" from the field menu, then Article will be maps, and "Basic Page" will be pins.
For Sitebuilders and Developers
Permissions:
Administer GMap Image Field - give role ability to administer gmap images
Drupal hooks
- hook_gmap_image_field_assets_css_alter($css_file) alter assets css stylesheet
- hook_gmap_image_field_map_settings_alter(&$gmap_image_field_map_setting); alter the map settings
JS events
- gmap_image_field_marker_clicked, hook on map and accept pin
Templates and themes
- theme gmap_image_field_show_map - presenting map field
- templates/gmap-image-field.tpl.php - presenting map field
- theme gmap_image_field_pin_content - presenting infowindow content
Styling
You can disable including of built in stylesheet from admin configuration -> GMap IMage Field and disable, but recommeds to copy and modify the module's stylesheet for overriding.
Drupal.behaviors is fired when marker's infowindow is opened.
Future plans
Plans about improving in the next version, if module get enough interest.
- Improve external JS markers loading.
- Rework backend using GD of PHP for tiling the images.
- UI for managing pins icons.
- Polylines, Polygons, Circles and Custom overlay builder.
Contacts
Developer: Adrian Dimtrov (adimitrov@propeople.dk)
Project information
- Project categories: Site structure, Media
 5 sites report using this module
- Created by dimitrov.adrian on , updated
 Stable releases for this project are covered by the security advisory policy.
There are currently no supported stable releases.

