 Come together with the global Drupal community in Rotterdam, 28 Sept – 1 Oct 2026. Sessions, contribution, connection, and Early Bird savings until 8 June.
Configuring Apache NetBeans IDE
This documentation needs work. See "Help improve this page" in the sidebar.
Apache NetBeans is an Open Source, platform-independent, Java-based integrated development environment (IDE) which supports a wide variety of languages, like PHP by default.
In addition to its speed and refactoring capabilities, it offers the following:
- Allows you to format your code according to Drupal Coding Standards
- It recognizes Drupal specific file extensions (.info, .module .install etc.)
- Replaces tabs with spaces
- Stores line breaks in UNIX format
- Character encoding of files can be UTF-8 by default
- Provides autocompletion with hint support for functions and classes project-wide, including Drupal core (provided core is in your project directory
- Code templates available for Drupal hooks for Drupal 7
- Supports GIT, SVN and Mecurial version control systems out of the box
Note: Windows users see http://drupal.org/node/1846954 to set up Netbeans, Xdebug, Drupal Dev Tools and Templates with Windows 7/XP and Acquia Dev Desktop (This reference is obsolete and not needed for later versions of Netbeans)
Netbeans Installation
Download and Install Apache Netbeans for your system. By default Netbeans supports PHP, you can verify the PHP plugin is activate by navigating to the Tools > Plugins menu item, then choose the Installed tab, and activate the PHP plugin, if it's not already.
Setting up Drupal Coding Standards
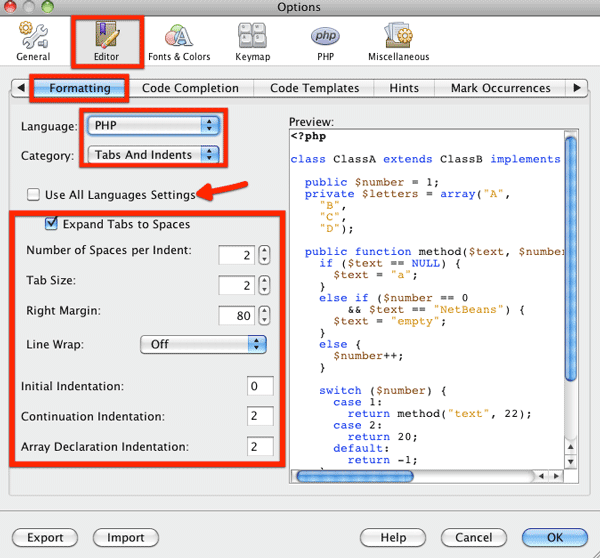
After you have activated the PHP plugin, go to Preferences (or Tools > Options) > Editor > Formatting, choose PHP in the “Language” drop-down, and choose Tabs And Indents from the “Category” drop-down. You should uncheck the "Use All Language Settings" checkbox in order to continue. After that use the following settings:
- Expand tabs to spaces: (check)
- Number of Spaces per indent: 2
- Tab size: 2
- Right margin: 80
- Initial Indentation: 0
- Continuation Indentation: 2 (if a new row is started within a condition)
- Array Declaration Indentation: 2
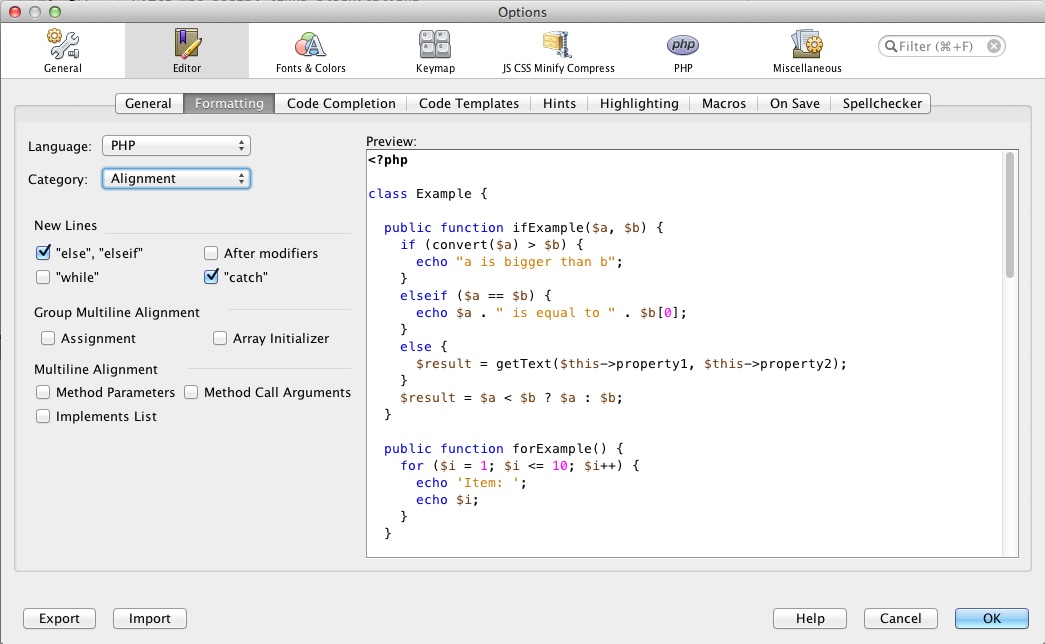
After that, choose Alignment from the category drop-down, and set "else and elseif" and "catch" to start in a new row:
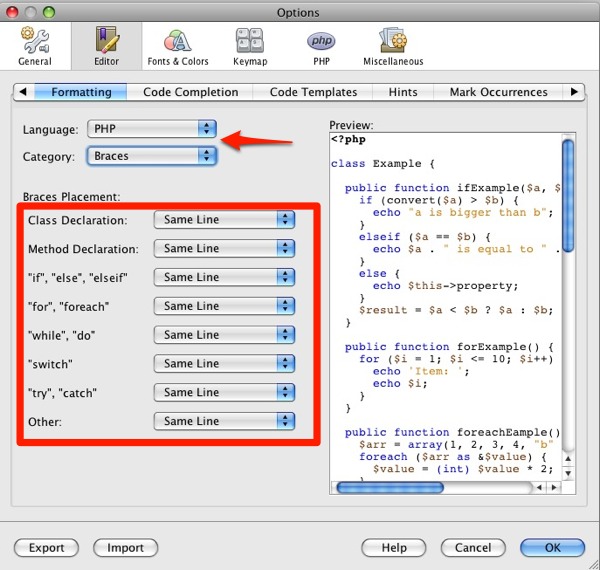
Choose Braces from category drop-down and set everything to "Same line":
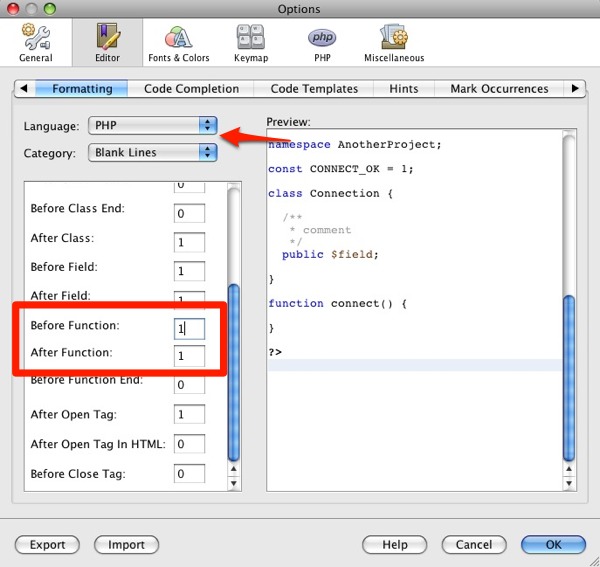
Choose Blank Lines from category drop-down and set 1-1 blank lines to be used before and after functions:
The last category is "Spaces". You should use the following settings here:
- Before keywords
- Check while, else, catch
- Before parentheses
- Uncheck Method / Function Declaration, Method / Function Call, Array Declaration
- Check if, for, while, catch, switch
- Around operators
- Uncheck Unary and Object operators
- Check Binary, Ternary, String concatenation, Key => Value and Assignment operators
- Check all options in "Before Left Braces"
- Uncheck all options in "Within parentheses"
- Other
- Uncheck “Before Comma” and “Before Semicolon”; check all others
When you have finished these steps, the code formatting will be just as required by the Drupal Coding Standards.
Local development tools
Developing Drupal websites locally needs services that emulate copies of a website for a developer to make the needed changes before deploying to production. There are numerous development tools that are suggest on this page.
Set up PHP code sniffer for development
Meeting the Drupal PHP standards is important for any developer. To achieve this install the coder-sniffer command line tool, and then use the Netbeans terminal to run PHP code sniffer commands during your development.
Usage
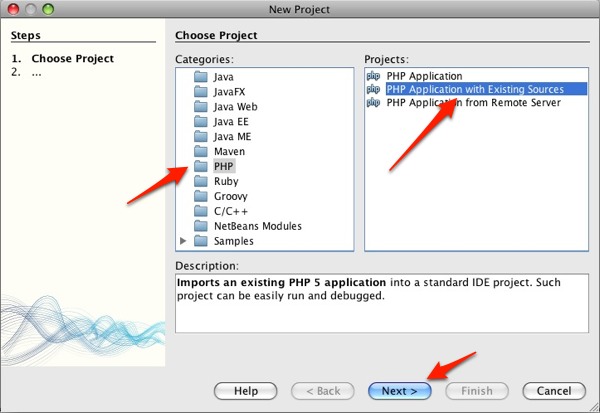
After you have set up localhost, and installed your Drupal, create a new PHP project with File > New Project, PHP, PHP Application with Existing Sources.
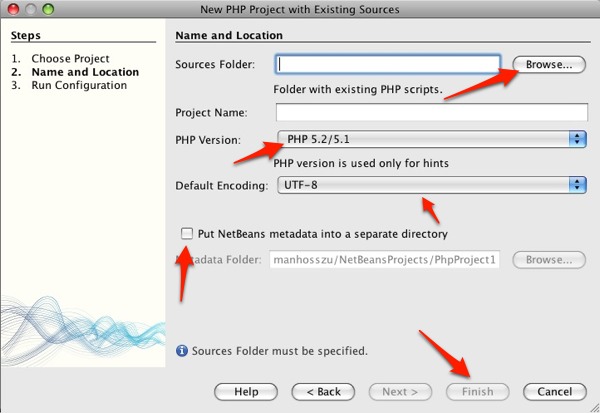
After clicking “Next”, you can set your project’s properties. I suggest using the sites folder of your installed Drupal as Sources folder. Select 5.3 for PHP version and UTF-8 for encoding. You don’t need to store Netbeans metadata in a separate directory.
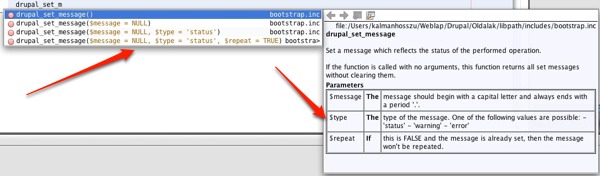
Now you can click “Finish”, and you will see your newly-created project. After creating a new file, you can use the autocomplete, and you are ready to use your NetBeans for Drupal development.
Windows users
Windows has by default line endings in CRLF, while Drupal expect the Linux/Unix line endings: LF.
Install in Tools > Plugins plugin 'Change Line Endings on Save' and next goto Tools > Options.
For global settings goto Editor > Line Endings
Please check "enable" and choose Unix (LF) line endings.
Per Project you can change the settings:
project properties > Line Endings
Please select global or project. You can also change "enable" with LF|CR|CRLF button on Toolbar.
Help improve this page
You can:
- Log in, click Edit, and edit this page
- Log in, click Discuss, update the Page status value, and suggest an improvement
- Log in and create a Documentation issue with your suggestion
