Installation and initial setup - MediaFront 7.x-2.x
Off-drupal.org tutorials: You may find the video "MediaFront 2.0 Intro", and the 9-videos "Advanced MediaFront 2.0" very helpful in using the MediaFront module. See the documentation page: External Advanced Tutorials and Videos - MediaFront.
Installation
To install and configure MediaFront you will need to install the required modules.
Modules needed:
Modules needed for Views playlist configuration:
Modules needed to use a private filesystem:
-
Note: Currently, MediaFront isn't designed to handle the private file system. Video files stored on a private filesystem will not play on iPhone/iPad, and possibly other platforms. A standard Drupal 7 installation uses a public filesystem by default. If you need to play video files stored on a private filesystem, install the Resumable Download module.
Download/ Install/ & Enable the latest MediaFront release. (and CTools)
The most recent version of the MediaFront module can be found at its drupal.org MediaFront project home page: http://drupal.org/project/mediafront.
- Download MediaFront; or just 'copy' the URL for the download from that page
- After un-compressing the downloaded file, place the entire MediaFront folder into your sites/all/modules directory; or use the Drupal interface "Install from a URL" option to install this module at: yoursite/admin/modules/install
- Download and Install 'CTools'.
-
Go to Admin > Site Building > Modules.
- Under the heading 'Chaos tool suite', enable the module 'CTools'.
- Under the heading 'MediaFront', enable the 'MediaFront' module.
- Under the heading 'MediaFront: Players', enable the 'Open Standards Media Player'.
- Click the page-bottom button: 'Save configuration'.
Preparing Drupal for Mediafront
To start, you will need to create a new content type for media.
- Go to Admin > Structure > Content types.
- Click Add content type.
- Choose a name for your new content type. You can name it "Media" or anything else.
- Optional: select any additional settings for this content type.
- After choosing a name, hit Save and add fields.
- In the Manage Fields section, you will need to add two fields:
- Media upload
- Image upload
Below are the step by step instructions for the two fields via the Manage Fields form:
Add a new field call Media Upload on the Manage Fields screen
- Enter Media Upload in the Add New Field box
Verify the Machine Name is media_upload
Choose File in the Field column combo box
Verify the Widget column displays File
Now click the Save button. - The Field Settings screen will be displayed by Drupal.
Do not change any fields on this screen.
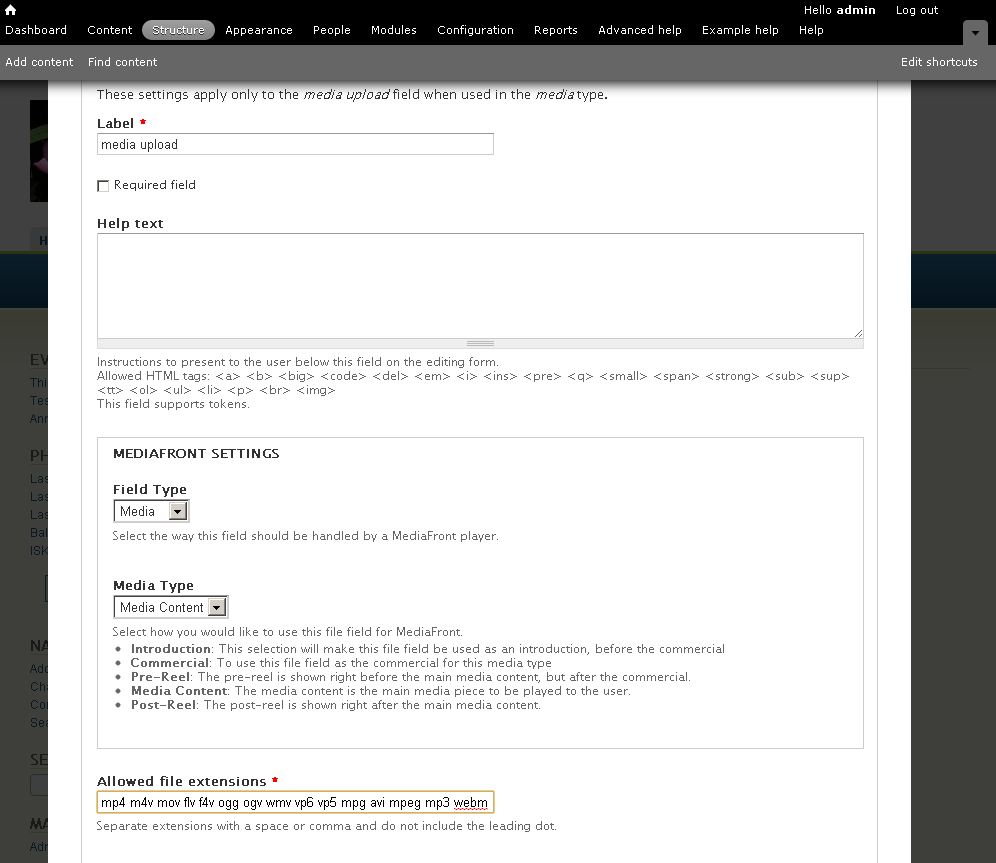
Click the Save field settings button. - The Drupal Edit "Media Settings" field screen will appear. Enter the following responses:
- Set Mediafront Settings Field Type to Media.
- Set Mediafront Settings Media Type to Media Content.
- In the Allowed file extensions box, enter mp4 m4v webm ogv
- You may add additional file types. However, file types webm ogv mov flv f4v ogg wmv vp6 vp5 mpg avi mpeg mp3 wma may not work across all browsers and/or platforms
- NOTE: The default values for PHP will restrict you to a maximum 2 MB upload file size. The maximum upload size should be increased to 10MB. Drupal's limits on upload file size are determined by your server's PHP settings as well as Drupal specified settings. Drupal.org provides instructions for increasing php's maximum upload size.
Your screen should look similar to the following image.
- Click Save settings and you will be returned to the Manage Fields screen. You have defined Media_Upload field.
Now, you will add a new field called Image Upload on the Manage Fields screen
- Enter Image Upload in the Add new field box
Verify the Machine Name is image_upload
Choose Image from the Field type combo box.
Verify the Widget field has the value Image.
Now click the Save button. - The Field Setting screen will be displayed by Drupal.
Do not change any fields on this screen.
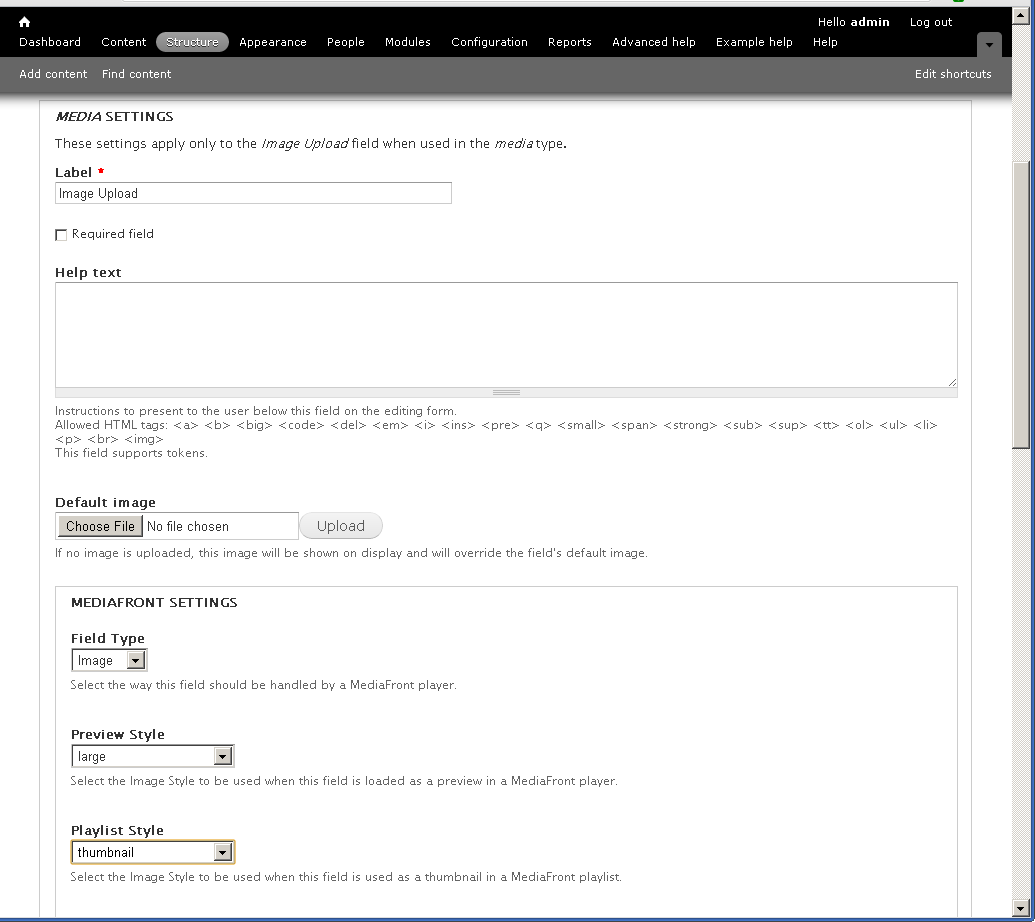
Click the Save field settings button. - The Drupal Edit "Image Upload" field screen will appear. Enter the following responses:
- Set the Mediafront Setting Field Type to Image
- Set the Mediafront Setting Preview Styleto Large.
- Set the Mediafront Setting Playlist Style to Thumbnail . You may change the styles later.
- The default values, (png, gif, jpg, jpeg) , for Allowed file extensions should be okay.
- Click Save Settings.
Your screen should look similar to the following:
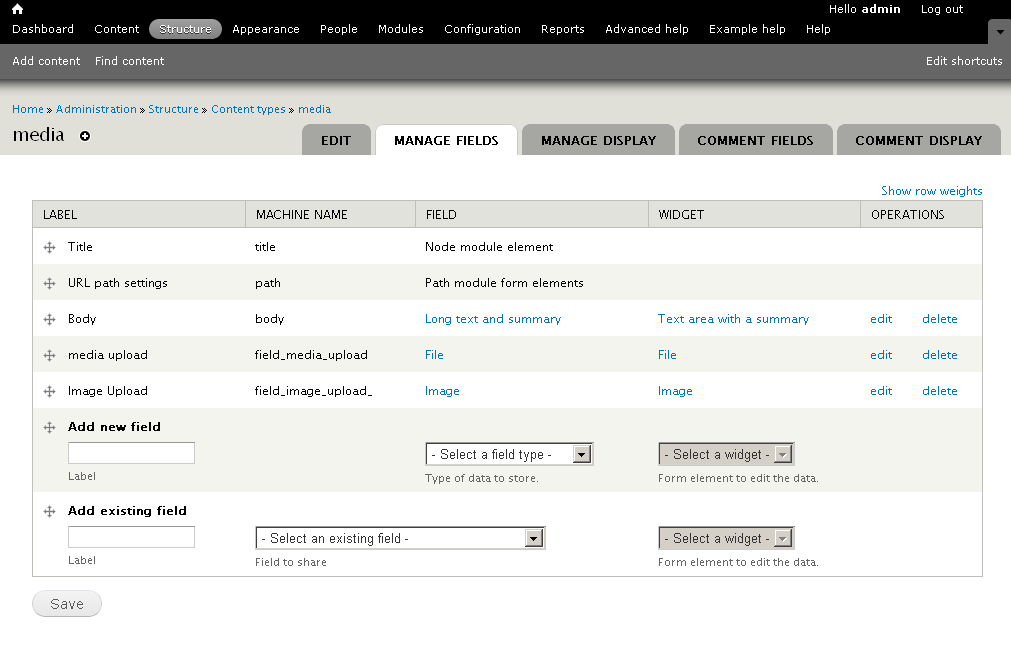
You have now defined two fields. The Manage Fields screen should look similar to the following:
- Manage Display settings for your media content type.
Click Manage Display tab and set up the fields in this order and with the following settings:
Field Label Format Body Hidden Default Media Upload Hidden MediaFront Player Image Upload Hidden Hidden Below is a screen shot of the Manage Display page.
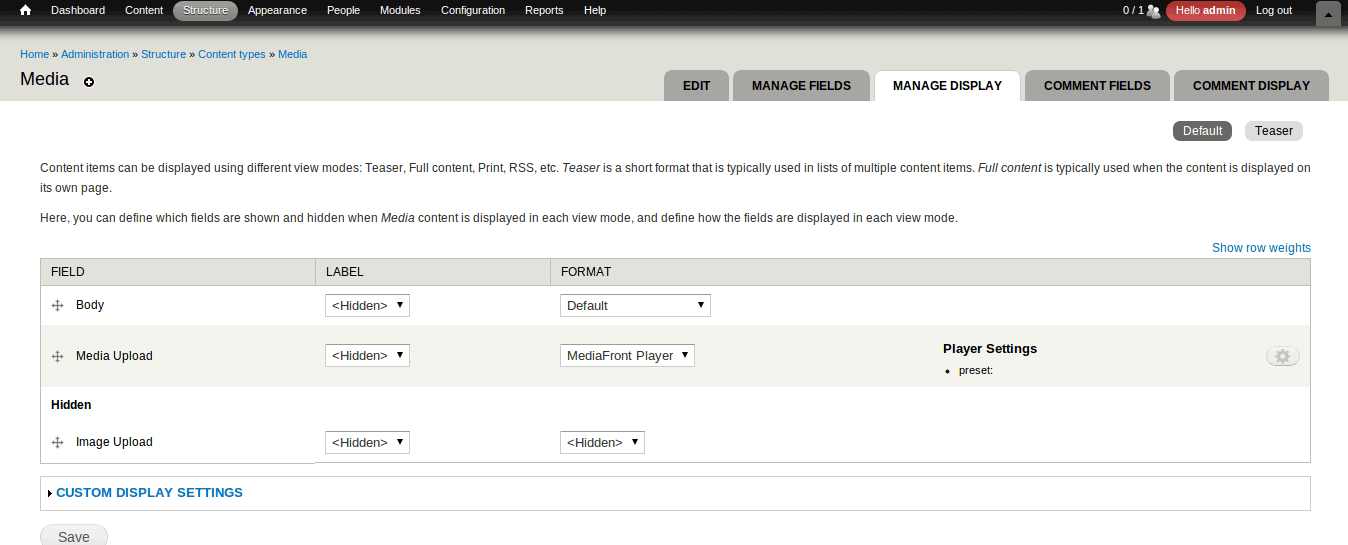
Click Save on the Manage Display page.
- At this point, we are almost done with setting up Mediafront. Now, you need to add a node for your media content type and create a MediaFront preset, which we will discuss below. To add a content type, you do click on Admin > Content > Add content > Media.
- Add a title for your content.
- You can download properly encoded sample video files to use for testing purposes: GitHub files (.flv, .mp4, .ogv, .webm) or a zip file (mp4, .webm, .ogv). Files are licensed under the Creative Commons Attribution 3.0 license for the Peach Open Movie Project, Big Buck Bunny.
- Upload a media file that adheres to the field type and size limit requirements.
NOTE:If you receive an error, increase the maximum upload size in php. Instructions for increasing your maximum file upload size. - You may also add an image.
- Save your content type.
- The MediaFront player (You will see the message "Player not available". Don't despair! We are not done setting up Mediafront.)
- Or the image (As it was set to hidden on the Manage Display setting for the Image upload field.)
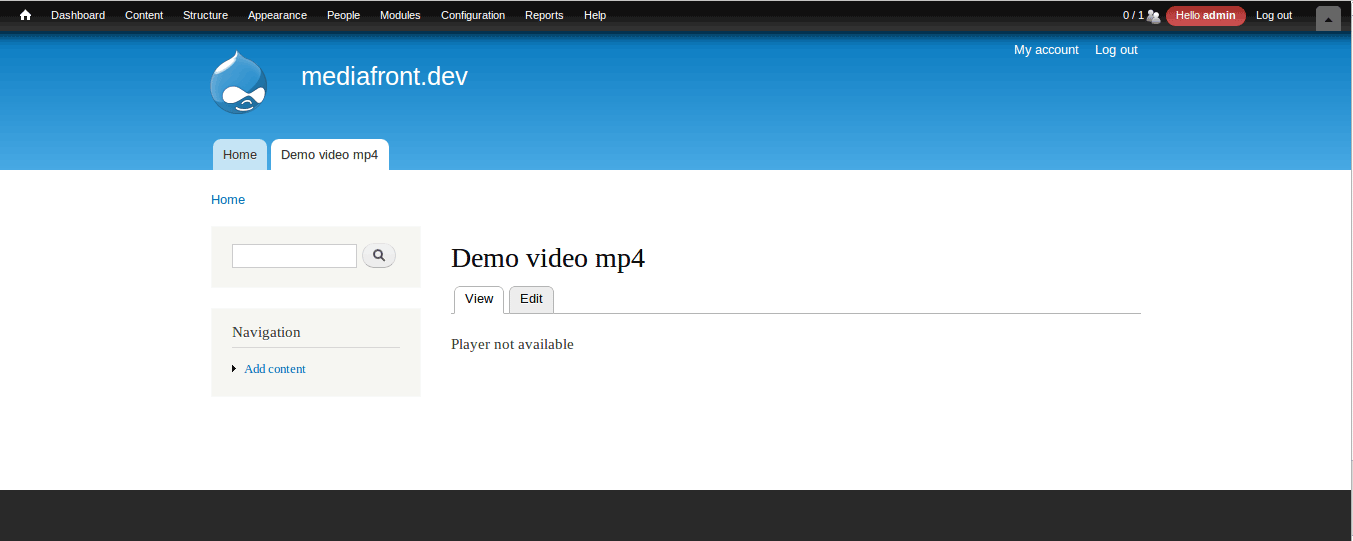
NOTE: The setup is NOT complete at this point. If you were to view the node you just created, you will not see either:
Your node should look similar to the node pictured below.


To complete the Mediafront play setup, you need to create a MediaFront preset and define the fields (from the content type media) that should be used in the MediaFront player. So please proceed to the next page to discover how to create and configure a Mediafront preset.
Help improve this page
You can:
- Log in, click Edit, and edit this page
- Log in, click Discuss, update the Page status value, and suggest an improvement
- Log in and create a Documentation issue with your suggestion
