Configuring playlists using Views
Note: This information applies to the 7.x-2.x version of MediaFront.
How playlists are configured depends upon your implementation needs and can be adjusted as your needs change. Below are a few examples of how Views can be configured with MediaFront.
If you have not done so already, install Views and CTools and enable these two modules including the Views UI module.
Creating a view with one large media player and built-in playlist
Please note: you will want to setup a preset for this view as outlined in the previous section
- Go to Administration > Structure > Views. Click “Add new view”.
- Name the view (we'll name it media for this exercise).
- Select Show “content” of type “media” (This is the content type that contains your video).
- Insure the “Create a page” is checked.
- Click “Continue & edit” button.
- Change the For option to “This page (override)”
- Configure the View’s FORMAT settings to the following:
- Format should be change to
- MediaFront Player
- Setting should be set to:
- Your “MediaFront Preset”
- Make sure the “For” is for “This page (override)
- Click “Apply (this display)” button
- Configure the View’s FIELDS setting to the following:
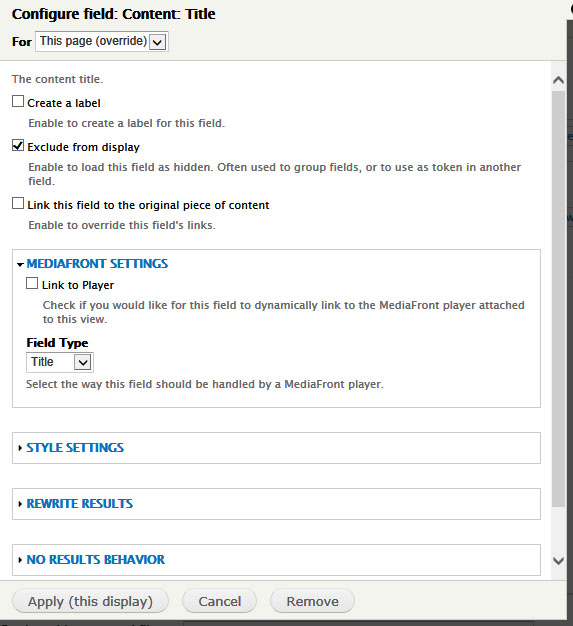
- Modify the existing Content: Title by clicking on “Content: Title”
- Check Exclude from display
- Under “MediaFront Settings” select Title as the Field Type.
- Click “Apply (This display)” button
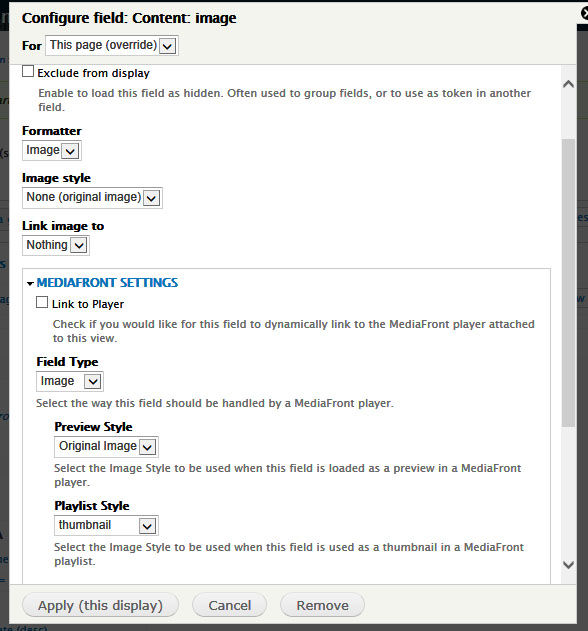
- Click Add to add the image field to the view
- Find and select your image field
- Click “Apply” button
- Unclick “Create a label”
- Set Formatter: Image
- Image style: None (original image)
- Link image to: Nothing
- Under “Mediafront Settings”
- Field Type: Image
- Preview Style: Original Image
- Playlist Style: thumbnail
- Click “Apply (this display)” button
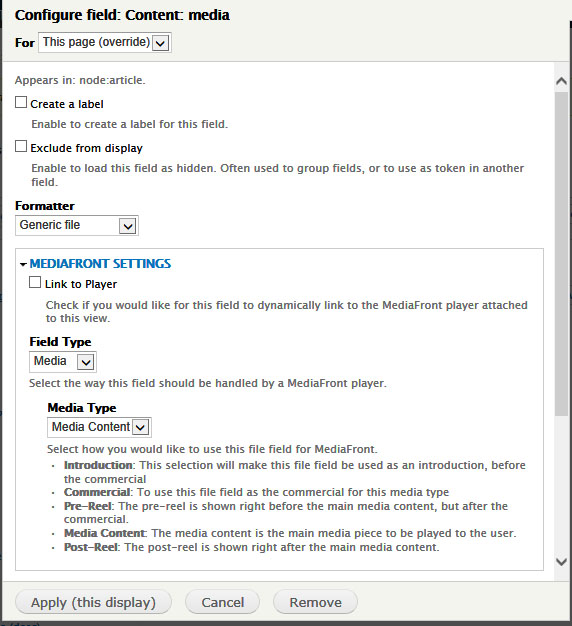
- Click Add to add the media field to the view
- Find and select your video field
- Click “Apply” button
- Unclick “Create a label”
- Set Formatter: Generic file
- Under “Mediafront Settings”
- Field Type: Media
- Media Type: Media Content
- Click “Apply (this display)” button
- Click the “Save” button. After the view has been save you will be able to see the view.
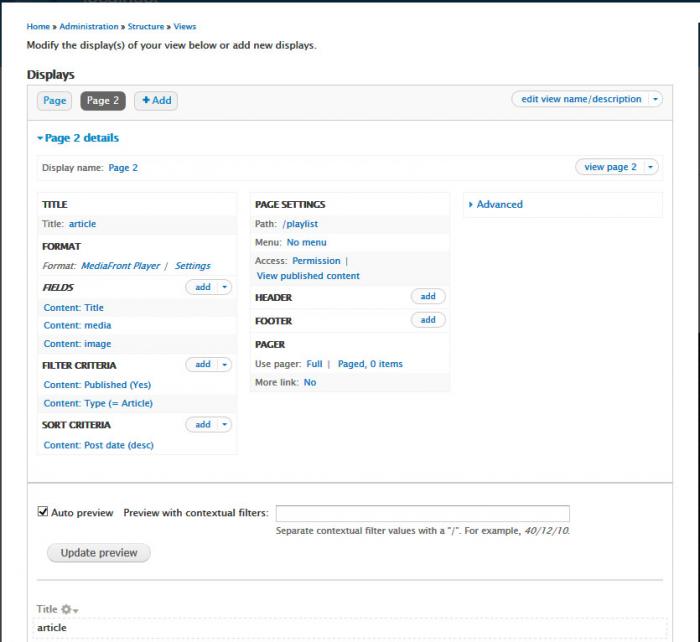
- Add a new page to your existing view: Click Add in the Displays section and select Page from the dropdown.
- Click Page next to Display Name and change the name to Media Grid. Click apply.
- In the Format section, click MediaFront Player to edit the format. Change Format to Grid and make use you the For dropdown box from All Displays to This page override. Click Apply (this display).
- Under Header, select Global: MediaFront Player for This page. Hit Apply (this display). In Configure Header, set MediaFront Presets to player. Under MediaFront Settings, field type should be set to none. Apply this display.
- Under Page Settings, set Path to media-grid. Hit Apply.
- Visit yoursite/media-grid. You should see a large media player with a grid of files below the player.
- Optional: If you want the files below the player to control the player, see "Dynamically linking fields to the player."
- Set up the preset.
- Go to Structure > MediaFront Presets > Add Preset.
- Select a name for your preset. Let's name it gridplayer.
- Add a description if you want. For Media Player, select Open Standard Media Player. Hit Next.
- You will see a preview of how MediaFront will display your media content.
- Go to Preset Settings > Player Settings > Playlist Settings> Display Settings. Select Disable playlist. Save preset.
- Under Presentation Settings, set Player Width to 200px and Player Height to 150px.
- Save preset.
- Set up a View page to display mini media players.
- Go to Structure > Views and edit the view named media.
- In your view, hit Add page under the Displays section. For Display name, we will name it Media Grid.
- Under Format, set Format to Grid and apply to this page. Hit Apply (this display).
- Under Page Settings, set Path to gridplayer. Hit Apply.
- Under Pager, set items per page to 16 for this page. Hit Apply (this display).
- Under Fields: Content Type: Media Upload, set Formatter to MediaFront Player and MediaFront Presets to gridplayer. Apply (this display).
- In Fields: Content Type: Image Upload, make sure Exclude from display is selected. Apply (this display).
- Hit Save.
- Visit yoursite/gridplayer. You should see a page of miniature media players.
Sample View page
Sample View Output
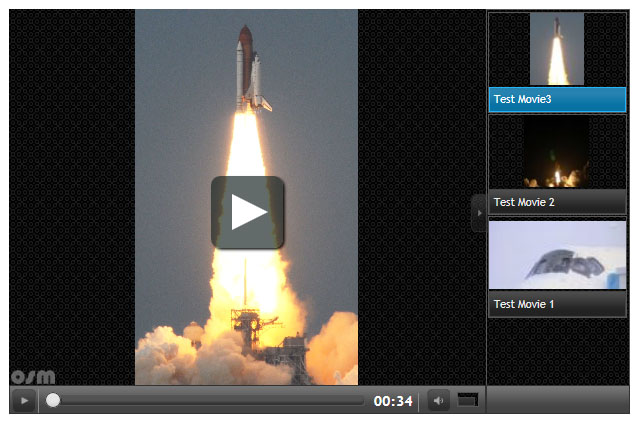
View with one large media player and a grid of files below
View with a grid of miniature media players
Dynamically linking fields to the player
Videos can be loaded dynamically into the player by linking a field to the player. Within your view administration, edit the field you would like to dynamically link to the Media Player. Within the MediaFront Settings of this field, click the box next to "Link to Player". Save the field and view.
Help improve this page
You can:
- Log in, click Edit, and edit this page
- Log in, click Discuss, update the Page status value, and suggest an improvement
- Log in and create a Documentation issue with your suggestion
