
On the first page you see as an administrator on a new Drupal site, there are no less than three links to add new content – one in the sidebar, one in the shortcuts at the top of the page, and one right in the middle of the page. (See figure 1.1) They all open the administrative overlay, allowing you to create either an Article or a Basic page. (See figure 1.2)

Figure 1.1: A Drupal standard installation without any content – click add content to create your first node!
Articles and Basic pages are two node types or types of content. Clicking on any of the type names will give you a form used to build a content of that type. This is called the node form. The forms used for Articles and Basic pages are different, but they work the same way. You get a number of fields where you can input information, and you have buttons for previewing or saving the piece of content. (See figure 1.3)

Figure 1.2: By default, nodes – content – come in two flavors: Articles and Basic pages.
Below is a description for the fields available in the Article node form.
- Title: This is the headline for the article, and will be shown at the top of the article's page on the website (it will also be used for the HTML title shown in the web browser's top bar).
- Tags: This is an opportunity to assign your article one or more keywords, which are used to categorize the content. Drupal will suggest any matching existing keywords while you write, but you can also provide new ones. If you want several keywords, separate them with commas. Keywords are usually displayed as links to lists of all nodes with the same keyword.
- Edit summary/hide summary: When clicking edit summary, you get a box where you can write a summary of the article. Summaries are often used when articles are listed, as a so-called teaser (see separate section). The link hide summary hides the box again. If no explicit summary is written, Drupal will create one from the first part of the body.
- Body: This field is used for the main text of the article.
- Text format: Usually the body field only contains plain text, but it can interpret some HTML markup. The settings in the text format field decide which markup should be allowed, which is important from a security point of view. These will be described in more detail in a separate section.
- Image: This gives you the opportunity to upload an image to be displayed along with the article. Uploaded images can by default be provided with alt texts – text shown if the image isn't loaded (this is important for screen readers used by the visually impaired, as well as for search engine robots).
- At the bottom of the node form, there are a number of settings for menus, comments, and some other things. These will be described later.
- Finally, there are buttons to save or preview the article. Clicking the save button takes you to a new web page that shows the article you just created. (See figure 1.4)
TIP: Node types are also called content types.
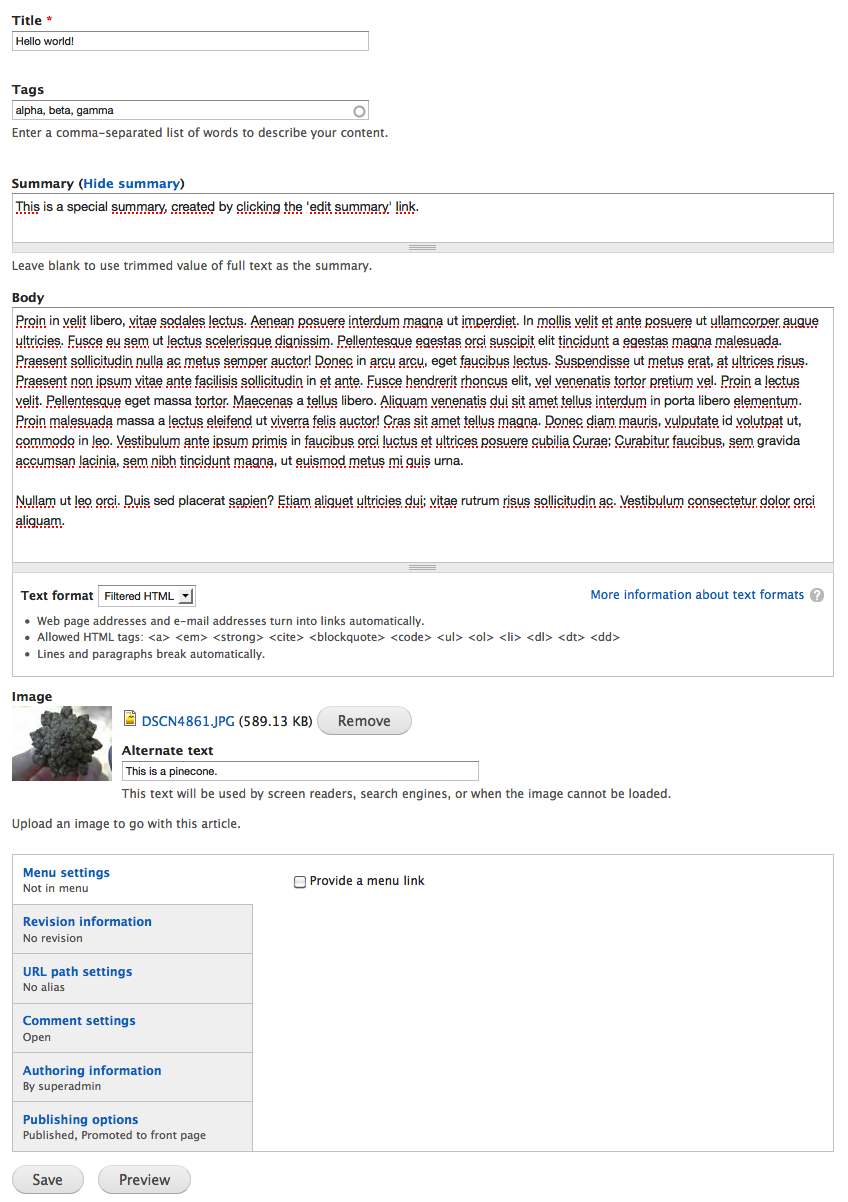
Figure 1.3: The form used to create new articles has room for different types of information.
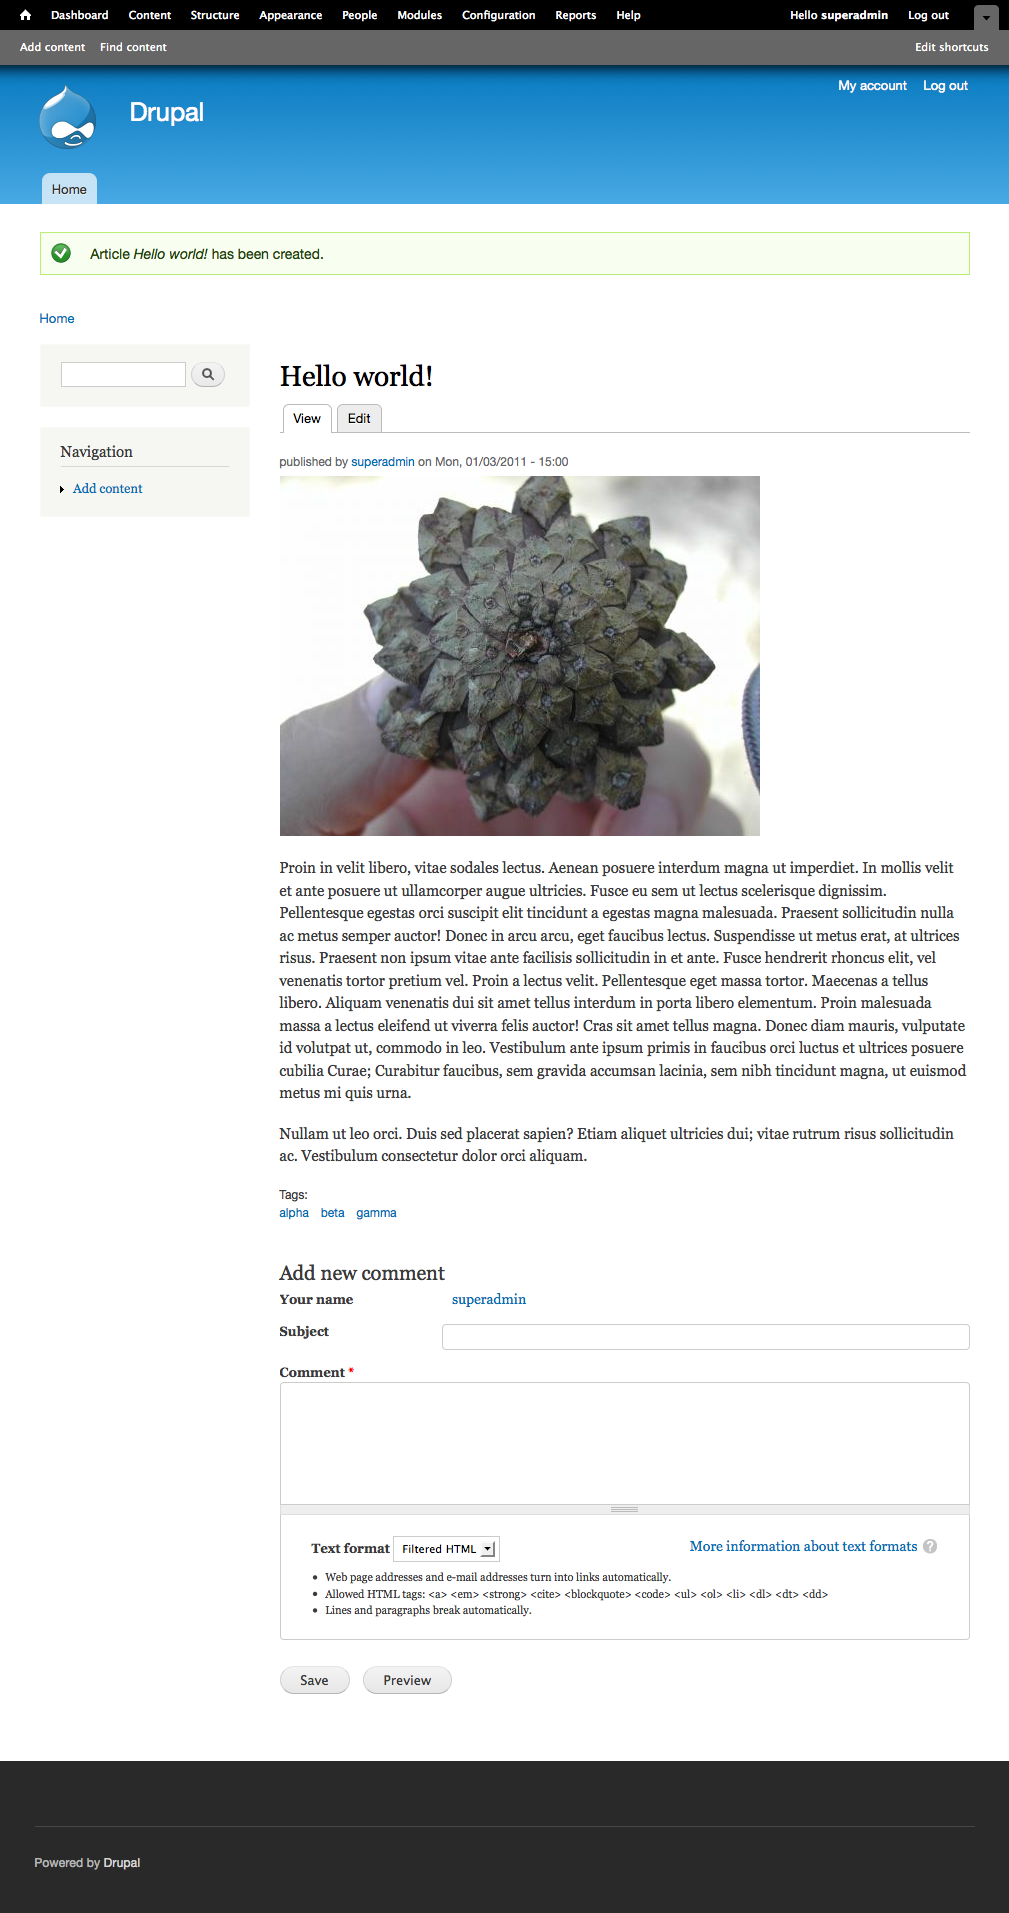
Figure 1.4: A saved article page, in its default layout.
| Attachment | Size |
|---|---|
| 01.1 Welcome to Drupal.png | 44.58 KB |
| 01.2 Add content.png | 56.47 KB |
| 01.3 Create Article.png | 214.21 KB |
| 01.4 Hello world!.png | 492.53 KB |


