On this page
Soundslides Module : Tutorial
Last updated on
18 June 2025
Drupal 7 will no longer be supported after January 5, 2025. Learn more and find resources for Drupal 7 sites
Summary
The Soundslides module allows the users to upload the soundslides project via media browser(provided by media module) in the form of a zip file and provides media formatters to render them.
Configuration
- Install Soundslides module (and the dependencies).
- Select where the soundslides project should be extracted. Goto
admin/config/media/file-systemand click Save Configuration. - Verify whether a new file type SoundSlides have been created. Click
manage file displayor visitadmin/config/media/file-types/manage/soundslides/file-displayand configure the filter. - Download and enable WYSIWYG module.
- Install any WYSIWYG library and install it as per the installation instructions at
admin/config/content/wysiwyg. - Select the Editor for the profile. I have installed CKEditor by following the installation instructions as mentioned in the step above.
- After selection of the editor. Click on the edit button as shown in the screenshot.
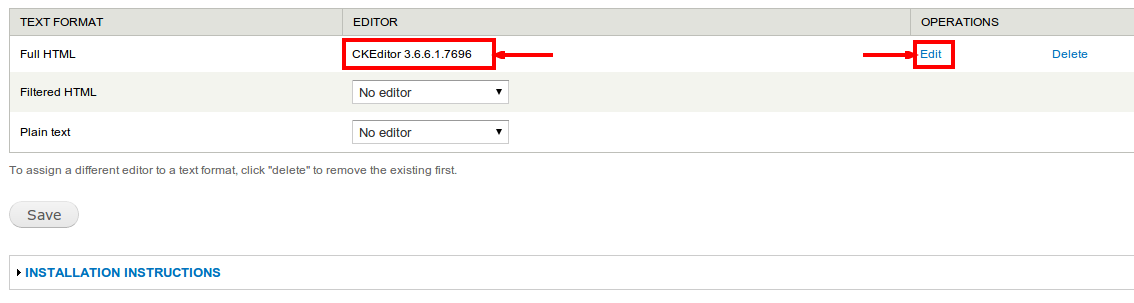
Or go toadmin/config/content/wysiwyg/profile/full_html/edit - Under Buttons and Plugins select media browser. Save
- Now add any content (e.g.
node/add/article) and select the text format for which you have configured the editor. - Click on the media button which in the editor:

-
This will open the media browser. Select Soundslides. Upload the zip archive of the publish_to_web directory that was exported from the Soundslides application.

- Save the page. You should now see the Soundslides slideshow embedded in the content.
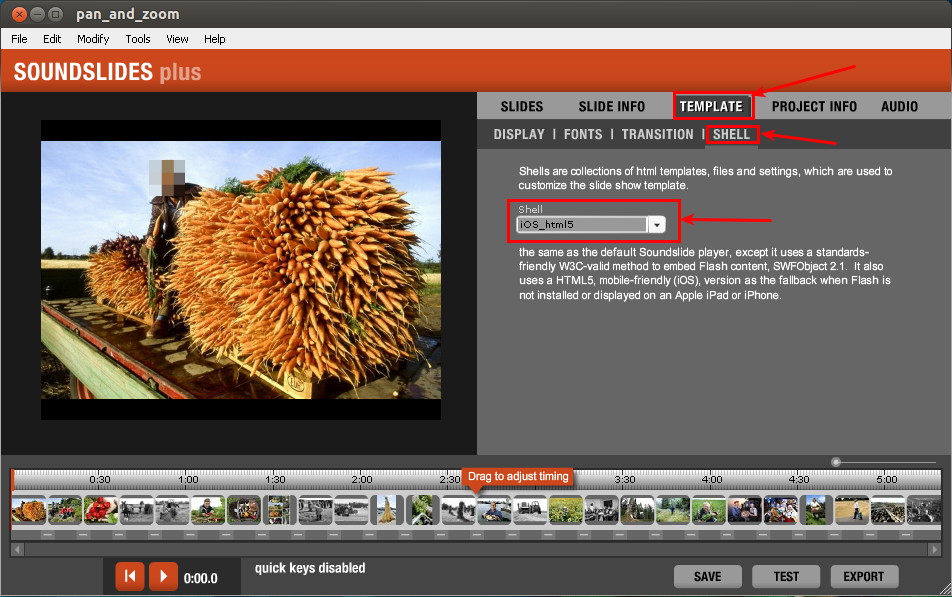
Note:
The current version of the module supports the slideshows which are exported with iOS_html5 shell. Please see the screenshot below to find out how to export the slideshow with iOS_html5 shell.
Help improve this page
Page status: Not set
You can:
You can:
- Log in, click Edit, and edit this page
- Log in, click Discuss, update the Page status value, and suggest an improvement
- Log in and create a Documentation issue with your suggestion
