On this page
Tutorial: Commerce Kickstart 2 and Authcache 2
Thanks to the Commerce ecosystem it became easy to put together extremely flexible online stores with Drupal. In order to showcase the capabilities, the Commerce Kickstart distribution has been created. The second major version brought a shiny theme. Therefore this project is extremely helpful when demoing the look and feel of customized Drupal sites. However if you ever tried it out, you probably noticed that the system slows down as soon as you put something in your shopping cart. Using Authcache it is possible to get rid of this delay by serving up cached pages even for users with an open session.
This is a step-by-step guide on setting up Authcache 2 in order to boost the performance of Commerce Kickstart 2.
Step 1: Setup Commerce Kickstart
Setup Commerce Kickstart by following the instructions. Then verify that the installation works.
If you do not feel setting up Commerce Kickstart and Authcache on a development environment, you may start a preconfigured instance on simplytest.me.
Step 2: Enable Drupal built-in page caching for anonymous users
Open the frontpage of your commerce kickstart instance and inspect the page load time using the developer tools of your browser (Firebug, Web Inspector, ...). Normally you should get a couple of hundred milliseconds.
Now login as administrator and navigate to Site Settings - Configuration - Performance and enable the checkbox Cache pages for anonymous users. Save settings and logout again.

Step 3: Explore caching behavior for anonymous users
The first time you visit the frontpage you will not notice any difference in page load times. However on subsequent page requests the page load times should drop by about a factor of 10 to under 50 milliseconds.

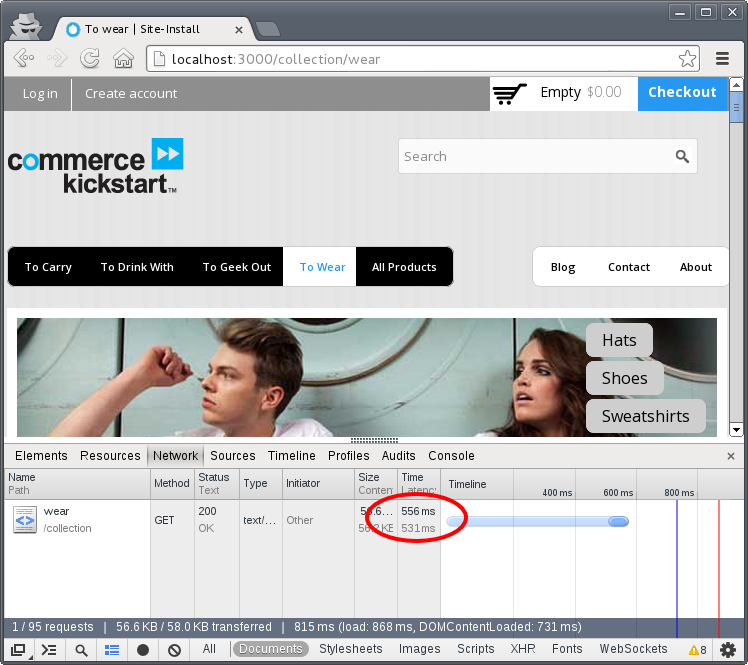
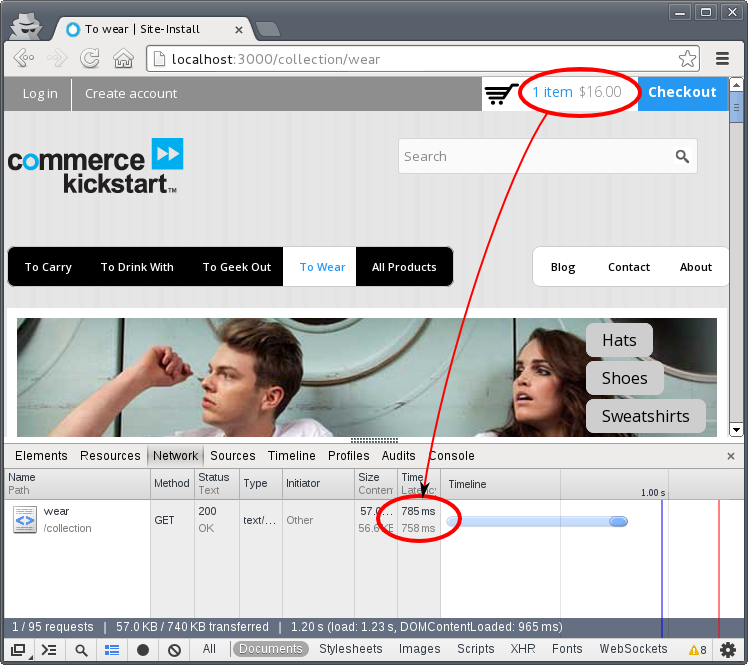
Now navigate to a product page of your choice and put something into your shopping cart. Return to the frontpage and repeat the measurement. Note that the page load time will be back up around some hundred milliseconds again, only because there is an item in your shopping cart. This is where authcache comes in.
Step 4: Download and install Authcache 2.x
Download and unpack Authcache 2 into the drupal commerce modules directory. Then enable the following modules:
- Authcache
- Authcache Ajax
- Authcache Builtin Storage Backend
- Authcache Comment
- Authcache Form
- Authcache Personazilation API
- Authcache Views
Also you may enable Authcache Debug. This module provides a widget indicating whether a page was delivered from cache and also the reason when caching was not possible.
After enabling the modules, you will be notified that the builtin storage backend needs to be configured properly before it works. Open your settings.php (most probably sites/default/settings.php) and add the following line:
$conf['cache_backends'][] = 'sites/all/modules/authcache/authcache.cache.inc';
$conf['cache_backends'][] = 'sites/all/modules/authcache/modules/authcache_builtin/authcache_builtin.cache.inc';
Also disable the drupal core page caching mechanism by reverting the configuration from step 3.
After that navigate to Site Settings - Site reports - Status report and ensure that there are no error messages showing up.
Step 5: Configure authcache
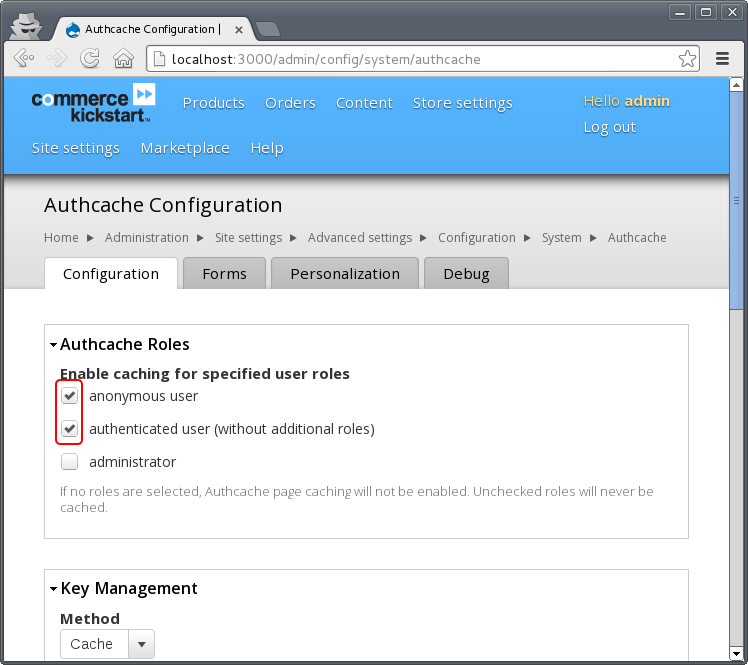
Navigate to Site Settings - Configuration - Authcache and enable authcache for anonymous and authenticated users.
Open the context menu on the shopping cart located in the top right corner of the Checkout button in the top-bar then choose Edit view. Open the Advanced settings of the shopping cart view and click on Authcache: Disabled.
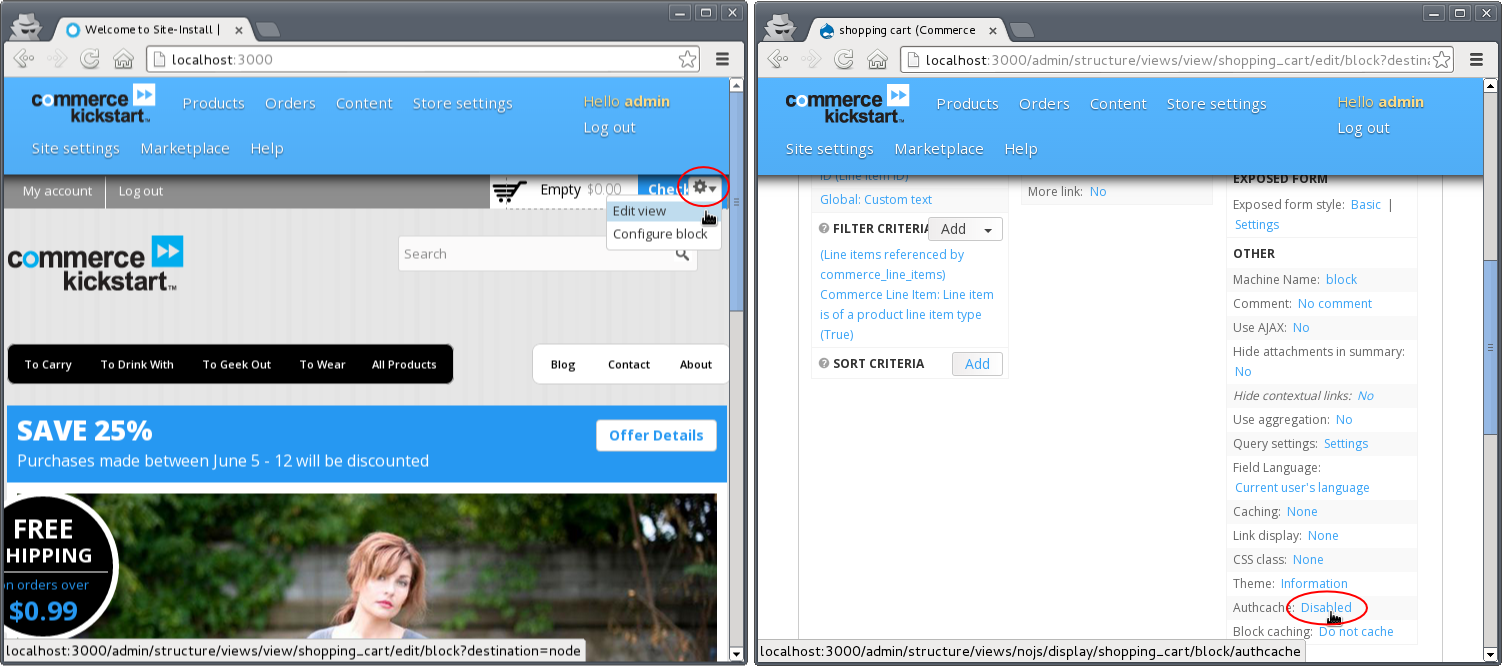
Enable the checkbox and click on Apply.

Finally save the changes to the view.
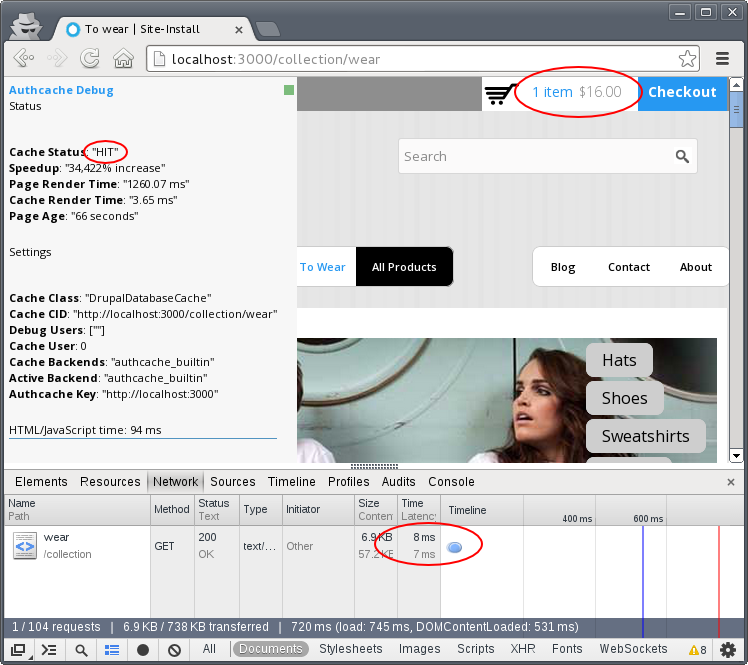
Step 6: Explore caching behavior with authcache enabled
Logout from the administrator account and reproduce the test sequence from Step 3. Verify that pages are cached and served from cache even when the shopping cart contains one or more products.
Where to continue
After working through this tutorial you should have an idea on how Authcache works and what it can do to help speeding up page load times for users with an open session. Additional documentation is linked form the project page.
Help improve this page
You can:
- Log in, click Edit, and edit this page
- Log in, click Discuss, update the Page status value, and suggest an improvement
- Log in and create a Documentation issue with your suggestion
