
The website about to created uses several key modules to work.
Go to Administer > Site building > Modules. Inconveniently, you can’t install all the modules at once because certain ones depend on others.
First, check all the boxes listed under CCK, and the box next to Date API, listed under Other. Click Save configuration.
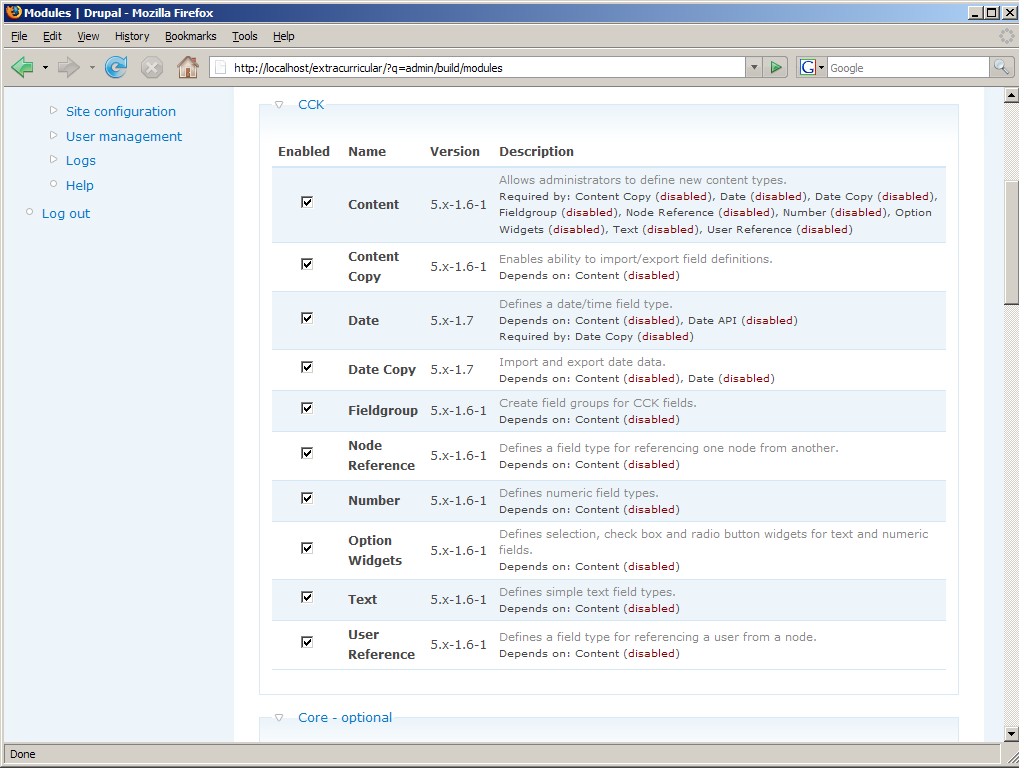
Then, check all the boxes under Event, and all the boxes under Views. Click Save configuration.
Finally, check both of the boxes under Organic Groups. Click Save configuration.
Go to Administer > Site configuration > Site information. Fill in the desired information and click Save
Configuration.
In order to define individual groups for each extracurricular, we need to create a content type for a group. Go to Administer > Content management > Content types. Click Add Content Type. Fill in the information as follows:
| Name: | Group |
| Type: | group |
| Description: | Defines a new extracurricular activity. |
| Published: | checked |
| Promoted to front page: | unchecked |
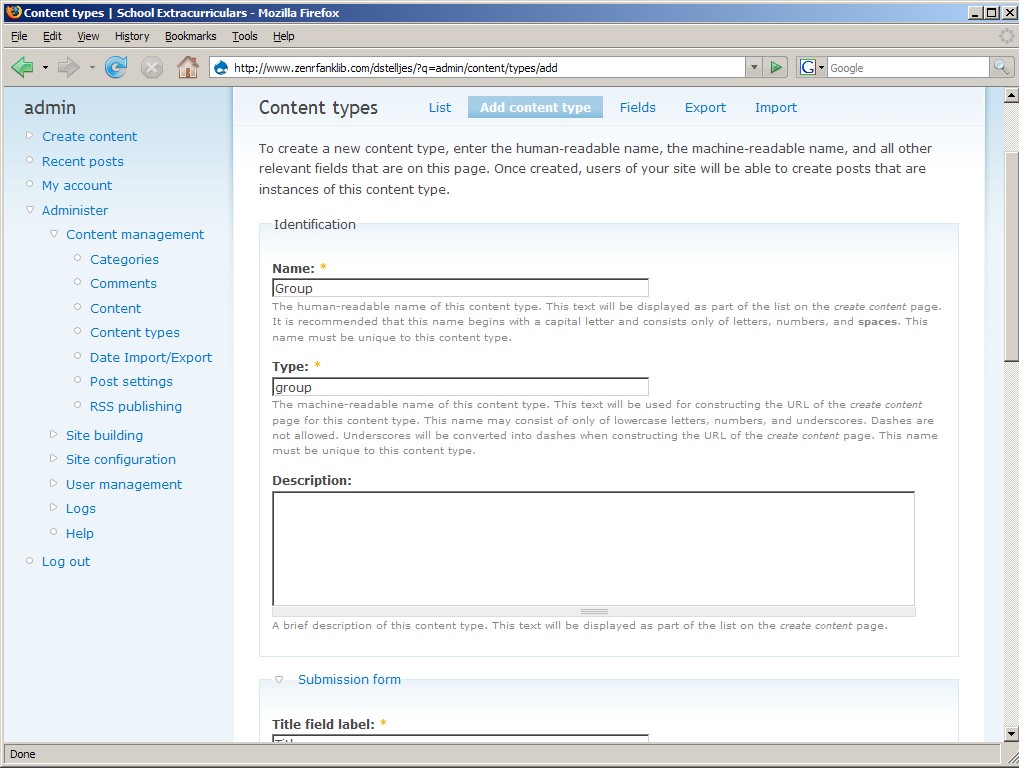
Once finished, click Save content type. Click Group, the type just created. Then click Add field at the top of the page.
This will enable users to sort by interest, gender, grade level, and other eligibility options. If we were to add an interest field, we would fill in Interest in the Name text box. Then, under Field type we would select Select List under Text. When you’re done, click Create field.

Another page of options appears. Leave everything as it is except for the Allowed values list. This is the list of all the possible interests. Enter interests like shown below; 1|value / 2|value and so on. Then click Save field settings.
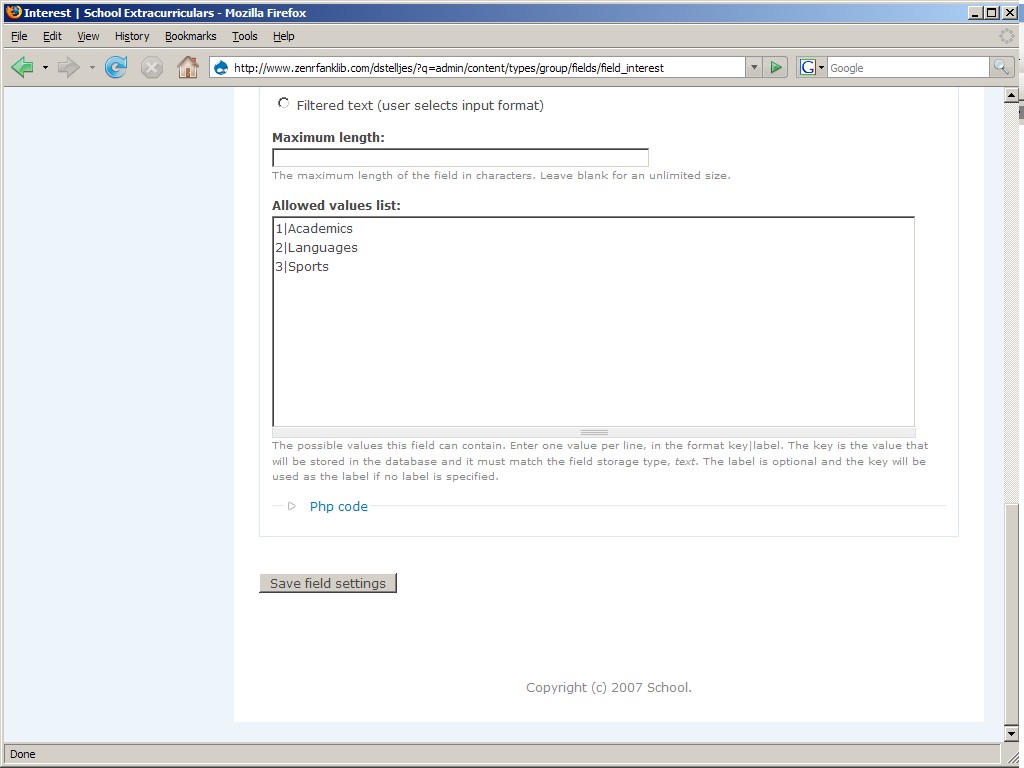
Repeat the Add field process for any other eligibility information you might have.
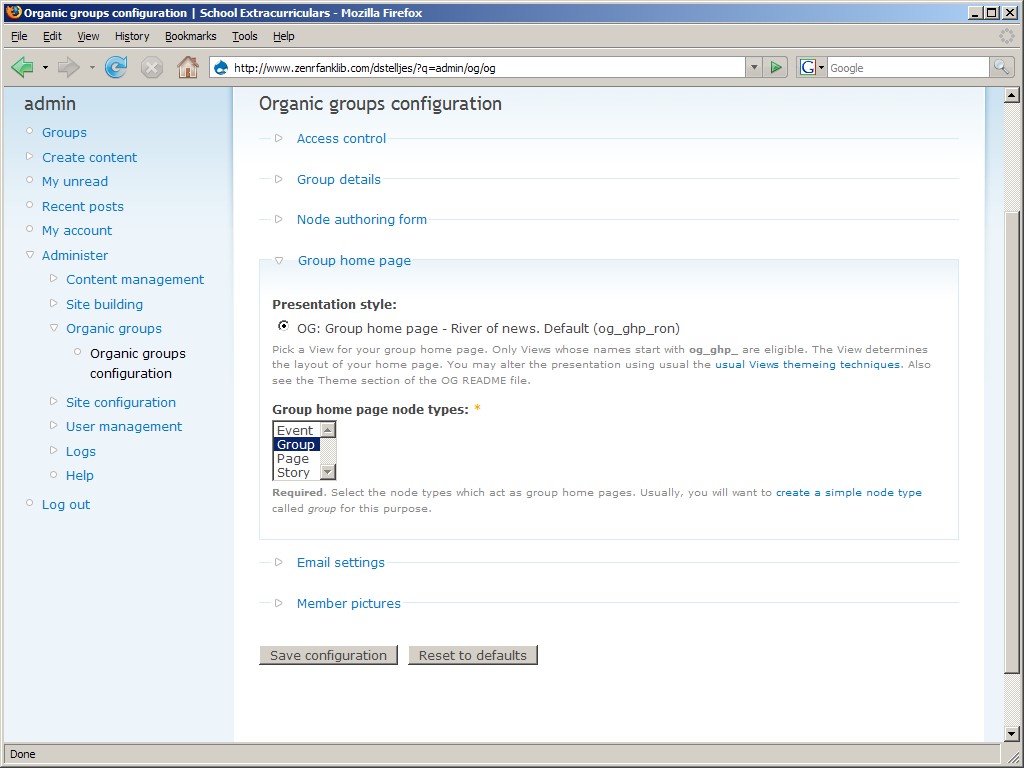
Now that we have the Group type set up, go to Administer > Organic groups > Organic groups configuration. Click on Group home page. Under Group home page node types select Group from the list. Then click Save configuration.
To set up a role that can administer groups, go to Administer > User Management > Roles. Type “group manager” in the text box to the left of the Add role button. Then click Add role. Next, click edit permissions next to the group manager role. Enable the following roles:
- Create events
- Edit own events
- Create group content
- Create page content
- Create story content
- Edit group content
- Edit own group content
- Edit own page content
- Edit own story content
- Administer organic groups
Then click Save permissions.

Now, add users to the role you just created. Go to Administer > User Management > Users. Click Add user at the top of the page. Fill in the desired information. Make sure to check the role group manager. Then click Create new account.

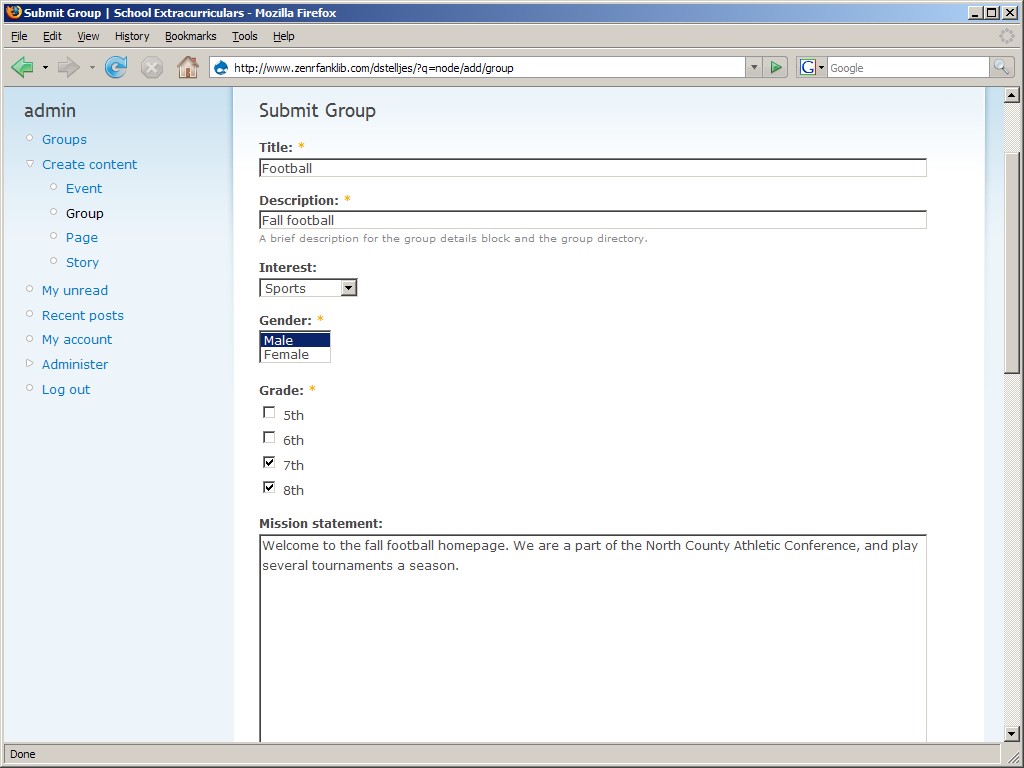
Go to Create content > Group. Fill in the desired information. Once you’re done, click Submit. Do this for each group you want to add. Now all the groups you added can be viewed under the Groups link in the menu.

To add events to a group calendar, go to Create Content > Event. Fill in the desired information. Under the group list, check the group(s) you want the event to appear under. Uncheck Promote to Front Page under Publishing Options. Click Submit.

To add a news story, go to Create Content > Story. Enter the story, and select the groups you want the story to appear in. If you want the story to appear on the extracurricular website homepage, make sure that Promoted to front page under Publishing Options is checked. Click Submit. Repeat for any other news stories you would like to add.

To make the site content easier to find, use blocks. Go to Administer > Site Building > Blocks. Some good ones to enable are the Calendar, Group Events, and Upcoming Events.
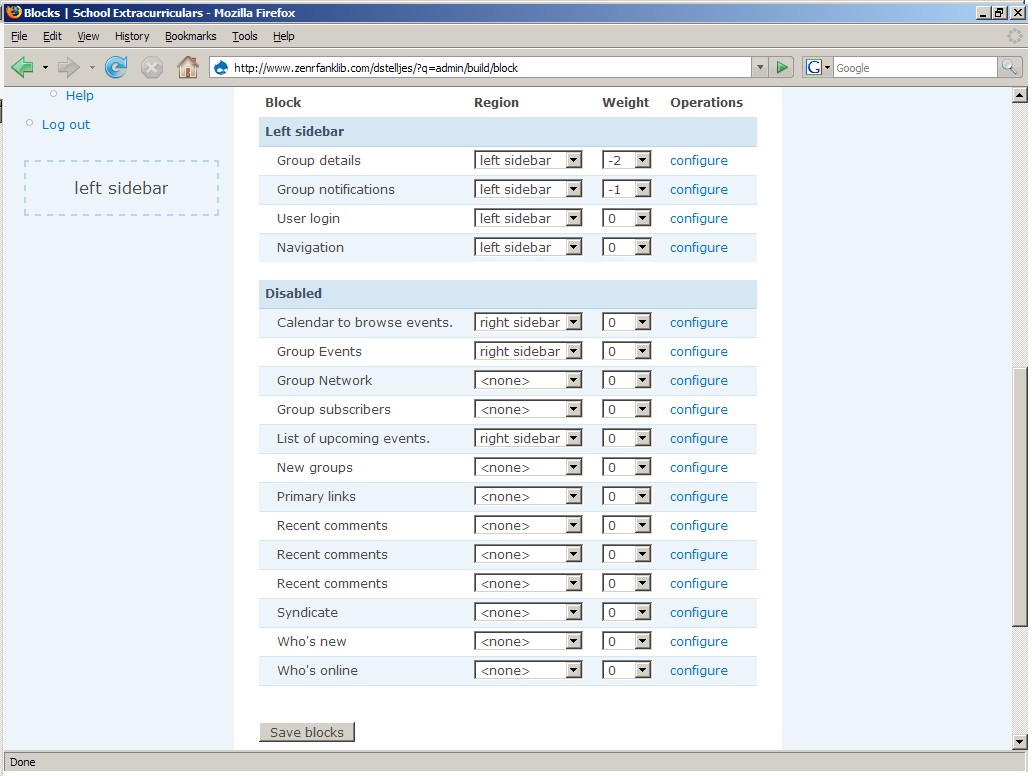
Once those are enabled, click Save blocks. The site now has a working calendar in the sidebar with a list of upcoming events.


