Support for Drupal 7 is ending on 5 January 2025—it’s time to migrate to Drupal 10! Learn about the many benefits of Drupal 10 and find migration tools in our resource center.
This section covers the basic configuration of a field to be included in "completeness" calculations.
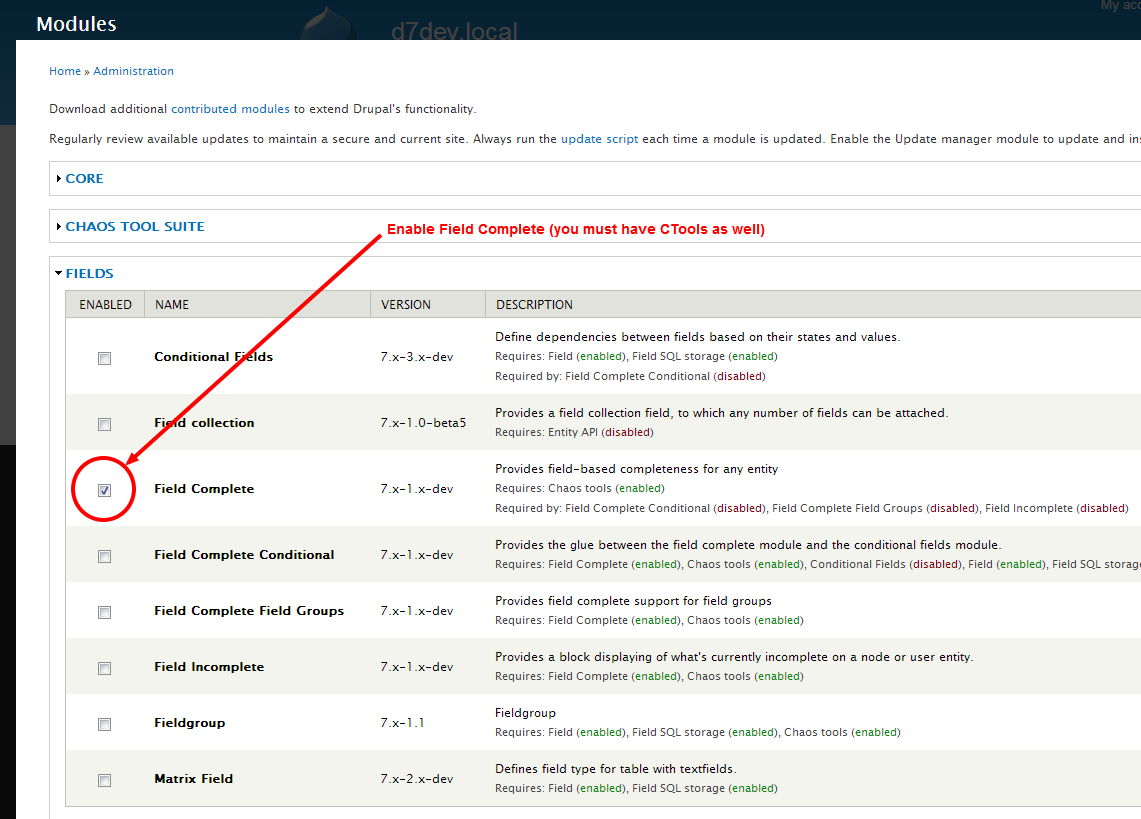
If you haven't done it already you need to install and enable the Field Complete module:
Article node type
A standard Drupal 7 installation gives you the "article" node type which has:
Title
Tags
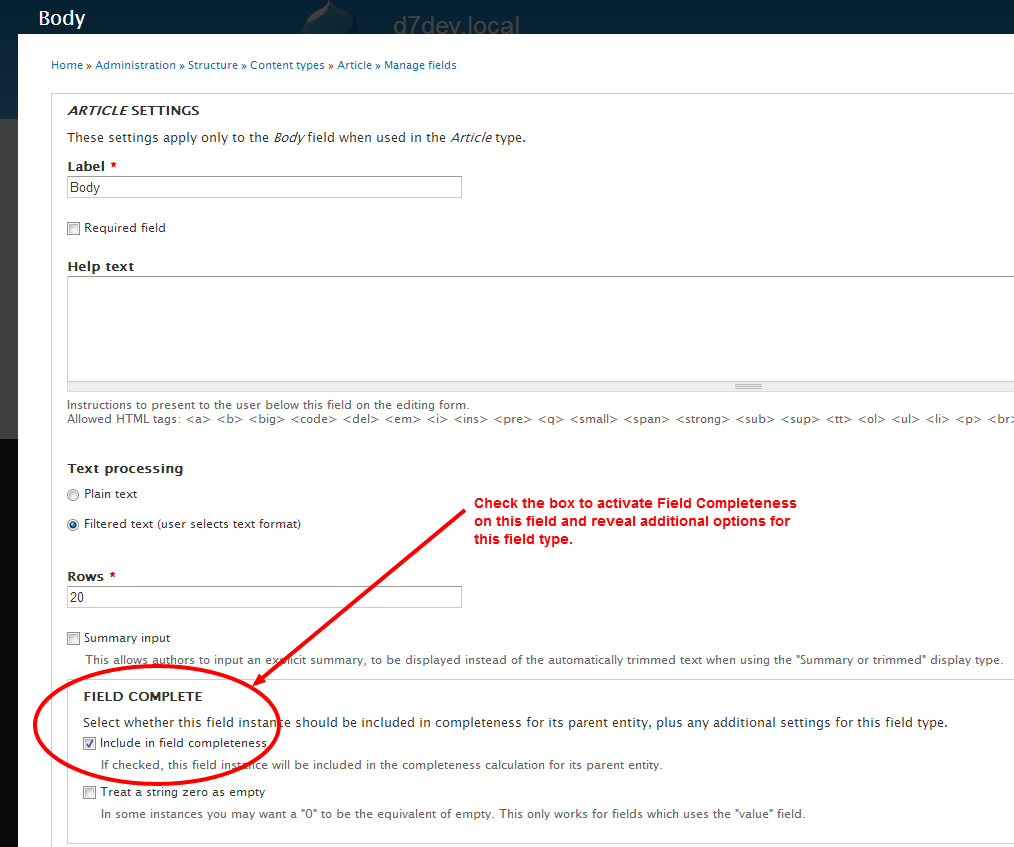
Body
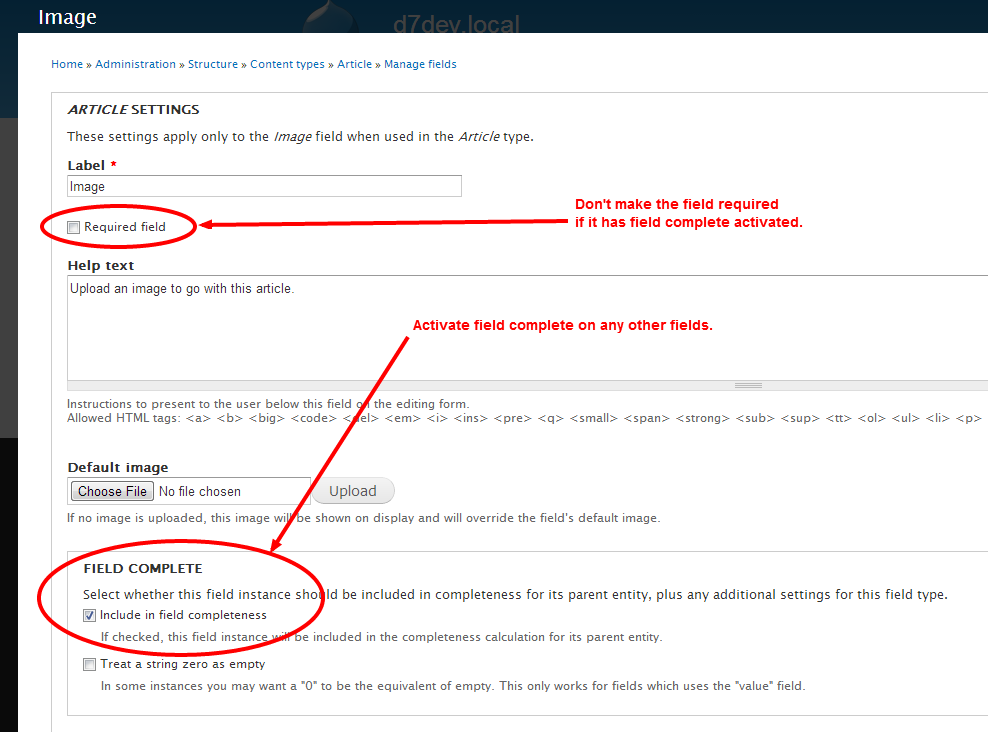
Image
Of these Title is a property not a field and is not covered by the Field Complete module. It is always set to Required and as such must be filled in before the first save. The other fields are not marked as required.
So let's say we want to enable completeness on the Body field, what this is saying to the user is that they don't have to fill it in - they won't be prevented from saving the node if they leave it empty - but the node is incomplete until they do.
The code has moved along a little bit from when these shots were taken. If you select a field as "required", you won't be able to select "completeness" and vice versa. There is no logic to having both selected on a field.
Disable debugging features and replace default logo
Next, we will disable the debugging features of Omega subthemes and replace the channelAustin logo with your logo:
Click on Appearance in the Admin Toolbar
Find the Community Media Theme and click Settings
Click debugging in the list of vertical tabs
Uncheck Enable the debugging (placeholder) blocks for the selected roles and Enable the grid overlay for the selected roles
Now towards the bottom of the form, find the Logo image settings
Either upload a logo or link to an existing logo. The logo will preferably be a transparent PNG, but a GIF or JPG will also work.
Click Save configuration
Remove Secondary Menu from theme settings
The secondary menu (the User Menu that includes My Account & Log Out) should always be disabled from the theme settings. Instead, if you wish to use the User Menu, place the User Menu block in the region where you want that menu to appear. This is how to do it:
Community Media Theme is now using sass, a more efficient way to write CSS. The files to edit are the .scss files in the /sass sub-folder. These will then be compiled to the normal .css files that are presented to the browser. To do this you will need Compass installed on your server.
This documentation explains how to configure and install reCAPTCHA as part of a Community Media installation. The existing reCAPTCHA Documentation by rkdeveloper contains extra useful information.
CiviCRM is an open source Constituent Relationship Management (CRM) solution. CiviCRM is web-based, open source, internationalized, and designed specifically to meet the needs of advocacy, non-profit and non-governmental groups and works well with Drupal sites.
This documentation was written to explain how to configure CiviCRM as part of a Community Media installation and modules included to improve the integration between Drupal and CiviCRM. Many of these CiviCRM related modules were developed specifically for Community Media, but can by used in any Drupal/CiviCRM configuration.
Configuring CiviCRM
Click on each item in the Configuration Checklistexample.com/civicrm/admin/configtask&reset=1 and add your details on each page. Sometimes you only need to review the existing information, but make sure to change:
Site Preferences - Select TinyMCE as your WYSIWYG Editor
The Webform module is used for making one-off custom surveys, contests, personalized contact forms, or petitions within your Drupal site. You could even to request studio reservations or something like that before implementing a more complicated solution like the Reservations API.
This documentation was written to explain how to configure and install Wysiwyg as part of a Community Media installation. The existing Webform Documentation by LinL contains extra useful information.
Enabling Webform
Navigate to Administer > Modules
Select Webform in the Webform block
Scroll to the bottom of the page and click Save Configuration
Configuring Webform
Webform is now ready to use, although with a full range of options, which you can adjust by navigating to Administer > Configuration > Content Authoring > Webform Settings
Further configuration of the Webform Content type is done by navigating to Administer > Structure > Content Types > Webform and click on the Edit tab.
Scroll down to the bottom tabs on the left hand side of the page