 Come together with the global Drupal community in Rotterdam, 28 Sept – 1 Oct 2026. Sessions, contribution, connection, and Early Bird savings until 8 June.
Creating an activity newspaper website using D7
Drupal 7 will no longer be supported after January 5, 2025. Learn more and find resources for Drupal 7 sites
Creating an activity newspaper website using D7
- View
- Revisions
- Drupal version: Drupal 7.x
- Updated: October 23, 2011
This tutorial shows you one way to create a school newspaper website in Drupal. This tutorial was created as part of class assignment.

It is assumed that you have Drupal 7.x or higher installed.
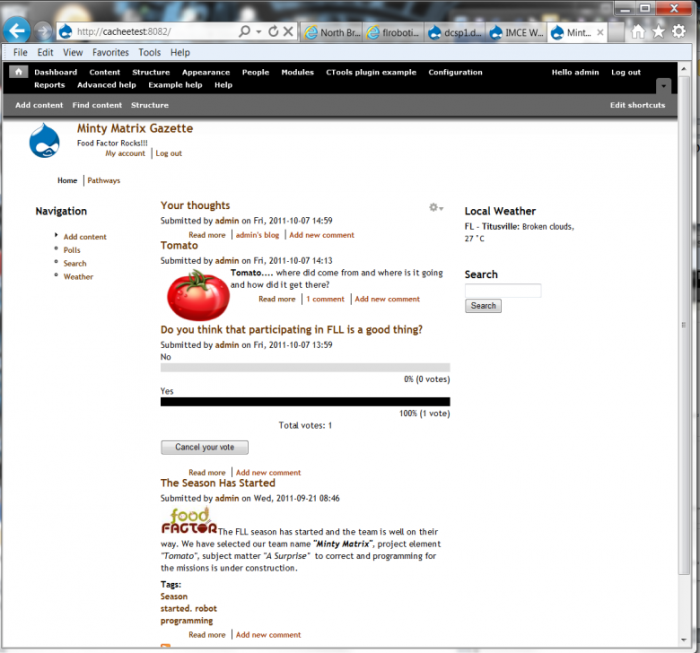
This figure shows a Drupal website after installation and some modifications.
Configuring the site
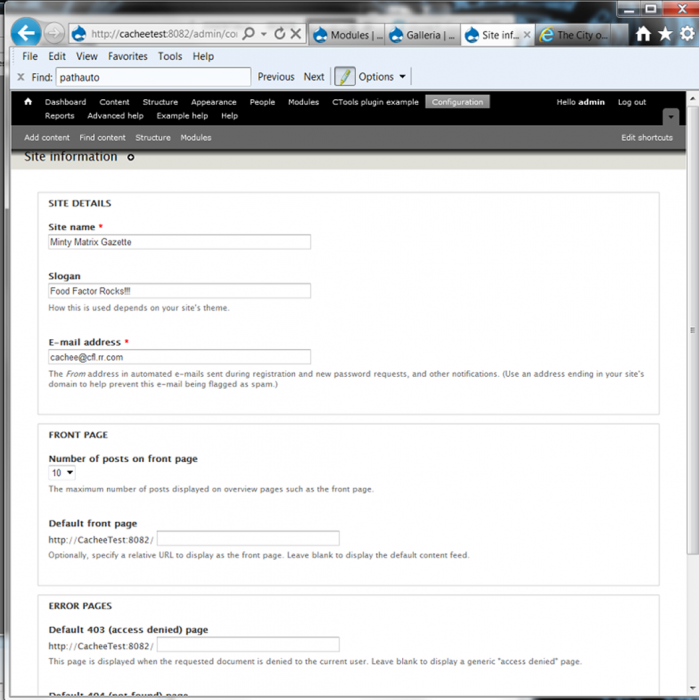
To begin you need to set up the site to match the newspaper information. This can be done by accessing the following Configuration tab then select Site information. (Note that the method of accessing the different options will vary depending on the Admin menu option or theme specified.) For the example purposes, we’ll call this newspaper "Minty Matrix Gazette."
Enter your information and click Save Configuration.
Users and Roles
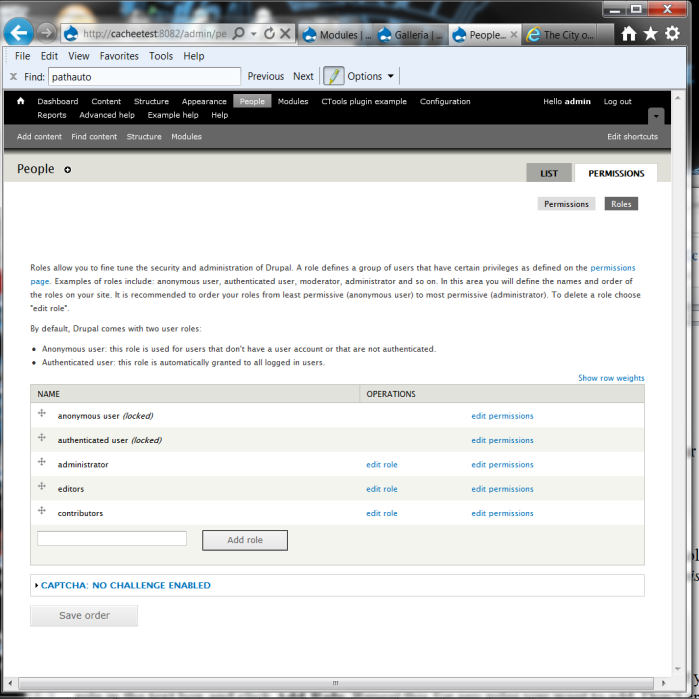
To allow others working on the paper to post their content, we’ll set up users and roles. Roles control what different types of users can do. First, we’ll set up roles. Go to People tab then select the Permissions tab then select Roles tab.
The two roles added in this example are the editors and contributors. Type in the “role name” in the text box and click Add role. Repeat this for each role you need. Note: Don’t create roles for individual people, but for groups.
After you’ve added your roles you need to set their permissions. Click on the “edit permissions” to the right of the role. In our example, editors have full control. Contributors can create page and article content, and edit their own content. Modify the permission as you see fit.
Next, you can set up users or let them sign up themselves. Go to the People tab then select the “+ Add User”. Enter the user’s information in accordance to the required information on the “New User’s Page” (see the User: Access and Management Settings on the Drupal Web Site Documentation Section to set up your user administration page). Make sure to make the password “Strong” when setting up your users. Check the appropriate role for your new user. In our example, the egreen user is an editor. When you’re finished, click Create new account.
Repeat this process for all users.

Modules
Now we’re going to enable the Drupal modules we want to use in building your newspaper. Click on the Modules tab to get the list of available modules. Make sure the following modules are available and enabled. All other modules needed should be enabled by default. If the needed modules are missing then see the discussion “Installing Contributed Modules” found on the Drupal Website in the Documentation Section.
| Name | Description |
| CKEditor | This module will allow Drupal to replace text area fields with the CKEditor - a visual HTML editor, sometimes called WYSIWYG editor. Make sure you enable the IMCE options in the “File Browser Settings” in both the profiles types. |
| IMCE | Allows users to upload files, such as pictures, to the site or your favorite upload module. To access this function you will access it from “My account” from the Home Page. |
| Path | Allows users to rename URLs, such as changing http://www.example.com/taxonomy/term/1 to http://www.example.com/schoolnews. This helps users use the site better. |
| Poll | Allows users to vote on an issue. |
| Search | Allows users to search the site. |
| Weather | Allows users to obtain the specified weather condition |
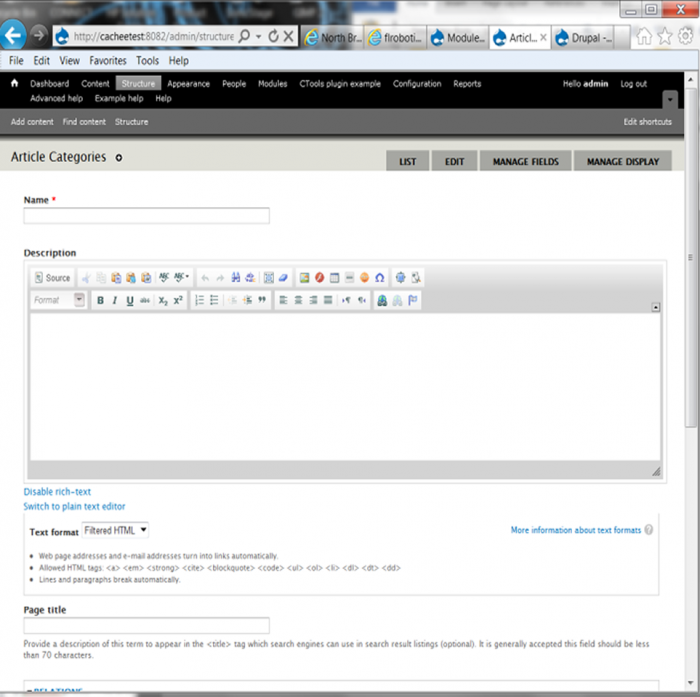
Taxonomy
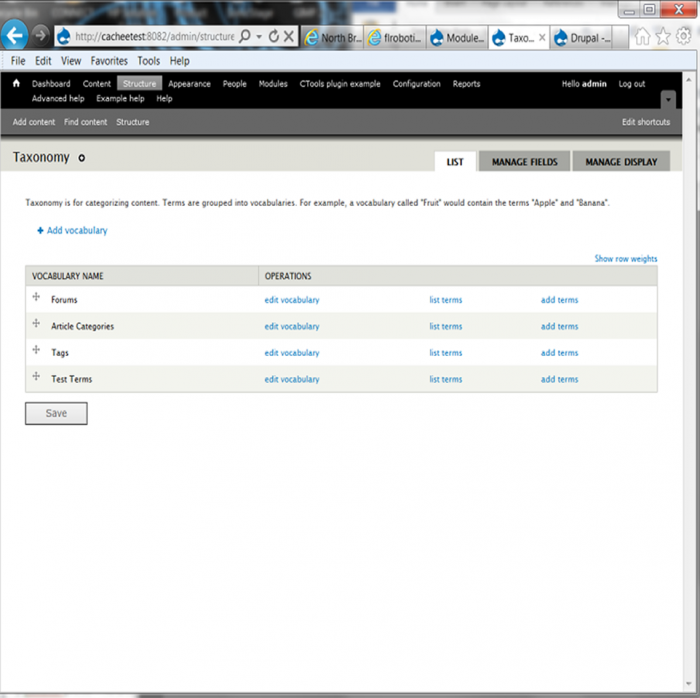
Taxonomy is a really amazing feature that allows you to categorize content and then organize it later. This helps create defined sections for your site, such as Sports or Drama. To start using taxonomy, go to the Structure tab then select Taxonomy and then select “+Add Vocabulary”.
The vocabulary to be added we will call “Article Categories.” Enter the vocabulary name and a description. Once completed, click Save at the bottom of the page.
After the vocabulary has been added, it is time to add terms. Select “Add terms” which is to the right of the “Article Categories” and add all terms that might be used in the different articles.
In the term name field, enter the name of the section of news. You may want to add terms such as Academics, Drama, Editorials, Events, School News, and Sports. These are the sections of the newspaper. When you have completed this task, it’s time to add content.
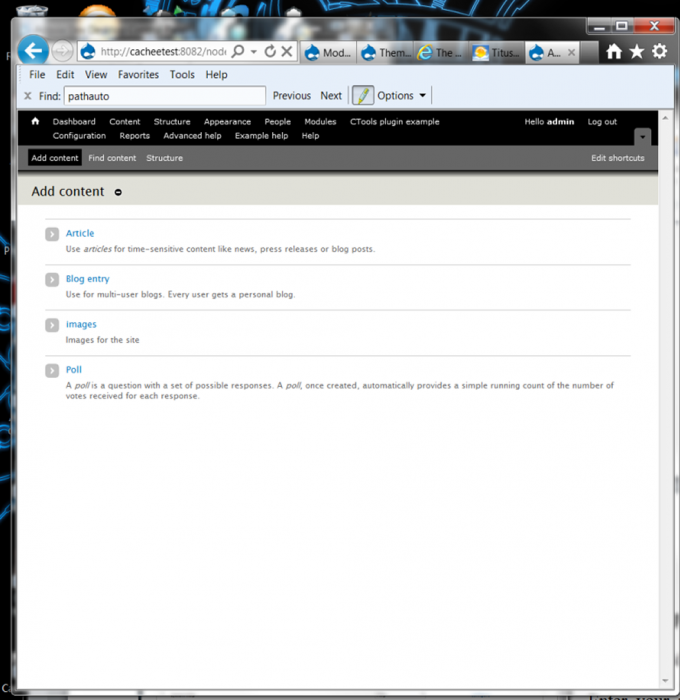
Adding content
Click on the Content tab, this will be in different places depending on the active “Theme.” Find the “+ Add Content” then select the type of content being added. The first type of content to be should be the “Article”. Type in the title of the article in the “Name” box and then enter the article content in the “Body” box. Under the box for entering the article, change the “Text format” from Filtered HTML to Full HTML.
Now it is time to add an image or two. First, select the “HOME” icon and then the “MyAccount”. Find the “File browser” tab and upload all the required images.
Return to the “Article” from the “Content” tab and add in all the content for the article. To add images use the image button and use the browser to find the images added in the previous step.
After you have finished, click Save.

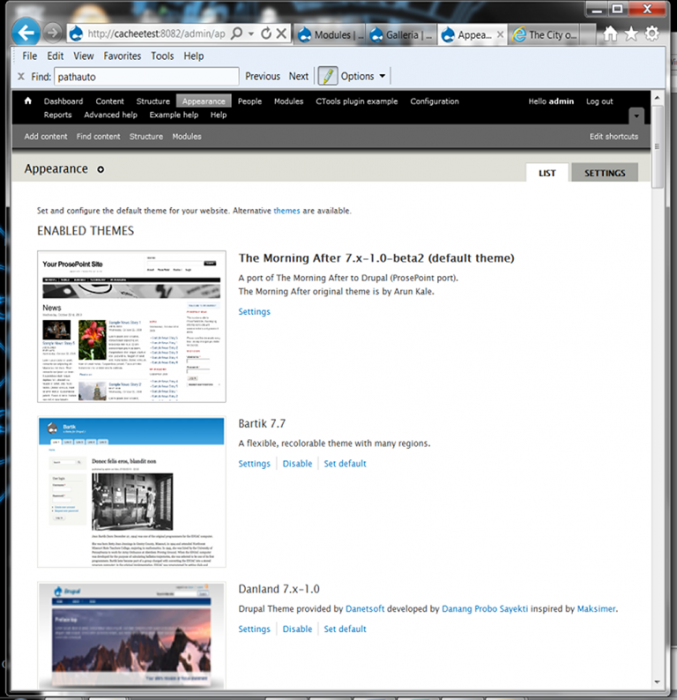
Themes/Layout
Now, you need to change the site to an appealing design/ layout. Click on the Appearance tab to change the site appearance. If the needed theme is missing then see the discussion “Installing Contributed Modules” found on the Drupal Website in the Documentation Section. A possible 4-column theme is “The Morning After”. Click on Enabled and Default next to the theme.
Your site is now using a different theme. You now need to set up the layout. Click on the Structure tab then select Blocks. To begin, we’re going to use a few blocks.
Adding a weather block
Click on the Structure tab and the select Blocks. Find the weather block place it in a region of choice, configure it and click the “Save” button.
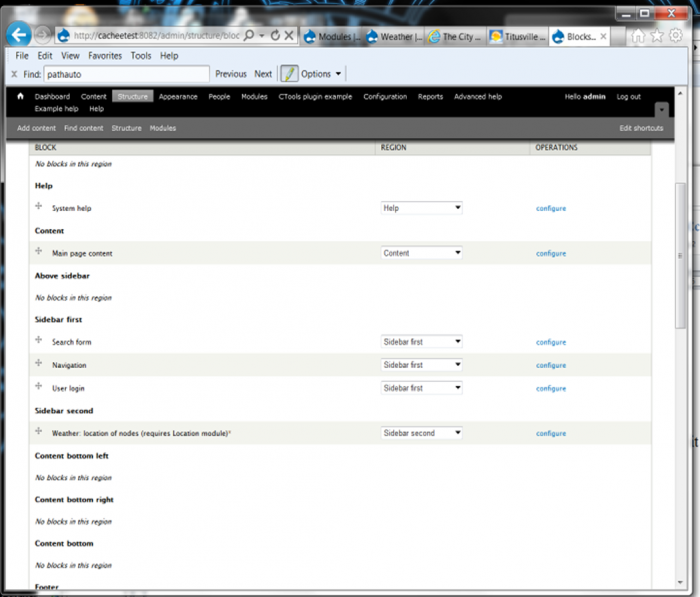
Adding a poll block
You can add a poll by selecting Content tab then select “+Add Content” then select Poll. Enter your poll information. The poll will now show up on the front page and in the Poll block.
If you don’t want the poll to show up on the front page like an Article does, then find the Publishing Options and un-check Promoted to front page. Click the Save button to save the information.
Help improve this page
You can:
- Log in, click Edit, and edit this page
- Log in, click Discuss, update the Page status value, and suggest an improvement
- Log in and create a Documentation issue with your suggestion
