Authorization flows and grant types
Here are the different ways a client (application) can get an access token.
This is a documentation page for the OAuth2 Server module.
OAuth 2.0 is the next evolution of the OAuth protocol which was originally created in late 2006. OAuth 2.0 focuses on client developer simplicity while providing specific authorization flows for web applications, desktop applications, mobile phones, and living room devices.
Source: http://oauth.net/2/
Long story short: If you're implementing an API, you'll most likely need an authorization solution. OAuth and OAuth 2 are such solutions.
For a brief overview of what OAuth2 is and how it works, see the following article:
http://aaronparecki.com/articles/2012/07/29/1/oauth2-simplified
For another, more detailed tutorial, see:
http://tutorials.jenkov.com/oauth2/index.html
Place it in your libraries folder (for example, sites/all/libraries/oauth2-server-php).
If installed, the Libraries API is used to locate the libraries folder, otherwise "sites/all/libraries" is assumed.
$ cd sites/all/libraries
$ git clone --branch master https://github.com/bshaffer/oauth2-server-php.git
Cloning into oauth2-server-php...
remote: Counting objects: 1807, done.
remote: Compressing objects: 100% (576/576), done.
remote: Total 1807 (delta 1074), reused 1752 (delta 1026)
Receiving objects: 100% (1807/1807), 278.33 KiB | 147 KiB/s, done.
Resolving deltas: 100% (1074/1074), done.
You then need to check out a stable version of the library. In the module release notes you can see which versions of the library are supported. For instance, run:
git checkout v1.7.0
to checkout v1.7.0 of the library, which works with the module version 7.x-1.2.
Go to admin/modules and enable the OAuth2 Server module.

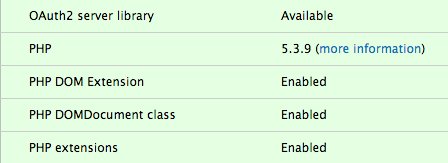
The admin/reports/status page should report the OAuth2 server library as available.
Go to admin/structure/oauth2-servers and create a server.
Leave the default values in settings, they will be explained later.
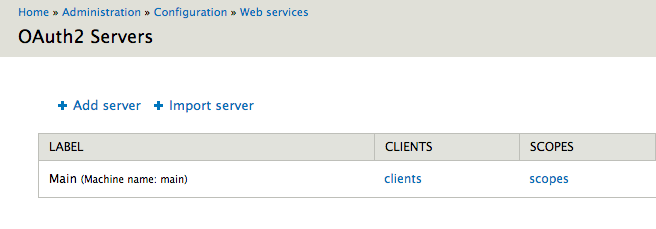
Click the "scopes" link, and you will be taken to the scopes listing page.
Make sure you have at least one scope.

The module automatically creates a "basic" scope for you, set as the default.
A default scope is granted if no scope is specified during authorization.
If no default scope exists, then the client will be forced to specify a scope during authorization.
From the spec:
If the client omits the scope parameter when requesting
authorization, the authorization server MUST either process the
request using a pre-defined default value or fail the request
indicating an invalid scope.
Note that the choice of the default scope can be affected by modules implementing hook_oauth2_server_default_scope(). If no implementation of hook_oauth2_server_default_scope() returns a default scope, the one specified in the UI is used.
See oauth2_server.api.php for more information on this hook.
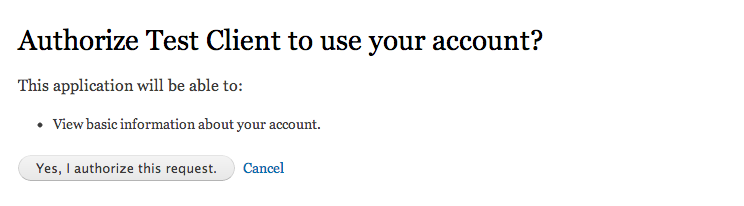
The scope description is shown on the authorization form to the end user (see screenshot on the bottom of the page).
If the i18n_string module is enabled (part of the Internationalization package) a "translate" link is present on the scope listing, allowing the description to be translated into other languages.

A client is an application requesting authorization from the resource owner (logged-in user on your website).

The Client ID and Client Secret can be thought of as the client username and password. The client id is considered public information while the client secret must be kept private at all cost.
The Redirect url must match the redirect_url param sent during authorization.
Important: Since OAuth2 requires SSL, the url MUST start with https.
"Automatically authorize this client" is an option that can be given to trusted clients, and will cause the authorization request to be automatically completed, without prompting the user for approval through the authorization form.
In admin/people/permissions, in section OAuth2 Server, check the permission Use OAuth2 Server (Use OAuth2 Server for authorization.) for anonymous users.
See oauth2_server.test for example client implementation code using drupal_http_request().
Here are the different ways a client (application) can get an access token.

Drupal is a registered trademark of Dries Buytaert.
