Step by Step Instructions for Views Galleriffic in Drupal 6
1. Prerequisites.
Step by Step Instructions for Views Galleriffic in Drupal 7
1. Prerequisites.
 Come together with the global Drupal community in Rotterdam, 28 Sept – 1 Oct 2026. Sessions, contribution, connection, and Early Bird savings until 8 June.
These are instructions for installing the Views Galleriffic module: http://drupal.org/project/views_galleriffic
If you are having trouble PLEASE DO NOT LEAVE A COMMENT HERE. Please open an issue on the module page: http://drupal.org/project/issues/views_galleriffic

I am happy to help but don't know if you leave a comment on this page. Please speak up if you have questions or need assistance.
Here are step by step instructions for:
This module is built by default to support image thumbnails that are 75px by 75px and images that are scaled to 500px wide (height doesn't matter).
You can control the size of the thumbnails and slide images in your imagecache (D6) or image style settings (D7). See the step by step instructions above for more details.
If you use different widths for your thumbnails and slides than the dimensions above you may need to change some of the widths in the CSS. I added the widths that you will need to change to the top of the two stylesheets in the D7 version. It is a best practice not to override the 'css/views_galleriffic_default.css' or 'css/views_galleriffic_above.css' stylesheet directly but to override them in your theme CSS.
Drupal 7 version now includes two styles to choose from.
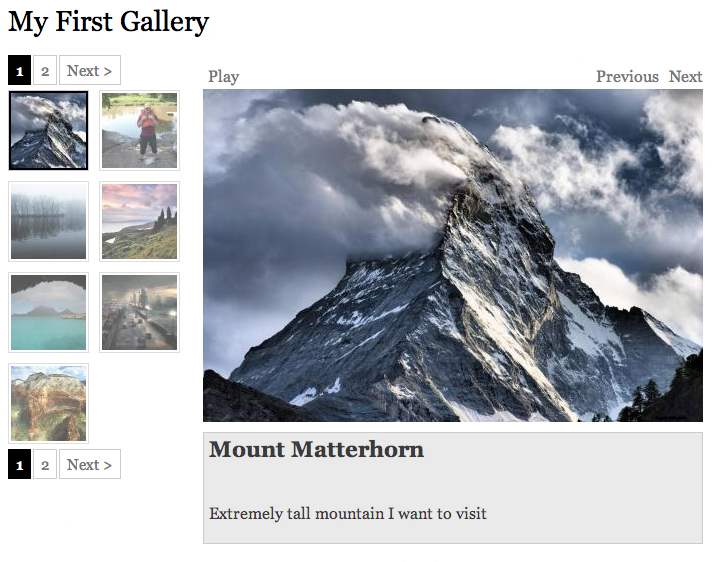
This uses the 'css/views_galleriffic_default.css' stylesheet.
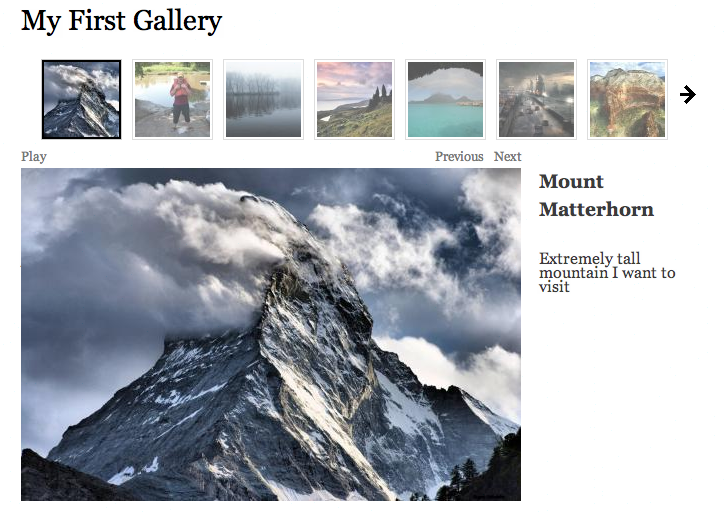
This uses the 'css/views_galleriffic_above.css' stylesheet.
You can switch between these two by selecting 'CSS Style' in the Galleriffic Gallery settings in the View.
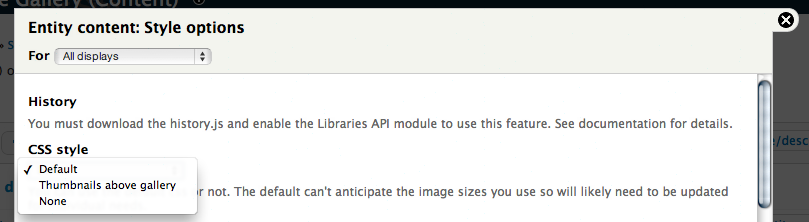
"History" is the ability to click on an image in the gallery and have a unique URL for that image. The unique URL is created with the following convention http://example.com/galleryname1#imagename
1) Download " http://galleriffic.googlecode.com/svn/trunk/example/js/jquery.history.js"
2) Place it into your views_galleriffic/js/ folder.
1) Download and enable the Libraries API module 1.x version: http://drupal.org/project/libraries
2) Make a directory 'sites/all/libraries/history'
3) Download: https://galleriffic.googlecode.com/svn/trunk/example/js/jquery.history.js
4) Place the jquery.history.js filed in the 'sites/all/libraries/history' folder
You can use this module to have a content type for which each node is a gallery.
To do this create a "gallery" content type with an image field "gallery_image". Select "unlimited" in the "Number of values" option for the image field. This will allow you to place more than one image in your gallery.
Create a View selecting "Views Galleriffic" fields as described above. Select the "gallery_image" field twice. One instance of the field should be used as the thumbnail and the second should be used as the slide field.
It is important for both fields that you do not select "Group Multiple Values". If you do you will not see all of the images in your gallery.
Attach the view to the "gallery" node using the Views Attach (D6) or EVA (D7) module.
You should now see the gallery when viewing the node.
Make sure to set the display to "hidden" for full nodes in the display settings of your gallery content type (admin/content/node-type/gallery/display) in D6.
To create a "super gallery" or gallery of all of your galleries, use the instructions above to create a "gallery" content type and attach galleriffic to it.
Create a new view with the "gallery" content type as a filter. Add the appropriate fields as described above (image, title, and description fields) to the gallery.
Select "Group Multiple Values" options for the image fields you are using in your view.
In order to see this option you must have your image fields set to "unlimited" for number of values as described above.
This should give you a gallery that has one image and links to each of your other galleries.
Please use the issue queue on the module page if you have any questions: http://drupal.org/project/issues/views_galleriffic
What if you want to have more than one field in the Description?
Let's say you want to have "Node: Body" and "Node: Edit link" fields in the Description so that users with rights to edit the node can do so.
To accomplish this, first add the "Node: Edit link" field. Select the "Exclude from Display" option for that field.
Next add the "Node: Body" field. Select the "Rewrite output of this field" option for that field. Include the tokens from the "Node: Edit link" and "Node: Body" in the text area.
Finally, select "Node: Body" field in the Description field in "Galleriffic Fields."
Your gallery should now display the Body and Edit link.
When making a gallery in Drupal, a primary question is if you want to use Fields or Nodes as the base instance of an image. The answer to that question really depends on what kind of gallery you need and what kind of information you want attached to each image.
If you want to use Fields for images you will create a 'Gallery' node and attach images to that node. You can still have information such as title and description for each image. However each image won't have it's own 'page' (ie node) for comments etc. If you want to use Nodes for each image you would create an 'Image' node and use Views to group those images together as a 'Gallery' or galleries.
This module supports both.
The "Group Multiple Values" (Drupal 6) or "Multiple Field Settings" (Drupal 7) setting in Views allows you to combine multiple results in a single row. What does that mean? If you have three nodes of the same type each with a single field that can have multiple values, your entries might look kind of like this:
|
Node 1 - Field 1A - Field 1B - Field 1C |
Node 2 - Field 2A - Field 2B - Field 2C - Field 2D |
Node 3 - Field 3A - Field 3B - Field 3C |
If you had a view that selected that node type as a filter "Node: Title" and "Content: Field" your output would like kind of like the list above. Each node title would be accompanied by each of the fields that was attached to the node.
If you select "Group Multiple Values" for the "Content: Field" and entered "Show 1 values starting from 0, the View would return each node title with only one instance of that field. Your results might look like this:
|
Node 1 - Field 1A |
Node 2 - Field 2A |
Node 3 - Field 3A |
In Views Galleriffic, if you want each node to be a gallery, you WOULD NOT want to select "Group Multiple Values" because it would limit the size of the gallery. Essentially what you want to see is one node title (the name of the gallery) with multiple instances of the field attached to it.
If you want each node to be an image, you WOULD want to select "Group Multiple Values" because you only want one result from each node. In this case the title of the gallery would be the name of the view and each image would be a single field from a multiple nodes. If you don't select "Group Multiple Values" you might see more than one result from each node.
The most important thing with "Group Multiple Values" is to have the setting the same for both of the imagefield fields you use in the View. If they are different the resulting gallery will have thumbnails that do not match the slides.
When you add the Content: Image Field to your Views display, you can choose to rewrite the output of the field using 'Rewrite Results'. The tokens exposed are:
[field_image] == Content: Image
[field_image-fid] == Raw fid
[field_image-alt] == Raw alt
[field_image-title] == Raw title.
If you want to display the image, use [field_image]. If you want to show a caption from the title field underneath the image, use [field_image]
[field_image-title].
From: http://drupal.org/node/1053894#comment-4420868
See here for an untested patch for use with lightbox module: http://drupal.org/node/725128#comment-4931040
Make sure you save new display in Views and clear the cache. See here for discussion: http://drupal.org/node/1591842#comment-6140014
File an issue here: http://drupal.org/node/498690 and we will see if we can help!
1. Prerequisites.
1. Prerequisites.

Drupal is a registered trademark of Dries Buytaert.
