Introduction
Drupal 7 will no longer be supported after January 5, 2025. Learn more and find resources for Drupal 7 sites
This guide provides instructions for installing and using the Salsify module on a Drupal site. Although not required, it assumes prior knowledge and experience with the Migrate module. Detailed instructions for using the Salsify service are available in the Salsify knowledge base. A Salsify account is required to use this module. Free trials are available.
The current version of the Salsify module supports one way syncing of product data from Salsify to your site. Two-way syncing is planned for the next version.
Preparing Salsify data for export
To export Salsify data to your site, you need to create a channel that exports data in JSON format. The export will include a list of all the attributes of the products in the channel. To match Salsify attributes to product fields on your site, you should create a separate channel for each product type.
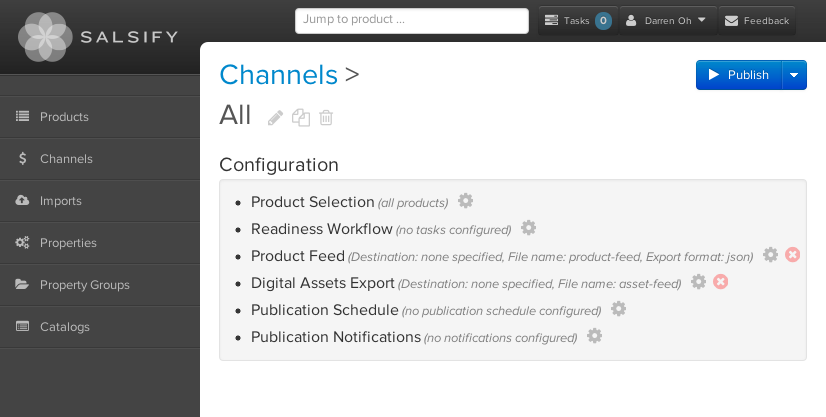
If your PHP installation has Zip support, you can create a separate digital assets export. This improves performance by downloading all file attachments in a single Zip file, instead of downloading each file separately.
Preparing to import data from Salsify
To import data from Salsify, you need to set up a migration group. Your migration group will contain a set of migration tasks that pull data from Salsify into equivalent Drupal entities on your site. See Setting up a migration group for more information. If you have more than one Salsify account, you will need to create a separate migration group for each one.
Getting updates from Salsify
Say you want to add a new product, or update an existing product, or change an image. You would make the changes on the Salsify site and import them into your site. You can set up a cron job to do this automatically. See Managing migration tasks for more information.
Help improve this page
You can:
- Log in, click Edit, and edit this page
- Log in, click Discuss, update the Page status value, and suggest an improvement
- Log in and create a Documentation issue with your suggestion
