


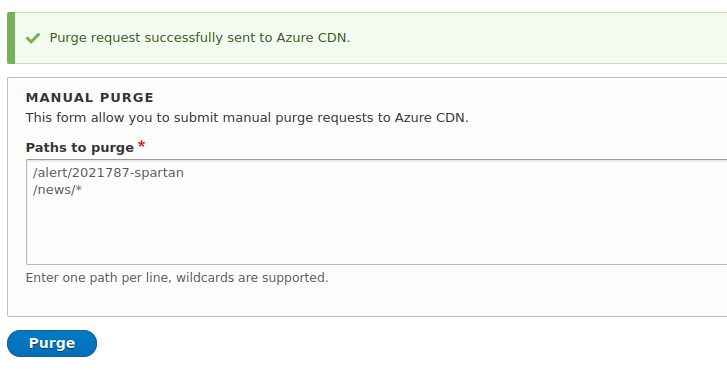
This module extends the Purge module by providing a purger, queuer, and processor plugin for Azure CDN. The module also comes with a manual purge form that allows users to send manual purge requests with support for wildcard paths - e.x. /news/*
Setup Azure CDN Purge
The following steps are required in order to get the Azure CDN purge module to work.
Step 1 - Setup your application in Azure
- Login to the Azure portal - https://portal.azure.com
- Select the Azure Active Directory option from the menu.
- Click “App registrations” from the menu on the left and select New registration. Give your application a name.
- Once created, click on your application and choose Certificates and secrets from the left menu
- Click New Client Secret, provide a description and select the expiry (recommend the longest period allowed by your IT security policy). IMPORTANT, be sure to record the Client secret value as this will not be retrievable after this process has completed.
- The overview page for the App will contain the Application ID (Client ID), the Directory ID (Tenant ID) and the Client secret value, all of which are required for configuring access to the Azure CDN purge endpoint.
Step 2 - CDN profile setup
- From the Azure portal dashboard, click on your CDN profile.
- The Overview tab will provide the Resource group name and your Subscription ID.
- In order to have authorization to perform the purge action, you will need to give your application the Contributor role. Click on the Access control (IAM) tab.
- Click the add button to give the Contributor role to Azure Resource Management (ARM).
Step 3 - Install and configure the Azure CDN Purge module
- Install as you would normally install a contributed Drupal module.
- You will also want to install the Purge UI (drupal/purge) module in order to configure your purge settings. The Cron processor (drupal/purge) module can optionally be installed to provide a processor triggered by cron.
- Configure user permissions by giving the 'administer azure cdn purge' permission to roles that should be able to configure the Azure CDN Purge configuration.
- Go to the Azure CDN Purge admin form (/admin/config/services/azure) to input all required information (from steps 1 & 2).
- On the Purge UI admin form (/admin/config/development/performance/purge) click the Add purger button and select Azure CDN.
- In the queue fieldset, make sure the Path queuer is enabled under the Queuers column, and Cron processor is enabled under the Processors column.
- Now when you save a node, it will be added to the queue and purged from Azure CDN on next cron run.
Other
- This module also works for Azure FrontDoor
- Highly recommend the drupal/purge_queues module. Specifically, the database_unique plugin that prevents bulk operations from filling up your queues with duplicate items/paths.
Supporting organizations:
Development and maintenance
Maintenance
Project information
- Project categories: Integrations
- Ecosystem: Purge
 63 sites report using this module
- Created by smulvih2 on , updated
 Stable releases for this project are covered by the security advisory policy.
Look for the shield icon below.


