
Overview
Integrate with Commerce in order to allow you to charge users to create nodes. It is possible to have multiple different product offerings for each node type, so the user can pick the product they want to purchase when creating the node. An example use-case would be a classifieds site that charges people to post listings.
Also offered, via a sub-module, is the ability to configure your product types to have an expiration period in which the node is unpublished after that period elapsed. Using the example from above, one product choice could be a listing that lasts one month, another could be for 3 months, etc. And since they are different products, they can have different prices, etc. This sub-module also gives the user the ability to renew/relist their node at any given time and optionally will send them a (configurable) email notification when they are about to expire.
Requirements
- Commerce
- Entity reference
- Interval Field: Required only for the expiration sub-module so you can set the interval of the node expiration (ie, 1 month, 1 year, etc).
Installation & Configuration
- Enable the module(s) included in this package and all required modules.
- View the "Pay to Publish" product-type that is now available at admin/commerce/products/types. This is the product type that will be used to buy nodes.
- Add at least one new product of this new type at admin/commerce/products/add. You can add an unlimited amount.
- If you haven't yet already done so, create the node-type(s) that you will charge users to create. Make sure they default to not be published.
- Edit the node-type(s) that you wish to enable payments for, navigate to the "Commerce Node Checkout" vertical tab and select the products you want to have available for this node type. If you enabled the sub-module, you can also enable optional email notifications for when the node is about to expire. The node author can decide if they want to receive them.
- Go to the "Manage fields" tab (if the Field UI module is enabled) and feel free to configure the new field(s) that have now been added.
- Go to the node add form to make sure that the form elements are present. For admins, you will be given the option to skip adding the node to the shopping cart after creation.
- To configure the workflow or the expiration notification settings or email template, navigate to the Rules interface (admin/config/workflow/rules) and edit the associated Rules provided by this module.
- If using the expiration sub-module, it's recommended that you inspect the provided View, "Commerce Node Checkout Expire Posts", which comes as disabled by default. This provides two useful examples: 1) The newly available field for Nodes that displays the form to renew/relist a given node. 2) How to use an aggregation query to accurately determine the expiration date of a given node. This query is needed because the module tracks many expirations for the nodes based on the multiple purchases, and the largest date is the only one that matters.
- Using a provided Rule, if the order contains only nodes, it will be set to completed after checkout is finished. You may not want this to happen. This can be configured using the Rules interface.
Usage
Be sure to read the installation instructions prior to reading this.
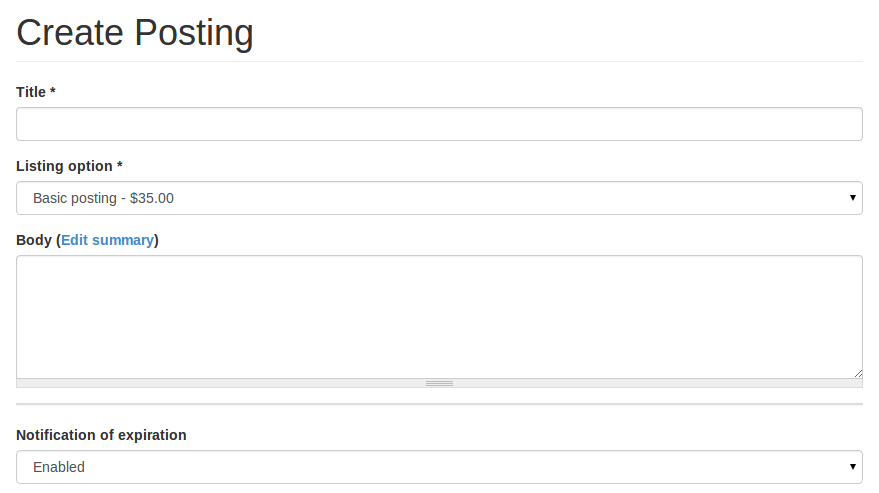
- A user navigates to the node creation form for the node type that has products enabled.
- The user completes the node form, also choosing the product they wish to purchase along with this node (if there are multiple options). If the expiration sub-module is enabled, they will also be able to choose whether or not they want to be notified of upcoming expirations.
- After creating the node, they are taken to their shopping cart which now contains the unpublished node. They can either checkout, create another node, etc.
- Once they successfully check out, the node becomes published.
- If the expiration sub-module is enabled, when viewing the node, a "Relist" tab will be available, where the user can view the form to choose the product and add it to their cart again. This allows them to relist or add time to their listing. If the node is set to expire in 3 weeks, and the user purchases a product with a 1 month expiration, the expiration date will now be 3 weeks + 1 month.
- If the expiration sub-module is enabled, the admin can provide the user with a View (see #9 of installation instructions) of all of their purchased nodes with a quick form to add them to the cart for renewal.
- If the expiration sub-module is enabled, and notifications are enabled for the node-type (see #5 from the installation instructions), the user will receive an email N days before it expires to remind them.
- Admins will have a tab present on purchased nodes to adjust the expiration date.
Status
This module is not yet considered production-ready, but it should be soon as a large number of fixes, improvements, and refactorings are taking place now. Please test out the module and post any issues you encounter.
Warning
If you started using this module with the 7.x-1.x-dev package dated on or before May 13th 2014, you must migrate from References to Entity reference. Information and the module that can handle the migration can be found here: https://drupal.org/project/entityreference_migration
Credits
- Written by Lee Rowlands of Rowlands Group - please visit our site if you're interested in sponsoring paid enhancements.
- Sponsored by Chat Wide Bay free classifieds for the Wide Bay region.
- mstef for joining as maintainer and getting this module ready for production; including a major rewrite of the expiration sub-module (credit to drakelam for helping).
Similar projects
Supporting organizations:
Support time
Project information
- Project categories: Content editing experience, E-commerce, Media
 148 sites report using this module
- Created by larowlan on , updated
 Stable releases for this project are covered by the security advisory policy.
There are currently no supported stable releases.


