On this page
- Fields on node types
- Editing fields and widgets
- Adding fields
- Field types in a standard Drupal installation
- Reusing fields
- Reasons Not to Reuse Fields
- Reasons to Reuse Fields
- Comment and user account fields
- Creating relations with fields
- Elaboration: The problem of directional references
- Example implementations of fields
- Attachments to articles
- Year of birth in the user profile
- Exercises: documentation site
- Documentation page
- How to demo
- Preparation
- Suggested solution
- Comments
- Documentation collection
- How to demo
- Preparation
- Suggested solution
- Comments
- User information
- How to demo
- Preparation
- Suggested solution
- Comments
- Exercises: News site
- News articles
- How to demo
- Preparation
- Fact boxes
- How to demo
- Preparation
6: Fields
Drupal 7 will no longer be supported after January 5, 2025. Learn more and find resources for Drupal 7 sites
Articles and basic pages are both node types, but they hold different information – while basic pages only store header and body, articles may also have images and tags. Another difference between the two node types is that they have different fields.
In short, fields work like this:
- Node types have a number of fields attached to them, which are used to store text, images or other data. The kind of data stored is determined by the field type.
- When creating or editing a node, you can enter data into each field attached to that type of node. How data is entered is determined by the field's widget, and includes select lists, text fields and file uploads.
- Each field has settings that determine how the field data should be displayed when viewing the saved node. Examples include which image size should be used, or if text should be displayed in its trimmed or full version. Field data can also be hidden.
- Administrators may add, remove and change settings for fields, thereby customizing the kind of information that could be stored on the website.
- Other parts of Drupal, particularly the Views module, may access and use field data to filter, sort, display and process content on your site in different ways.
This summarizes most of the ways fields are used in Drupal. It may seem like a short list, but when you have mastered it, you will be able to create powerful web applications in little time.
In a standard Drupal installation, nodes can have fields, and so can comments, users, and taxonomy terms (See Chapter 7). These are collectively called entities (together with some nonfieldable parts of Drupal). There is a point-and-click interface for building information structures for all these parts of a website: this gives Drupal a unique flexibility that should not be underestimated.
The following section describes how to manage fields for nodes. Field management for comments, users, and taxonomy terms is carried out in an almost identical fashion.
TIP: The term fields can denote several quite different things in the Drupalverse. In this book, the term entity fields is used where there is a need to explicitly point out that we're talking about fields that can be added to nodes, users and other entities.
The initial version of this section of the Community Documentation came from the book Drupal 7: The Essentials, courtesy of NodeOne and Johan Falk.
Fields on node types
To get an overview of the fields a node type contains, click on the toolbar Structure, Content types, and the link Manage fields for the node type you wish to inspect. The overview page for fields allows a number of operations (see figure 6.1). Here you will find that:
- You may change the order of the fields by clicking and dragging the sorting arrow for each field. This order is reflected on the node edit form and, unless it is set otherwise, also on the node view page.
- You may edit the settings for each field by clicking its edit link.
- You may change a field's type by clicking the field type name. (This can only be done if nothing has yet been stored in the field, since it might otherwise destroy user-entered data.)
- Each field may be deleted. This also deletes any data stored in the field.
- The widget used for data entry may be changed by clicking on the widget name for the relevant field.
- New fields may be added.
- Fields used on other entities may be reused as an alternative to adding new fields; however it is usually better to create a new field as explained in the section on reusing fields.
Below is a more detailed description of these operations.
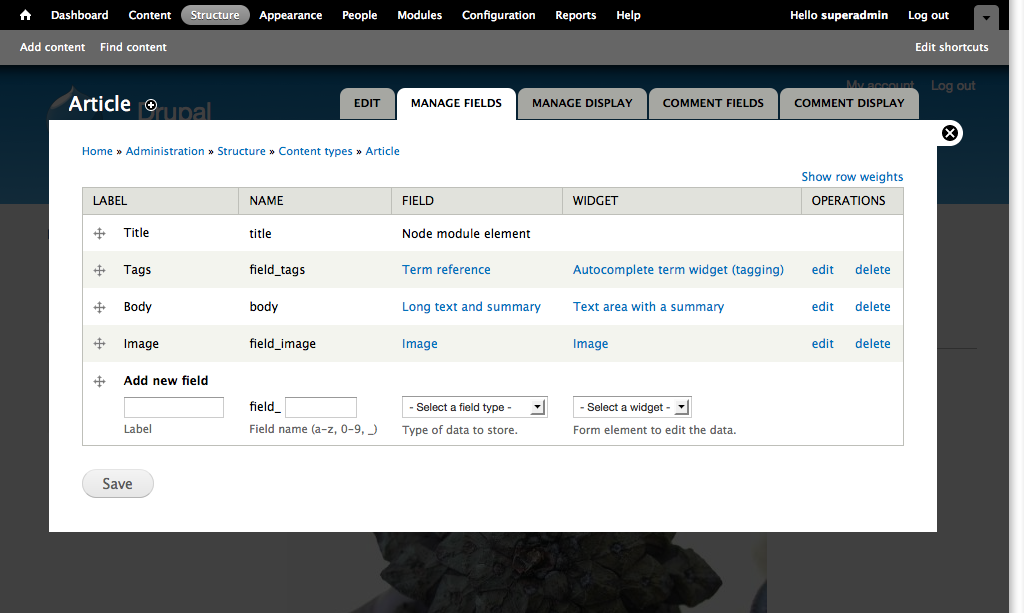
Figure 5.1: The node type ”Article” has a number of fields which you can edit and reorder.
Editing fields and widgets
Clicking the edit link for an entity field brings you to a page full of settings for that field, while a click on the widget name opens a corresponding page for the widget. (You can switch between these pages using the tabs at the top of the page.)
The settings available for a field depend on its field type and its widget. Usually the help texts explain quite well how the different settings are used. Below are descriptions for the most common settings.
- Required: Users will get an error message if trying to save a node (or other entity) while required fields are empty.
- Help text: Any help text will usually be displayed in small font below the input field. Best practice dictates that every field should have help text, unless there is a good reason otherwise.
- Default value: This sets the default value when creating new nodes/entities. (The default value will not be automatically used if the field is left empty – it just saves the effort of filling in the most common value by hand.)
- Number of values: If there is a need, fields can accept multiple values. For example, you may allow users to upload several images to an article. This setting either allows a fixed number of values (normally just one), or unlimited. This second option provides a button with the text add another item below the field, allowing the user to add more items when required. If the field uses a check boxes/radio buttons widget, multiple-value fields will be displayed as check boxes instead of radio buttons.
- Allowed values (list fields only): In this text area, you may enter a list of values the user should be able to select from - one per line. It is possible to separate the data stored in the database and the value presented to the user by writing lines on the form stored data|displayed data. Only the data stored in the database has to match the field type – a number list could, for example, have 0|free of charge as a possible value, displaying free of charge to all users while still storing a number in the database.
- Text processing (text fields only): This option determines if a text input should be able to hold markup, or if it is always plain text. See the section on text formats in Chapter 5 for more information.
Adding fields
At the bottom of the field list for a node type is a row used to add new fields. Each field requires a label, a machine name, a field type, and finally also a widget that matches the selected field type.
When adding a new field, you are automatically redirected to the pages for configuring the field and its widget. (See figure 6.2.)

Figure 6.2: Different field types have different settings. The figure shows the settings for text fields.
Field types in a standard Drupal installation
The field types included in a standard Drupal installation are:
- Boolean: This stores a zero/one value in the database, but could be displayed to users as any text (such as no/yes).
- Decimal: This stores a number with a specified number of decimals. The character used for the decimal point is configurable, and you may optionally add a prefix or suffix to the number – for example, "$."
- File: This stores file data to a node/entity (while the actual file is stored in the file structure and not the database). Settings for this field include accepted file types, the folder where the files should be stored, file size limitations, and a few more options. It is possible to store files without making them publicly accessible if you have entered a path to use for private files on the toolbar Configuration, File system.
- Float: This stores a float number, which is the most precise type of number used in Drupal. As with decimals, you may add a prefix and suffix to the field.
- Image: This stores metadata for an image (while the actual image file is stored in the file structure and not the database). Field settings are similar to those for files, but also include alternate and title text settings, as well as limitations for image sizes.
- Integer: This stores a lightweight integer. As with decimals, you may add a prefix and suffix to the field.
- List (integer/float/text): This stores number and text data for predefined lists. The field type is useful for creating select lists or check boxes.
- Long text: This can store a large amount of text in the database, and is normally used only when you want a text area input.
- Long text and summary: This saves text along with a summary in the database. This field type is used in a standard article. Field settings include the option to write a customized summary.
- Term reference: This stores a reference to a taxonomy term. See Chapter 7 for details.
- Text: This stores a shorter amount of text in the database, usually inputted via a single-line text field.
Figure 6.2: Different field types have different settings. The figure shows the settings for text fields.
TIP: Drupal modules may provide more fields and widgets for your site, making it possible to have fields customized for e-mail addresses, geodata, video, and much more.
Reusing fields
It is possible to use the same field on bundles within the same entity - for example, an image field can be used on both a node "article" and a node "event". You do this by using the row add existing field in the list of fields.
You cannot reuse a field between different entity types: for example, use the same field on a node entity and a user entity (this is a change from versions prior to Drupal 8, where cross-entity reuse was possible).
When reusing fields, only parts of the configuration, such as help text, may be changed for each bundle. Others must be the same for all bundles where the field is used, such as number of values to store.
Reasons Not to Reuse Fields
The main reasons to use a new field are you get increased flexibility for field configuration, and shared fields can make it more difficult to export selected parts of the configuration on your site. (See the section on exporting configuration in Appendix 1 for more information about why configuration export is useful.)
Reasons to Reuse Fields
Reusing fields not only makes Drupal run faster, it also makes your project easier to maintain. There are times to use a separate field. If you need a field on one content type to be single value instead of multi-value, then you'll want to add a new field. When an image field is shared between content types with an easy to remember name like field_hero_image, your custom code is easier to write and maintain, your views are easier to build and you have fewer UI changes to make if you have to update a field configuration.
Comment and user account fields
Just as with node types, you may add and configure fields for comments and user accounts. Field settings for comments can be found at their respective node type settings by clicking the tab Comment fields. Field settings for users are found at the toolbar Configuration, Account settings and the tab Manage fields.
Fields applied to user accounts have additional settings that determine whether the field should be displayed on the user registration page. Required user fields are always included on the registration form.
Creating relations with fields
An important part of building an information structure is to create relations between nodes, and also between other entities. For example, this fact box belongs to that article, this press release relates to those products, and so on.
In Drupal, these relations are created with reference fields or relation fields. These are fields connecting entities on your site.
There are multiple modules that allow creating references between entities. Two of the most commonly used are:
- The Entity Reference module.
This module provides simple links between any entity types. for example, you could link two different node types or you could link a node type to a user. There are additional modules available that can extend the functionality of the entity reference module, for example corresponding entity references, which allows bi-directional entity reference fields. - The Relation module also provides a way to relate any kinds of entities. It includes options for directional and symmetrical relations and the ability to add fields to a relation (relations themselves are also an entity in this case).
This module is more complex but may be more useful in certain circumstances.
Elaboration: The problem of directional references
As a Drupal developer, you will find yourself considering which direction a reference should have – should you put a reference field on node type A pointing towards a selected user, or should the field be placed on the user and point towards selected A-type nodes?
Factors influencing these choices are usually, in order:
- The technical consequences of the choice, and limitations on how easy it will be to store, retrieve and display the data.
- The workflows on the site, and which solution will be most comfortable for end users.
- The information structure on the site, and which solution gives the cleanest result.
When these factors conflict, you can often provide tools for improving site workflows, but these tools will not be described further in this book.
Determining how references should be directed is an art that requires training. Incorrect choices frequently have no consequences until you are halfway through a website project.
TIP: If one direction, but not the other, leads to a reference field having one value instead of many, it is probably the best choice. A fact box relating to exactly one article is usually a better choice than one article relating to a number of fact boxes.
Example implementations of fields
This section contains examples of how the concepts and functionalities in this chapter may be used. You can find more examples in the exercises.
Attachments to articles
As the editor of my news site, I want to be able to attach PDF documents to articles. This will allow visitors to view and download the files. This is important since we often have useful extra information in PDFs that we want to offer to our visitors.
The functionality above can be achieved by following these steps:
- Visit the Manage fields page for the node type article.
- Add another field of the type file. Give it the label attachment and the name field_article_attachment.
- Drag and drop the field to a suitable place in the field list.
- Save the field list, opening the settings for the new field.
- Use the default field-wide settings by clicking save field settings.
- Add a help text, explaining that any attached files will be shown along with the article.
- Change the allowed file extensions to pdf.
- Set file directory to article/attachments.
- Check enable description field.
- Change number of values to unlimited. Save!
Year of birth in the user profile
As an administrator on my forum site, I would like all members to state their year of birth when registering. This is important since it helps me understand how popular the site is among different age groups.
The functionality above can be achieved by the following steps:
- Edit the fields for user accounts. These are at Admin / Configuration / Account Settings / Managed Fields, not under Admin / Structure
- Add a new field of the type integer, for example with label year of birth and the name field_user_birthyear.
- Saving the field list will open the settings for the new field.
- As integer fields lack site-global settings, you can just hit save field settings to continue to the configuration used on user accounts only.
- Mark the field as required, which automatically includes it on the registration form for the site.
- Write a help text explaining how the information this new field provides will or will not be used.
- Set minimum to 1900 and maximum to 2012 to prevent users from providing nonsense years.
TIP: The Date module provides entity fields for dates and times, which in this case would be a good alternative to using an integer field.
Exercises: documentation site
These are the first exercises in the documentation site suite. They include how to build the basic information structure for a website used by a community for building software documentation collaboratively. Carrying out these exercises requires using the concepts described in this chapter, as well as concepts covered by part A of this book.
Documentation page
As a site member, I want to be able to create and edit documentation pages containing text, screenshot uploads and file attachments. This is important because it allows me to contribute to building online documentation.
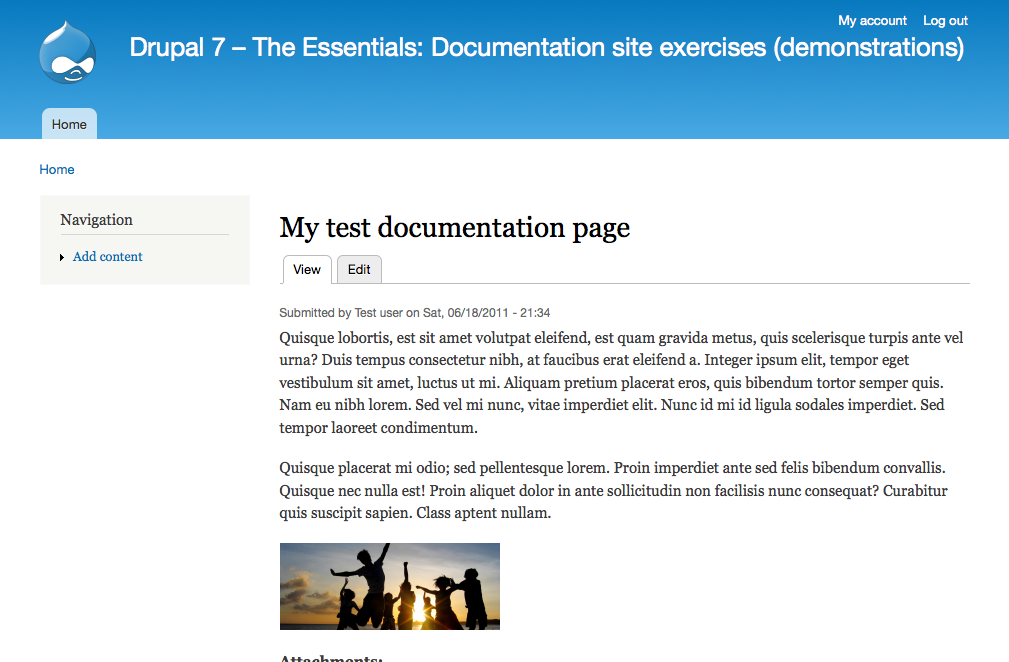
Figure 6.3: An example of how the finished documentation page may look.
How to demo
- Log into the site.
- Create a new documentation page containing text, images and file attachments.
- Verify that text, images and file attachments are displayed when viewing the saved documentation page.
- Log out. As an anonymous visitor, verify that the documentation page is not editable.
- Log in with another account. Verify that the documentation page is editable.
Preparation
- An empty Drupal site.
Suggested solution
- Add a new content type: Documentation page. Provide it with a description of how the content type will be used, such as: Documentation pages are editable by all site members, and contain documentation about a given concept. (See node types and node administration.)
- Click the save and add fields button to go to the fields overview page for the node type.
- Add a new image field to the content type. Give it the label images, provide it with a help text, and allow an unlimited number of images to be uploaded into the field. (See adding new fields.)
- Add a new file field to the content type. Give it the label attachments, provide it with some help text, and change the allowed file extensions to txt pdf doc xls zip tar.gz odt ods docx xlsx. Enable the description setting, and allow an unlimited number of uploads in this field. (See adding new fields.)
- Change the permissions settings on the site to allow all authenticated users to add and edit documentation pages. (See permissions and roles.)
Comments
- Since documentation pages probably won't appear in any menus, it may make sense to deselect all menu options in the node type setting.
- There are a lot of settings when adding new fields to content types. In most cases, you can just use the default settings, and change whatever you need afterwards.
- It is useful to have conventions when deciding machine names for fields. This makes it easier for you and others to find and recognize them. One convention is to start each machine name with the name of the node type it is used on (or any other entity).
- The content of the fields may not be displayed in the best way, but that is actually not a part of this user story. Writing and reading user stories in concise ways helps you focus on the right tasks.
Documentation collection
Warning: It is unclear whether this example can be built using the information provided in the book to this point. It is unclear how reference nodes can be added. Maybe extra modules are required? It also appears to promote obsolete technologies (References intead of Entity References).
As site member I want to be able to create documentation collections, referring to one or several documentation pages. There should be room for entering a description for each collection. This is important since it allows me to organize the on-line documentation in a way that is meaningful to me, as well as take part of documentation structures others find useful.
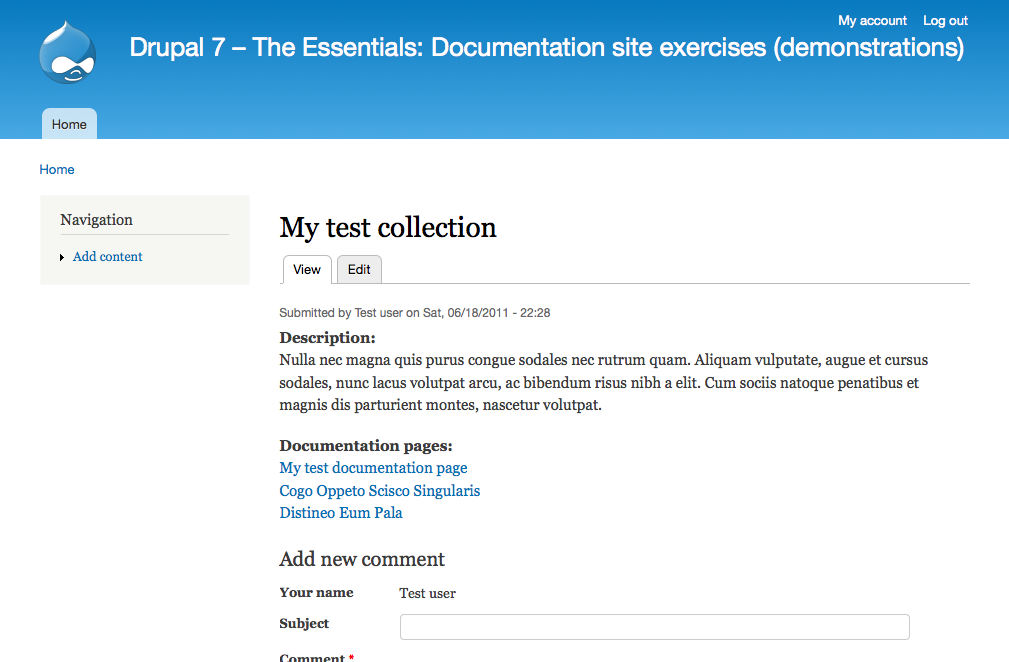
Figure 6.4: An example of how the finished documentation collection may look.
How to demo
- Log in to the site.
- Create a new documentation collection, containing a description and referring to at least two documentation pages.
- Verify that the collection description and links to the documentation pages are displayed when viewing the saved documentation collection.
- Edit the collection and change the order of documentation page references. Verify that the list order has changed accordingly when viewing the saved collection.
- Log out and log in with another account. Verify that the documentation collection is not editable.
Preparation
- A number of documentation pages should be available on the site (see previous exercise).
- The Entity Reference module should be downloaded and installed.
Suggested solution
- Add a new content type Documentation collection. Provide it with a description. Click save and add fields to go to the fields overview page. (See node types and node administration.)
- Make sure that the Entity Reference module is enabled. Then add an Entity Reference field, for example using the label Documentation pages. (See adding new fields.)
- You can use any widget, however if you are referencing an entity type that will have a lot of options then autocomplete is likely the best widget. For example, if you have hundreds or thousands of options in your reference field, using checkboxes or a select field may cause your site to crash due to the web server's memory limit.
- Set the entity reference field's Target type to Node and Target bundles to Documentation page. Mark it as required, provide it with a help text, and allow users to enter an unlimited number of values. (See adding new fields.)
- Go to the permissions list for the website, and set permissions to allow authenticated users to create and edit their own documentation collections. (See permissions and roles.)
Comments
- As with documentation pages, it does not really make sense to add collections to menu, so all menus may be deselected in the node type settings.
User information
As a site member I want to be able to view details about other site members, such as real name, a user image and the country in which they live. It should be possible to enter this information when creating an account on the site. This is important since it makes it easier to get to know the people I'm cooperating with on the website.
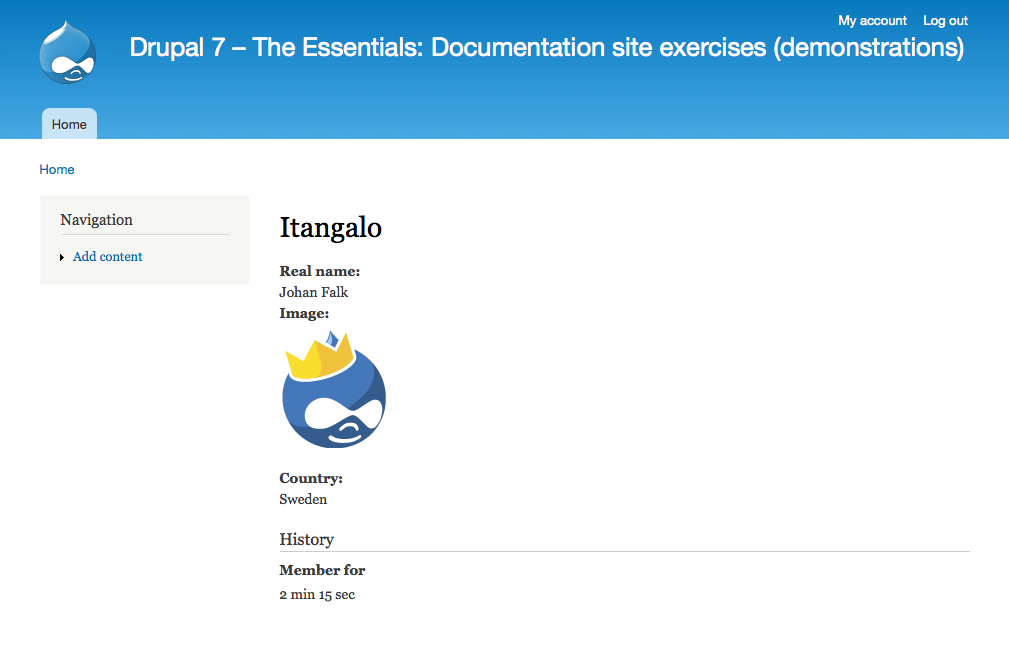
Figure 6.5: An example of how a user page may look.
How to demo
- As an anonymous visitor, create a new account on the website. Verify that it is possible to enter a real name, upload a user image, and enter which country you live in.
- Verify that your user information is displayed when viewing the new account. (Copy the URL for use in the next step. The unique URL for this user account can be found by going to the user edit page and copying all but the /edit part of the path.)
- Log out. As anonymous visitor, verify that you cannot access the page with the user information. (Manually paste the URL into your browser.)
- Log in as another user. Verify that you can view the user information for the newly created account.
Preparation
- An empty Drupal site.
Suggested solution
- Go to the account settings on your site, and change the registration settings to allow people to register without administrator approval. Also turn off the default image used for user accounts. (See other user account settings.)
- Go to the manage fields tab on the account settings page. Add a new text field with the label real name. Give it a help text and set it to be displayed in the user registration form. (See comment and user account fields plus adding new fields.)
- Add another field, for user images. Add a help text, and have the field being displayed on the user registration form.
- Add a last text field, for country. Provide it with a help text – and have it displayed on the user registration form.
- Change the permission settings to allow all authenticated users to view the profile pages.
Comments
- The default picture field for user accounts cannot be used in this case, since there is no easy way of having it appear in the user registration form.
- Whenever adding fields to user accounts, it is sensible to have help texts letting the end user know if the information will be displayed publicly or not.
Exercises: News site
These are the first exercises in the news site suite. They include building the basic information structure for a website used to publish news. Carrying out these exercises requires using the concepts described in this chapter, as well as concepts covered by part A of this book.
News articles
As a news writer I want to be able to create news articles, and also to edit my own news articles. News articles contain a title, header image, introduction, body, and non-header images. This is important since it allows me to provide site visitors with news.
How to demo
- Log in to the site as writer.
- Create a news article with a title, header image, introduction, body and at least one non-header image.
- Verify that all elements are displayed when viewing the article.
- Verify that you can edit the article.
- Log out. As anonymous visitor, verify that you can view the article.
- Log in as another writer. Verify that you can view but not edit the article.
Preparation
- An empty Drupal site.
Fact boxes
As a news writer I want to be able to add fact boxes to news articles. Fact boxes should contain a title and plain text only. An article should be able to have multiple fact boxes, but each fact box should belong to only one article. Fact boxes are important since they allow me to add valuable site information to articles without weighing down the article body with details.
How to demo
- Log in to the site as writer.
- Create a new fact box. Enter title and text. Verify that you must select an article the fact box belongs to in order to be allowed to save.
Note that this user story does not contain any functionality for viewing the fact box with the articles – only to create fact boxes.
Preparation
- At least one news article created on the site (see previous exercise).
- The Entity reference module should be downloaded and installed. (Alternatively, the References or Relation module could be used.)
Help improve this page
You can:
- Log in, click Edit, and edit this page
- Log in, click Discuss, update the Page status value, and suggest an improvement
- Log in and create a Documentation issue with your suggestion
